October 31, 2016

A Day at the Pumpkin Patch

Happy Halloween my friends! I can't wait to share all about Morley's first Halloween, but until then, another fun fall activity with baby girl (plus a pretty awesome giveaway)...

Baby can't celebrate her first fall without two things, 1) an afternoon spent apple picking and 2) a visit to the pumpkin patch. Fall just isn't fall until you've checked both of those activities off of the list. Am I right?

A Day at the Pumpkin Patch

After a successful visit to the apple orchard, we decided to create another fun fall family tradition and spend the afternoon at a local pumpkin patch. We had the entire patch to ourselves, which meant the pick of the patch. As dad searched for the best mama, papa and baby pumpkins to carve up for baby's first Halloween, baby girl was content just playing in the dirt. Mom was happy because baby's contentment meant she was still and mama could play mamarazzi.  You can never have too many photos of baby, something even my husband has come to understand.

A Day at the Pumpkin Patch
Morley's outfit: bow (homemade)  //  dress  //  leggings  //  boots

Reesor Farm Market, located in Markham, ON, was the perfect pumpkin patch for baby's first pumpkin picking experience because of its small size. We visited during the day, so it was also extremely quiet - we were the only family in the patch. The main building is home to lots of locally grown produce, meats and baked goods, and ready-picked pumpkins, if you don't want to get your hands dirty. Beside pumpkin picking, they also have a corn maze for the kids, and kids at heart. 

We can't wait to continue the fun fall family tradition again next year!


Where we went:
Reesor Farm Market
10825 Ninth Line, Markham, Ontario
HoursPumpkin Patch, Corn Maze  and Farm Market are open Monday to Saturday 9am-6:30pm
*Pick-your-own runs from late September to early October. Check website for further details. 


How do you celebrate fall with your family? Do you have any fun fall family traditions?


--------------------

GIVEAWAY

October may be coming to an end, but fall is still in full swing! I've teamed up with some other fantastic bloggers and small-business owners to bring you an AMAZING fall-inspired giveaway this month. This giveaway is super perfect with the holidays rapidly approaching, because who couldn't use extra tools in the kitchen?

Want to win a Kitchenaid mixer and other fall-inspired cooking goodies? Then read on!
October's Big Kitchenaid Mixer Giveaway
octsponsors

Enter the Kitchenaid Mixer Giveaway

Are you ready to enter for a chance to win a Kitchenaid Mixer* and some other fantastic Fall cooking tools? This giveaway is open Worldwide** and ends at 12AM MST on 10/15/16. Entering below agrees to all the terms and conditions within the Rafflecopter widget.


*Prize is subject to change due to availability. Substitutions may be made.
**International Winners will receive $300 in cash instead of the prizes due to shipping limitations.


 photo TampF sig_zpsi50j9kbk.jpg
SHARE:

October 26, 2016

DIY Teething Necklace

Looking for a solution to help with your baby's teething troubles? Check out this stylish and affordable teething necklace DIY. The perfect mom jewellery!

DIY Teething Necklace

There comes a time when your baby decides that everything and anything in sight needs to go in their mouth. We have reached that time. Ah, the pleasures of teething.

Since reaching this new "milestone", I have had to start watching what I wear.  Everything from my hair and my glasses to my necklaces, and even a bra strap or two, go straight in the mouth. Safe to say, it hasn't fared well for some of my jewellery. 

To help the babe with her teething troubles, to keep the random articles and germs out of her mouth, and to prevent me having to go buy new necklaces, I decided to make her her own teething necklace- something to chew on and play with for her and some new and stylish mom jewellery for me. I'd call that a win, win.

DIY Teething Necklace

DIY Teething Necklace


Materials:
  • scissors
  • cord
  • break-away clasp
  • silicone beads (number, colours and sizes of choice)

Instructions:
  1. On a flat surface, arrange the beads to your liking. Get creative and experiment with different arrangements of colours, shapes and sizes.
  2. Once you have your arrangement, thread the beads onto the cord.
  3. If needed, trim the cord to desired necklace size. Remember to keep it a bit longer than usual, so that it is easy for baby to grab and doesn't choke you.
  4. Centre the beads on the cord and tie knots at the top of the beads to keep them from sliding. I also chose to tie knots between the larger, central beads so that the necklace laid correctly when wearing. Knot placement is dependent on your preference, but you should have at least two to keep the beads secure when baby is chewing.
  5. Thread one half of the clasp onto the cord. Slide the clasp a few inches up the cord, tie a knot at the very end of the cord and then slide the clasp back. The knot should be inside of the clasp. Repeat on the other end of the cord.
  6. To keep the clasp from sliding down the necklace, add a knot right before the clasp.

Voila, so simple!

DIY Teething Necklace

Made of silicone, these beads provide visual and tactile stimulation for babies, and are soft on baby's gums, non-toxic and BPA-free. They are also very easy to clean - you can pop them in the dishwasher (top shelf only) or rinse clean in the sink with soap and water. The breakaway clasp on the necklace is safe, especially for those strong babies that like to pull.

DIY Teething Necklace

Specific Materials Used

Rose Gold Necklace (left):

  • 35'' Regular Cord, White
  • Breakaway Clasp, White
  • 4x15mm Rose Gold Beads
  • 4x15mm Copper Beads
  • 4x12mm Dusty Rose Beads
  • 4x12mm Blush Beads
  • 3x Hexagon Cappucino Beads


Blue & White Necklace (right):

  • 35'' Regular Cord, White
  • Breakaway Clasp, White
  • 1x Rose Flower, White
  • 5x12mm Glacier Grey Beads
  • 5x12mm Pearl Beads
  • 5x12mm White Beads
  • 5x12mm Robin's Egg Beads


All materials were purchased through Canadian DIY Supply Inc. All beads ordered in quantities of 5.

I wear a lot of greys, so I was immediately drawn to the rose gold, copper and light pink beads (left). Although this necklace is a bit shorter, I find myself wearing it more because it goes with a lot of the clothing I own. Don't tell Morley, but sometimes I even wear it when she isn't with me. However, I do love the large floral accent bead on the light blue, white and pearl coloured necklace (right). The size of the accent bead and the longer length of this necklace make it easier for baby to grab when I'm holding her.

I've gotten so many great compliments on these necklaces, and people are shocked when I say that I made them. There are many different necklaces such as these for sale on Pinterest or Etsy, and as much as I love supporting local, they're a little out of my price range. For the same price, I was able to buy enough supplies to make two necklaces and one pacifier string!

DIY Teething Necklace

If you're interested in making your own, I ordered the supplies for the necklaces here. However, there are several shops online. The shop I used has a great selection of beads - in all sizes, shapes and colours - as well as closures, cord and clips to make everything from a necklace to a bracelet, pacifier clip or simple teething ring.

Please note: This teething necklace is only considered safe while mom (or dad) is wearing it, and under their direct supervision. Never leave baby unattended with a necklace. 

Pretty happy with my new mom jewellery!


Do you have a teething babe? How do you help soothe the discomfort? I'd love to hear your tips and tricks!
SHARE:

October 24, 2016

Apple Pumpkin Baby Cookies

Looking for a new and exciting, yet tasty and healthy snack for your little one? Check out this fall-inspired recipe for baby Apple Pumpkin Cookies!

Apple Pumpkin Baby Cookie Recipe
Babies love exploring the tastes and textures of new food. And little miss Morley is no exception. As she expands her palate (and appetite), I am constantly looking for fun and exciting ways to introduce her to new, yet healthy, foods at lunch, dinner and snack time in between. 

Sure, grocery store shelves are loaded with snacks that come in all shapes and sizes, but these snacks also tend to contain a long list of ingredients. Too long for my liking. They may also contain ingredients that you are not yet prepared to feed your little one, such as eggs and sugar. 

Instead, I looked to my own kitchen. Since we already prepare our own baby food for Morley, I decided to add these baby cookies to our kitchen's menu. 

Apple Pumpkin Baby Cookie Recipe

With just five ingredients, this recipe for apple pumpkin baby cookies is simple, inexpensive and healthy for baby. Pumpkins are jam-packed full of some of the best nutritional compounds around - they are loaded with Vitamin A and are a good source of potassium, protein, and iron. Pumpkins are also low in fat and calories, but high in fibre. Apples and oatmeal are an additionally great source of fibre, and oatmeal adds calcium, protein and even some B vitamins. The soft consistency of this cookie is perfect for babies just learning to chew. 

Baby will love these cookies, jam-packed with all the fall deliciousness!

Apple Pumpkin Baby Cookie Recipe

Apple Pumpkin Baby Cookies


Yields: 24 small muffin-sized cookies
*Suitable for babies 6+ months

Ingredients
  • 1/4 cup apple sauce
  • 3/4 cup pumpkin puree (either canned or homemade - not pumpkin pie filling!)
  • 1 cup oatmeal
  • 1/4 cup milk/almond milk/prepared formula
  • dash of cinnamon or nutmeg

Directions
  1. Preheat oven to 350 degrees F.
  2. Mix all ingredients in medium bowl.
  3. If baby is not yet able to eat food with a bit of texture, puree mixture in a blender.
  4. Using a spoon, fill each individual muffin 3/4 of the way full. If you do not have a small muffin tin, using a spoon lay a one-inch long dollop of the mixture on a parchment paper lined baking sheet and repeat.
  5. Bake for 15 minutes for a soft cookie, longer if you would like the cookie to be a bit harder (i.e. for a child with teeth).
  6. Allow to cool before giving to baby.
  7. Store in sealed container in the fridge, for up to 5 days.
  8. Break into small pieces for baby or, if old enough, give whole and allow them to bite themselves.

Home Chef Tip #1: If baby is not a fan of apple or pumpkin, this recipe can easily be made by substituting two ripe, mashed, bananas instead. 

Home Chef Tip #2: Depending on baby's age and number of teeth, they can either be given whole or broken into bits for baby to grab and feed themselves. Please do not leave your baby unattended while eating!

Apple Pumpkin Baby Cookie Recipe

I am a sucker for all things apple and pumpkin during the fall, and now baby girl can be too!

What is your favourite fall-inspired recipe? What flavours does baby love?


SHARE:

October 21, 2016

Lessons From My 7 Month Old

If you follow me on Instagram, you would have seen that earlier in the week, this little family of mine got in a pretty scary car accident. All it took was one completely unnecessary action from a teenager at the local high school to set off a chain reaction of unfortunate events. Long story short, it did not fair well for us, or our vehicle. Although sore and angry, mom, dad and baby are all safe, and that is the most important thing.

Lessons From My 7 Month Old

On the same day of our accident, Little Miss Morley turned 7 months old.  What a way to celebrate, I know. 

I know I say it every month, but it's crazy how fast time flies around here. Life with a 7 month old is exciting. She is constantly learning new things, copying what we're doing, becoming more vocal, developing a little personality of her own and establishing a hearty appetite and love of food. Yet, at the same time, it is also exhausting. Nothing is safe. And I mean, nothing. Every little thing goes in the mouth, she has no fear of barrel rolling across the hard floor, and then there's her newest trick... crawling. Good thing the baby gates are just a matter of installation.

Lessons From My 7 Month Old

In the 7 short months since baby girl entered the world she has taught us so much. Thanks to that awful accident, this past week alone, she may have taught me the most important lessons of all. 

These are her lessons...

Lessons From My 7 Month Old


Have no fear, 

But also don't hide your feelings.


Every day is a fresh start,

And everything is going to be all right.


Remember what is important,

But also what is replaceable.


Hold your loved ones tight,

Because love is all that matters.


While no one wants to be in a car accident, having a baby in the car brought the unfortunate situation to a whole new level. She was our only concern. It did not matter what happened to our car, the contents inside, or even our own bodies, how she was was number one. As she wondered why her mom and dad were hugging her so tight, and as she watched her mom break down in tears, huddled on the ground beside her, her dad pacing back and forth on the phone and random strangers swarming her, she handled the entire situation like a pro. Like nothing at all happened. Like everything was going to be all right. And I think that was the most important lesson of all.

Lessons From My 7 Month Old

A big THANK YOU to all of the messages of support that we have received over the past few days. Mom, dad and baby are all ok. We are waiting to hear the fate of our vehicle, as well as next steps. 


More lessons from my daughter: 


What have you learned this month?


 photo TampF sig_zpsi50j9kbk.jpg
SHARE:

October 14, 2016

Pregnancy Must Haves

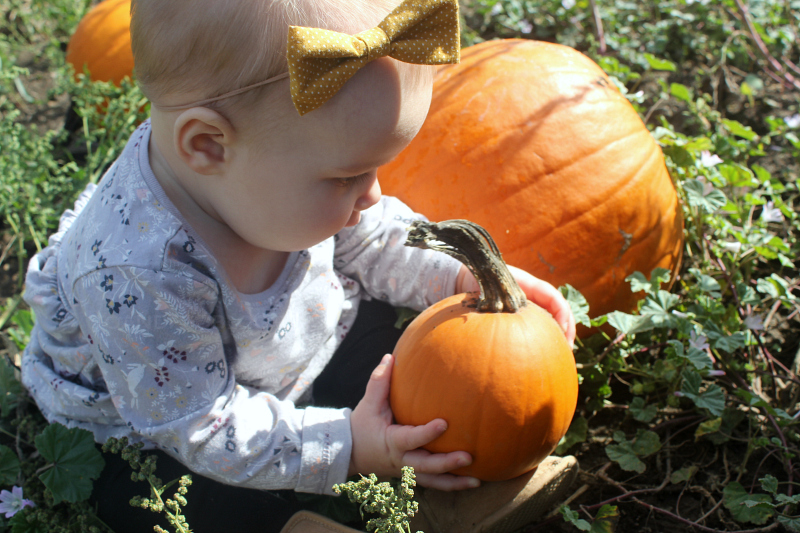
Now that baby girl is nearing 7 months old, the conversation of when the next one will come along has been brought up more than once. While I can guarantee you it won't be any time soon, it has really made me start thinking about what and how I will do things differently the next time around.

Pregnancy Must Haves + Enso Rings Giveaway

I will be the first to admit, I wasn't the healthiest during my pregnancy. I didn't eat whatever food was in sight, but I did have a general salt craving, which included things such as chips, Mr Noodle soup, and plain salt, straight from the grinder. I know, it makes my heart hurt just thinking about it. I also had a craving for salad, which in my mind, evened out the salt craving. Paired with a less active lifestyle than I'm used to, its safe to say I gained a few extra lbs.

That being said, there are also some things that I would do exactly the same next go around. When it came to some of my must haves, I didn't go all out and buy the fanciest, pregnancy-specific items. I made do with whatever I had around the house, or found an alternative, cheaper and more "multi purpose" item to use instead.

Check out my pregnancy must haves, plus an awesome giveaway (below)...

Pregnancy Must Haves + Enso Rings Giveaway

My Pregnancy Must Haves


1. Coconut oil.
Growing, stretching skin needs to be kept moisturized in order to prevent the unbearable itchiness that often comes along with pregnancy. There are so many expensive lotions and potions on the market that will provide the relief needed, however, I found that coconut oil was the perfect all-natural remedy. While everyone is different, and coconut oil won't completely eliminate the dreaded stretch marks, especially if you're genetically doomed, it does help minimize the stretching of the skin by keeping it moisturized.  Apply coconut oil to your belly, and all over, right out of the shower when is cleaned and best at absorbing it. Always allow the oil to soak in and dry before dressing.

I also made my own all natural whipped belly butter with this recipe.

2. Body pillow.
I will gladly admit, sleeping while pregnant is the worst! Pregnancy can bring with it a variety of aches and pains, as well as considerable challenges for comfortably sleeping through the night. Sure there are many pregnancy-specific body pillow available on the market, but instead of shelling out $50+, why not just use a simple body pillow which can be purchased for around $10-20? Some people may already have one at home. Using a large pillow to support and cradle your growing body is especially helpful during the last trimester. Sleeping on your side, a normal body pillow can easily be positioned to give you a comfortable night's sleep.

3. Robe. 
Let's face it, when you are sporting a 40 week belly, getting dressed can be a challenge. Donning a comfortable, warm robe is so much better. A robe is also important if you're using a belly butter, such as the recipe above, because you need to let it dry on your skin before putting your clothes on. You may also want a robe during your hospital stay to help keep you warm and to cover up when you have visitors. 

4. Maternity jeans. 
I live in leggings. But, I also love jeans. Knowing that they would be packed away after 9 months, I didn't spend a lot of maternity-specific clothing. I opted for shirts, leggings, etc. that were purchased in the normal sections that I shop in, and that could be worn post pregnancy. Maternity clothes are expensive! The one thing I did splurge on was a pair of good maternity bootcut jeans. That stretchy expandable belly panel, paired with the super stretchy cotton blend denim fabric made these jeans an absolute dream to wear. And I may or may not have worn them for a few months post pregnancy before eventually retiring them.  (Unlike the above picture, I did not wear heels with these jeans. My kankles would not have been a fan.)

5. Silicone wedding band. 
I love wearing my rings, but sadly, I was not blessed with slim fingers. With the weight gain going what seemed as straight to my fingers, it turned them into something that can only be best described as a breakfast sausages.  I'm just going to take a stab an say that this also may or may not have been directly related to my salt cravings. Regardless, I knew from early on that my wedding rings had to go. Even now with the heat and humidity of this past summer, my rings have remained in safe keeping. 

I was recently sent a set of stackable silicone rings from Enso Rings, the perfect solution for those pregnancy sausage fingers. Made from soft, lightweight, medical-grade silicone, these rings are flexible enough to get on and off my fingers, no matter what size or shape they take on. With a  variety of colours to mix and match, the Women's Stackables are extremely versatile and the perfect way to express your unique personality. I chose the purple and turquoise stackables, two of my favourite colours. [Pictured above: Women's Stackable Silicone Ring in plum. Available in a variety of colours and sizes.]

Pregnancy Must Haves + Enso Rings Giveaway
See... I wasn't lying when I said sausage fingers.

Although not pregnant, my husband also approves of Enso Rings. As a former professional hockey player, he could never wear his wedding band while playing in case he was injured. His current wedding ring is made of tungsten carbide, which is not the safest material for someone with an active lifestyle. He also didn't want to misplace it with the constant on and off between games. With being on the road half of the season, his ring sat at home most of the time. He received the Men's Ultralite Silicone Ring in obsidian (black) for review and is a big fan! He has received quite a few comments from family, friends and coworkers on the uniqueness of the ring. The thing he loves most is how lightweight and flexible it is, especially compared to his tungsten carbide wedding band. Like the women's stackables, this ring is also made with medical grade silicone and features their Anti Ring Avulsion Technology, meaning the ring keeps it’s shape, but if needed, will also break away in a potential accident. My husband's biggest wish was that he had of discovered Enso Rings during his hockey playing days. 

Besides the affordability, selection and quality, one of my favourite things about Enso Rings is that they believe in giving back. For every ring they sell, a portion of the proceeds are donated to local and global organizations that are working to solve problems like hunger, poverty, disease and protecting our planet.

Pregnancy Must Haves + Enso Rings Giveaway

**GIVEAWAY**

Whether there's a baby on the way, you're travelling and want to leave your jewels at home, you can't wear certain jewellery due to work or allergies, or something in between, Enso Rings are the perfect solution. Now you can have a set of your own - enter the giveaway below for your chance to win $50 worth of Enso Rings! And with how affordable these rings are, that's more than enough to purchase a new ring for yourself and for another.

a Rafflecopter giveaway


Rules, because there's always rules: Contest runs 10/14/2016 to 10/19/2016 at 11:59pm, and is open to residents of Canada and US. Must be 18 years or older to enter. Winner will be notified on 10/20/2016 and has 48 hours to respond. If prize is not claimed within this time, another winner will be drawn at random. Prize is in the form of a coupon code worth $50, to be used at Enso Rings. Good luck!


What are your pregnancy must haves and recommendations? I'd love to hear!


*I was provided a set of women's stackable silicone rings and a men's ultralite silicone ring for review. All opinions are 100% my own. Thank you Enso Rings!


 photo TampF sig_zpsi50j9kbk.jpg
SHARE:

October 11, 2016

Baby's First Halloween - Treat Bag DIY

This shop has been compensated by Collective Bias, Inc. and its advertiser. All opinions are mine alone. #BacktoBabyBasics #CollectiveBias

Looking for a fun activity to celebrate you little one's first Halloween? Make your own Halloween treat bags with this tutorial, and simple recipe for baby-safe paints.

Baby's First Halloween Treat Bag DIY & Baby Safe Paint Recipe

As a child, Halloween was one of my favourite times of the year. What's not to love about dressing up in a fun costume, canvassing the neighbourhood with your friends and then devouring all of your candy until your stomach hurts? Now that I have a daughter of my own, I can’t wait to celebrate Halloween through her eyes (and candy bag). 

At 7 months old, Morley's a little young for the typical Halloween shenanigans. However, we still plan on celebrating her first, by dressing her up in a super adorable costume and giving family members these homemade Halloween treat bags, decorated with baby-safe paints and filled yummy goodies.

DIY Halloween Treat Bag


Materials
  • baby safe paint (recipe below)
  • small aluminum pie pans (one for each paint colour)
  • painting tools - brushes, popsicle sticks, foam pieces, etc. (optional)
  • paper lunch bags
  • large garbage bag and/or large piece of craft paper
  • tape
  • decorations (halloween/fall-themed stickers, stamps, googley eyes, etc.)
  • glue
  • markers
  • hole punch
  • twine, ribbon or string

Directions
  1. Set up baby’s workspace - i.e. high chair, bath tub, living room floor, outside, etc. This activity can easily be done in the highchair, to help contain the mess, or by taping a garbage bag and/or craft paper to the floor, making it a great tummy time activity. We chose to do this activity on the living room floor by layering garbage bags with craft paper on top. This made it much easier to clean up when the activity was done.
  2. Lay out the paper bags and paint (in the pie tins) on the working surface.
  3. Set baby up. Make sure they are in their diaper, or clothes that can potentially be ruined by the paint. Make sure you are also in clothes that can get dirty, because you will get dirty!
  4. If your child is old enough, provide them with painting tools. If not, their fingers will do just fine.
  5. Let baby go to town on creating their masterpiece.
  6. Once they are finished painting (or in our case, start to fall asleep in the paint), immediately clean baby. I recommend having Huggies Natural Care wipes handy and a bath ready to go.
  7. Since the paint is quite thick, allow the bags to dry for at least 24 hours.
  8. Once the bags are dry, it is time for mom and/or dad to take over the activity. Decorate with Halloween-themed stickers, stamps, etc. Using the glue gun, we added foam pumpkins and googley eyes. 
  9. Using a marker, add recipient's name to the bag. 
  10. Fill with candies, tie closed and deliver to that special someone!
Baby's First Halloween Treat Bag DIY & Baby Safe Paint Recipe

Baby-Safe Paint 


Ingredients
  • 3 tbsp white sugar
  • 1/2 tsp table salt
  • 1/2 cup cornstarch
  • 2 cups water

Directions
  1. Combine ingredients in a small sauce pan and stir until combined.
  2. On medium low heat, warm until thickened, stirring continuously.
  3. If mixture becomes too thick, or goopy, add a bit more water to thin it out.
  4. Remove from heat and allow mixture to cool.
  5. Divide mixture equally amongst containers of choice. Choose containers that are baby safe, and easy for baby to access (i.e. small aluminium pie plates). 
  6. Add food colouring to achieve colour of choice. Stir to combine.
  7. Leftover paint can be stored in a sealed container in the fridge for up to 3 days.

Important notes: Any finger paint that you use for young children must be non-toxic by mouth and non-irritating to the skin.  If your child is allergic or intolerant to any food substances in this recipe, please do not use this paint. These paints are not to be eaten, but if tasted, are safe for baby. And I promise you, there will be tasting. Please do not leave your child unattended while doing this activity.

Baby's First Halloween Treat Bag DIY & Baby Safe Paint Recipe

Painting is such a fun activity for young children. Not only does it allow them to express their creativity (yes, even at 7 months old), but it’s also fun! Sure, it can make a mess, which can equal stress for us adults. But for baby, messy is good. Messy play stimulates the senses, allowing baby to explore different colours and textures. It also helps develop hand and eye coordination and fine motor skills. What may look like a mess to you, is actually a learning experience for your child. So, roll up your sleeves and have some fun creating these Halloween treat bags. They are sure to be a hit amongst family and friends!

Baby's First Halloween Treat Bag DIY & Baby Safe Paint Recipe

To help keep the mess at bay when doing this fun activity with your little one, turn to Huggies Natural Care wipes! They’re gentle on baby’s skin and do a great job of cleaning up all sorts of messes. Huggies products, including these Natural Care wipes, can be found in the baby care (diaper, wipes, creams, etc.) aisle at your local Babies “R” Us

Baby's First Halloween Treat Bag DIY & Baby Safe Paint Recipe
Location of Huggies products, including Huggies Natural Care wipes, in Babies "R" Us.

Did you know that Babies “R” Us is more than just a retailer destination? I love shopping in store because not only do they have a great selection of baby products, from diapers and wipes, to items to help celebrate baby's first Halloween (like super cute costumes) and beyond, they are also a great resource for all things baby, including some great baby-friendly events!

Make sure to visit your local stand alone Babies “R” Us on 10/15 from 11am-12pm for some Halloween celebrations with baby! Celebrate baby’s first with a keepsake craft and parade around the store, and help mom get ready for colder weather with great product solutions and tips. This celebration is a great opportunity to meet and mingle with local moms who have babies of similar age, and your chance to win some incredible giveaways and raffle prizes!

Baby's First Halloween Treat Bag DIY & Baby Safe Paint Recipe

Happy Halloween, from our family to you and yours!

How do you celebrate baby’s firsts? Any exciting Halloween plans? I’d love to hear!

 photo TampF sig_zpsi50j9kbk.jpg
SHARE:

October 7, 2016

Creating Family Traditions at the Apple Orchard

With a little family to call our own, we're all about creating new family traditions. We started at the end of the summer, with a trip to the CNE, and now, we're moving into fall with a visit to the family cottage and a trip to the orchard to go apple picking, the perfect fall family activity.

There are several orchards located just outside of the greater Toronto area, so choosing which one to visit was difficult. When I searched for recommendations, I came across Archibald Estate Winery & Apple Orchard, located in Bowmanville, approximately 45 minutes east of where we live. Like the name suggests, it is not only an apple orchard, but also an estate winery. I was sold. 

We chose to visit mid-day during the week. Smart move on our part as we were only one of three cars in the orchard. We had the whole place to ourselves and it was amazing! 


Fun Fall Family Activity - Apple Picking

We filled our half bushel bag with 20 lbs of honey crisp and gala apples, perfect for making my infamous apple crisp and homemade applesauce for Miss Morley. We enjoyed walking up and down the rows of apple trees and teaching Morley how apples are grown, whether she understood or not. She loved sitting in the grass and playing with the freshly picked apples. After filling our bag, we ventured into the winery to sample the wine and cider made with local fruit and apples grown just steps away. I love learning about where my food comes from and knowing that what my family is eating, and drinking, was grown with love right here in Ontario.

We can't wait to continue the fun fall family tradition again next year. 

Fun Fall Family Activity - Apple Picking

Lately, I've been loving these Aquarius Rectangle eyeglasses in Tortoise from GlassesShop.com.  While I've needed glasses since I was in 8 years old (I know, poor me), for the past ten plus years I've opted for contacts. As a result, I usually don't spend a lot of money on eyeglasses. Since I do like to switch things up and put on a fashionable pair of specks once in a while, these affordable glasses are the perfect solution! Aside from being affordable and stylish, they also fit my face comfortably and are very durable, which is extremely important when you have a little grabby hands that loves to rip them off your face.

If you're in the market for a new pair of glasses, GlassesShop.com has a huge selection of affordable and stylish glasses frames, including prescription sunglasses. Use code GSHOT50 for 50% off your next pair of eyeglasses or sunglasses with free lenses (sale frames excluded).

Fun Fall Family Activity - Apple Picking

Where we went:
Archibald's Estate Winery & Apple Orchard 
6275 Liberty Street North Bowmanville, Ontario
Fall hours: Open daily at 9:00am.  Last cars in for picking – 5:00pm.  Winery is open until 6:00pm.
*Apple picking season runs mid-September to mid-October. Check website for availability.


How do you celebrate fall with your family? Do you have any fun fall family traditions?


*I was provided a free pair of prescription glasses and lenses in exchange for this review. All opinions are 100% my own. Thank you to GlassesShop.com for helping me see clearly!


SHARE:
Blog Design Created by pipdig