March 12, 2021

Our Spin on the Baked Feta Pasta Recipe - BBQ Feta Pasta!


Tiger King, sourdough bread, TikTok dances and baked feta pasta. Just to name a few.

As we celebrate a year since the global pandemic began, it's hard not to look back and see what transpired over the past 365(ish) days. Including those things that went viral. 


I will admit, we binged Tiger King as fast as we could. We got a quarantine puppy. And most recently, we made the baked feta pasta recipe.

But, due to a lack of oven in our house we were forced to put our own spin on it.

So without further ado, I give to you... BBQ Feta Pasta.


A lack of oven has really forced us to get creative with what we make. And with the global pandemic and stay at home orders, we've had nothing but time to perfect our BBQ skills. Homemade pizza, Thanksgiving dinner roast, mac n' cheese, banana bread... just a few of the things that we have successfully cooked on the grill. And now, we can officially say we've 'been there, tried that' with the baked feta pasta recipe that went viral on social media. 

And we also now know just WHY it went viral on social media. It's easy to make with minimal ingredients and cooking time. A true one pot meal that your kids will LOVE. Oh ya, and it's freakin' delicious. Check out how we did it on the BBQ below.

BBQ Feta Pasta Recipe

Ingredients:

  • 2 pints cherry tomatoes
  • large chunk of feta cheese
  • 5 whole gloves garlic, smashed
  • olive oil
  • salt and pepper
  • dried italian seasoning
  • fresh basil, thinly chopped
  • pasta of your choice, cooked to al dente and drained

Directions:

  1. Turn up the BBQ burners to high.
  2. In a BBQ safe baking dish (we used a Pyrex), add cherry tomatoes. Toss in olive oil.
  3. Add feta cheese to the centre of the dish. Drizzle with olive oil, add smashed garlic cloves and salt, pepper and dried italian seasoning (amount to your liking).
  4. Once the BBQ reaches approximately 450F, turn down the centre to low. 
  5. Place the baking dish in the middle of the grill and close the lid.
  6. Allow to cook, checking every 10 minutes. 
  7. While tomatoes and cheese are cooking, thinly slice the basil.
  8. Cook the pasta to al dente.
  9. At approximately 30 minutes, turn off the BBQ. Mix the tomatoes and cheese. Add the pasta and mix until combined. Sprinkle with fresh basil.
  10. Enjoy!

>> For more details on how we made this recipe on the BBQ, hop over to my Instagram and check out this Reel


Tell me - what quarantine trends were your favourite? What were your least favourite? Have you tried the baked feta pasta?


PIN IT

SHARE:

January 14, 2021

Easy Make-at-Home Miso Soup Recipe

What do you think of when you think 'soup'? For me, it's warming up after a snowy adventure outdoors with the family. The ultimate comfort food. 

If you're looking for a new soup recipe to try (but also one that's super easy), check out this Easy Make-at-Home Miso Soup Recipe. All it takes is five minutes and minimal ingredients!

Easy Make-at-Home Miso Soup Recipe

There's nothing more comforting than a steaming bowl of soup and the smell of warm broth that warms you up. It's the ultimate comfort food. 

I'm a big fan of miso soup. I don't know if it's the saltiness (no sweet tooth here) or the fact that right after I finish a bowl, I'm typically going to mow down a huge meal of sushi. If only I were kidding...

All-you-can-eat sushi aside, while I knew miso soup was a winner from the first time that I tried it, what I didn't know was how EASY it is to make at home. 

If you're looking for a new soup recipe to try (but also one that's super easy), check out this Easy Make-at-Home Miso Soup Recipe. All it takes is five minutes and minimal ingredients!

Easy Make-at-Home Miso Soup Recipe

Easy Make-at-Home Miso Soup Recipe

Ingredients:

  • 4 cups low sodium broth (can be vegetable or chicken)
  • 1 sheet of nori, cut into rectangles
  • 1/2 cup medium-firm tofu, cubed
  • 1/2 cup green onions, chopped
  • 3-4 tbsp. miso paste

Directions:

  1. Bring 4 cups of broth to a low simmer.
  2. While broth is simmering, add 3-4 tablespoons of miso paste into a small bowl. Add a small bit of hot water and stir to combine. Miso should now be a 'creamy' consistency.
  3. Once the brother is simmering, add the miso and whisk to combine.
  4. Gently add the tofu and green onion and simmer for five minutes. 
  5. Once done simmering, add the nori pieces. 
  6. Remove from heat and taste. Add more miso if desired.

For those unfamiliar with miso soup or Japanese cuisine, nori is an edible seaweed, eaten either fresh or dried in sheets (think the green 'papery' stuff wrapped around sushi). Miso is a paste made from fermented soybeans and barley or rice malt. It can be white, red or a combination of the two. The taste of the miso depends on how long it is fermented - red miso is fermented longer and has strong, saltier flavour, whereas white miso is fermented for a shorter period and has lighter, sweeter flavour. 

In this recipe, I used red miso as it was all that I could find at my local grocery store. In the past, I have used white miso and it tastes just as good. Although, I am partial to the saltier flavours. Miso is also great to use in salad dressings, sauces (such as this Miso Ginger Sauce) and marinades!

Easy Make-at-Home Miso Soup Recipe

Ok, so this miso soup recipe may not be your traditional miso soup made with dashi (Japanese fish stock prepared with kombu, dried seaweed and dried bonito fish flakes), BUT for this soup lover, it's a welcomed substitution. And an easy one to make at that. (If only it's muted colours were as easy to photograph...)

If you enjoy soup as much as I do, check out these delicious recipes:

Please share - what is your favourite soup recipe? I'm always looking for new ones so I'd love to hear!

PIN IT

easy make at home miso soup recipe


SHARE:

September 17, 2020

Favourite Packable Kid-Friendly School Lunch Ideas


There’s no denying that for children everywhere, the 2020-2021 school year will look different than those in the past. Just how different, is yet to be fully determined. But one thing that will remain constant is lunch time, and the need to pack your child’s lunch. 


Check out some of our favourite packable kid-friendly school lunch ideas, made with Mastro/San Daniele cooked deli meats.


Favourite Packable Kid-Friendly School Lunch Ideas


This September, our family enters a new chapter - our oldest daughter enters kindergarten. And while we're all excited for her to go to "big girl school", one thing I'm NOT looking forward to? Having to pack her lunch every day. 


I was having a conversation with a girlfriend the other day about school lunches. For the past six months, I’ve made my girls’ lunch every. single. day. Making my kindergartener lunch for school should be no different, right? Wrong. We may only be a few days into the school year, but I’ve quickly found that the opposite is true.


So much more planning needs to go into school lunches - ensuring they have enough food to last the entire day, that what you pack is peanut-free, that your kids actually like and eat what you pack, that the lunch contains minimal packaging, that they can easily open any of those packages, and so on, and so on. 


Favourite Packable Kid-Friendly School Lunch Ideas


At the end of the day, regardless of whether our children are in kindergarten or high school, we just want them to eat lunch. Am I right?! But, coming up with creative ideas that ensure no food gets left behind can often be a challenge. 


Mastro/San Daniele offers a variety of cooked deli meat products that are great for families and can make going back-to-school easier. They are versatile, light and can be used to elevate a dish that you eat regularly (think that reliable lunch sandwich) or incorporated into a tasty snack. 


Check out our favourite packable kid-friendly lunch ideas made with Mastro/San Daniele cooked deli meats - meals that are easy to whip up the night before, but delicious and healthy to keep our kiddos fuelled throughout their busy day (regardless of what that may look like this school year).

Favourite Kid-Friendly School Lunch Ideas 

Nectarine Wraps

Kids won’t eat fruit? Try this fun alternative. Mastro Prosciutto Cotto is full in flavour, extra lean and low in fat. Combined with the sweet nectarine, its a winning combination.


What you’ll need:

  • Mastro Prosciutto Cotto
  • Nectarine (can also use peach, pear or melon)


What to do:

  1. Slice the nectarine into manageable sizes. 
  2. Wrap each individual slice of nectarine in an approximately sized piece of prosciutto cotto.


Favourite Packable Kid-Friendly School Lunch Ideas

Ham & Cheese Flatbread

A fun spin on a classic sandwich! Slow cooked to perfection, Mastro Capocollo’s distinctive flavours make it ideal in sandwiches, antipasto and pizzas.


What you’ll need: 

  • Mastro Capocollo
  • Cheese, thinly sliced
  • Small pita or naan bread
  • Mayonnaise (optional)
  • Mustard (optional)
  • Shape cutters (optional)


What to do:

  1. If your child likes mayonnaise and mustard, add a thin layer of each to the top of the pita or naan.
  2. Add a piece of Mastro Capocollo on top of the bread. 
  3. On top of the cooked deli meat, add a piece of thinly sliced cheese (your choice of variety). 
  4. If you want to get really fancy and fun, use shape cutters to cut fun shapes into the bread, meat and cheese.

Favourite Packable Kid-Friendly School Lunch Ideas

Lunch Sandwich Sushi

Perfectly portioned, two-bite sandwich rolls. It’s like kid-friendly sushi! San Daniele Mortadella is gently prepared and cooked to savoury perfection, a great choice for this lunch sushi. It comes in three varieties - classica, light and hot.


What you’ll need:

  • San Daniele Mortadella
  • Whole wheat tortilla
  • Cream cheese
  • Cucumber, thinly sliced


What to do:

  1. Peel and thinly slice cucumber.
  2. Lay out the tortilla on a flat surface, and cover in a thin, even layer of cream cheese.
  3. At the bottom of the tortilla (closest to you), lay a few thin slices of cucumber.
  4. Layer a piece of San Daniele Mortadella on top of the cucumber.
  5. Starting from the bottom (closest to you), roll up the tortilla. If the wrap does not stay closed, use a bit of cream cheese to hold it together. 
  6. Using a sharp knife, slice in one inch sections.

Favourite Packable Kid-Friendly School Lunch Ideas

Check out this link for $1 OFF your next Mastro Prosciutto, Mastro Capocollo or San Daniele Mortadella purchase. 


What are your favourite kid-friendly lunch ideas? Any tips or tricks for this new school-aged kiddo mom? I’d love to hear!


*Disclosure: I have participated in a paid partnership with Mastro/San Daniele. Opinions in this post are my own.


PIN IT

Favourite Packable Kid-Friendly School Lunch Ideas


SHARE:

December 28, 2019

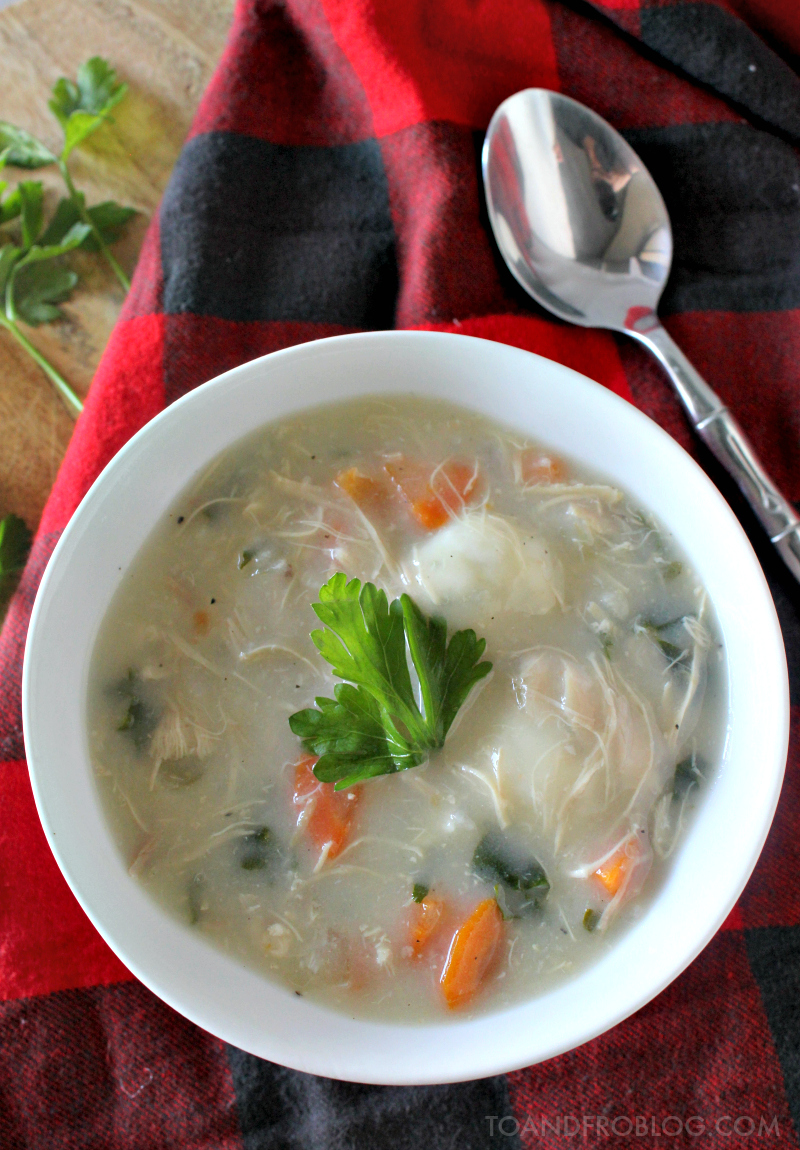
The Best Chicken Dumpling Soup Recipe


Looking for the perfect comfort food in a bowl? Check out this hearty recipe for the best Chicken Dumpling Soup, loaded with chicken, vegetables and tasty dumplings. 

The Best Chicken Dumpling Soup Recipe

I recently discovered cooking chicken in the slow cooker. I don't know why I wasn't cooking it this way before - boy, was I really missing out. And it's so easy! Just add twskin-on, bone-in chicken pieces (usually breast and thigh combos) to the slow cooker, season with a bit of salt and pepper and then cover with approximately 2 cups of water. I then allow it to cook on high for 3-4 hours, or until no longer pink, and voila! Delicious, juicy, tender, fall-off-the-bone chicken. 

Not only does it create tender, delicious chicken, you will also be left with a flavourful broth that can be used in your next recipe, or in this delicious soup recipe.


During the cold months, soups are my go to. I usually pay them with a side salad or a sandwich. This soup, however, is a complete meal in a bowl. Loaded with that tender chicken, hearty vegetables and tasty dumplings, this Chicken Dumpling Soup is sure to win over your family's stomachs this chilly winter.

Chicken Dumpling Soup

Ingredients

Soup:
  • 1 tbsp extra virgin olive oil
  • 1 cup celery, chopped
  • 1 cup carrots, peeled and chopped
  • 1 small onion, diced
  • 3 cups chicken, cooked and chopped
  • 3 cloves garlic, minced
  • 1/2 tsp garlic powder
  • 4 cups low-sodium chicken broth
  • 4 cups water
  • 1/2 cup all purpose flour
Dumplings:
  • 2 cups all purpose flour
  • 1 tbsp baking powder
  • 1/2 tsp baking soda
  • 1/4 tsp salt
  • 1/4 tsp pepper
  • 6 tbsp unsalted butter, melted (3/4 stick)
  • 3/4 cup buttermilk (or 1 tbsp white vinegar and 3/4 cup milk, combined)
  • 2 tbsp fresh parsley, minced

Directions

  1. Add the olive oil to a large stock pot and bring to a medium-high heat. Add celery, carrots, onion and garlic and sauté for 5-7 minutes, until onions are translucent.
  2. Add chicken pieces and garlic powder to the pot. Stir to combine.
  3. Add chicken stock and water to the pot. If you like your soup salty, feel free to use 8 cups of stock, instead of half water, half stock.
  4. Bring mixture to a simmer for 25-30 minutes.
  5. While soup is simmering, make your dumplings. In a medium bowl, whisk together dry ingredients. Stir in the melted butter, buttermilk and parsley until just combined. At this point, should be a nice dough. Set aside.
  6. Ladle 2 cups of the cooking liquid into a large bowl. Whisk in 1/2 cup of flour until smooth. Add flour mixture back into the soup by continuously whisking until combined. Simmer until slightly thickened, occasionally whisking, about 8-10 minutes.
  7. Once soup has thickened, add dumplings. Form balls of dough about the size of half of your thumb. Gently drop dumplings one at a time into simmering soup. Simmer, covered, until dumplings are firm, about 12-15 minutes.
  8. Season with salt and pepper.
  9. Serve immediately, sprinkled with additional minced fresh parsley for garnish (optional).
Home Chef Tip 1: If you do not end up using all of the dumpling dough (I only used about half), store the remainder in the freezer in a freezer-safe container. It will keep for a few weeks.

Home Chef Tip 2: If you do not want to cook the chicken from scratch, you can also use leftover chicken or turkey and premixed stock.

Voila, comfort food at its finest!


If you like this recipe, you may also like this recipe for Fall Harvest Root Vegetable Soup.

What is your favourite soup recipe? Any fall or winter favourites? I'd love to hear!


SHARE:

March 26, 2019

Build Your Own Buddha Bowl - Shrimp Buddha Bowl Recipe


What are some of your hacks for cleaning out your fridge, freezer or pantry? Lately, build your own buddha bowls have been mine, including this Shrimp Buddha Bowl recipe. And they’re something the WHOLE family enjoys - meaning I’m only prepping one meal, instead of three. Win!

Build Your Own Buddha Bowl - Shrimp Buddha Bowl Recipe

Want to hear a ridiculous story?

Up until last year, I thought I was allergic to shrimp. 

Since I was 18, I avoided shrimp like the plague. I told restaurants I was allergic. I refused to eat at hibachi restaurants or sushi restaurants.  I know, I know, I’ve heard it all - “You’re missing out on all of the fun”, “Poor you” and even “Wow, you must be a cheap date”.

And it was all because one night when I was 18, I got one single hive under my eye, after eating shrimp.

Like anyone who thinks they have a food allergy, I immediately went to the doctor to get it checked. They pricked my arm and it was determined that “your suspicions were confirmed, you’re allergic to shellfish.” Shrimp and lobster to be exact. 

So I avoided it, for over a decade.

Build Your Own Buddha Bowl - Shrimp Buddha Bowl Recipe

Those ten plus years passed and I thought, “Hey, why not get checked again”. And so I did. A different doctor pricked my arm and determined I wasn’t allergic. I didn’t believe her. So, I went for the official blood test just to confirm. Negative. “Chances are,” the doctor said, “You were never allergic in the first place. Shellfish is one you don’t really grow out of.”

A doctor confirmed that I was not allergic. I had the blood test done to further rule it out. Yet I was still hesitant to eat it.

I know, pretty ridiculous, right?

Well, that all changed this year. My three year old daughter became a “shrimp monster” (her words, not mine), and so I began eating it again. And now I can’t get enough. 

Build Your Own Buddha Bowl - Shrimp Buddha Bowl Recipe

Shrimp is such a great protein alternative. Not only is it high in protein, it is low in calories and fat (when cooked properly) and also provides heart-healthy EPA and DHA omega-3 fatty acids. 

When buying shrimp, we also make sure that we are buying sustainably-harvested shrimp, meaning that the shrimp is either caught or farmed in a way that considers the long-term vitality of the harvested species and the well-being of the oceans.

One of my favourite ways to eat shrimp? In this Shrimp Buddha Bowl - a bowl packed so full with yummy goodness that it has a rounded “belly” appearance, just like a buddha’s belly. Not only is it delicious, but it's also fun!

Read on for the recipe, and to learn about alternative and/or additional ingredients that can be used.

Build Your Own Buddha Bowl - Shrimp Buddha Bowl Recipe

Shrimp Buddha Bowl

Ingredients

  • Cous cous
  • Cucumber
  • Red onion
  • Carrot
  • Slivered almonds
  • Avocado
  • shrimp (peeled, tails off)
  • edamame
  • sesame seeds
  • Mayonnaise
  • Sriracha
  • Soy sauce (optional)

Directions

  1. Cook the cous cows according to the directions on the package.
  2. Cut up the veggies (cucumber, red onion, carrot, avocado) to the size of your choosing. (*For a shortcut, we purchase carrots pre-cut into matchstick-sized pieces.)
  3. Cook the shrimp and edamame.
  4. Make the sriracha mayo by combining the mayo and sriracha, to your desired spicy-ness level. Add a small amount of soy sauce to thin the sauce and make it more of a dressing consistency (optional). 
  5. Assemble the bowl. Put a layer of cous cous on the bottom, add the veggies and protein, sprinkle with slivered almonds and sesame seeds and drizzle the sriracha mayo dressing on top. 
  6. Toss and enjoy!

Alternative/Additional Ingredients

The great thing about these bowls is that you can really add anything to them, the options are unlimited. What you add depends on what you have available and what you like, and can include green onions, cashews, zucchini, bean sprouts, waster chestnuts, sweet potato, beets, tofu, salmon, chicken, chickpeas, beans, corn, radish and more. If spicy isn’t your thing, you could sub in a peanut sauce in lieu of the sriracha mayo dressing. If you don’t like cous cous, you could use quinoa, rice, spiralized vegetables, noodles (rice, udon, glass, etc.) or even greens as your base. 

You may also like:
Crispy Garlic Tofu Rice Bowl
Teriyaki Salmon Bowl

Final Thoughts

Like I said before, this recipe is not only a good way to clean out your fridge, freezer and pantry, but I especially love it because it is eaten by the ENTIRE family. That means I’m only preparing 1 meal, and not the usual 3. Yes, even 7 month old little sister can eat a variation with couscous and avocado. And big sister eats it all, minus “the spicy”. WIN!

What are some creative ways you clean our your fridge, freezer and pantry? I’d love to know!


PIN IT

Build Your Own Buddha Bowl - Shrimp Buddha Bowl Recipe

SHARE:

March 5, 2019

Crispy Garlic Tofu Rice Bowl

Much to my husband's knowledge and approval, I've recently started incorporating tofu into some of our dinners.

It's not that we're turning into vegetarians, we still love a juicy grilled steak with all the fixin's once in a while. But sometimes, meat can be pricy. Made from soybeans, not only is tofu is a great alternative for "Meatless Monday", it is also dirt cheap. Think under $2 for a 4 person serving. For a family on a budget, that makes my wallet happy. 

Tofu is also surprisingly tasty. Especially when it takes on the flavour of whatever you cook it in. There are many delicious and easy tofu recipes - we've made tofu stir fry, lettuce wraps with tofu, added it to salads, even subbed it for the salmon in my infamous teriyaki salmon bowl. But this tofu recipe for Crispy Garlic Tofu Rice Bowl is definitely one of my favourites.

Crispy Garlic Tofu Rice Bowl Recipe

CRISPY GARLIC TOFU RICE BOWL

Serves: 4

Ingredients:

  • 1 block firm tofu, cut into bit-sized pieces
  • 3 garlic cloves, minced
  • 2 tbsp low sodium soy sauce
  • 1 tsp garlic powder
  • 1 1/2 tbsp light brown sugar
  • 1 tsp Sriracha 
  • 1/2 tbsp cornstarch + 6 tbsp water
  • 1 cup rice (variety of choice)
  • 2 cups water
  • 4 green onions, chopped

Directions:

  1. Preheat oven to 400 degrees F.
  2. Cook rice according to package.
  3. Once the oven is preheated, place tofu cubes on a baking sheet lined with parchment paper. Bake for about 35-40 minutes until golden and crisp around the edges, flipping halfway through.
  4. When tofu is near done, start making the sauce. In a small saucepan over medium heat, add garlic, soy sauce, garlic powder, brown sugar and sriracha and whisk until combined. 
  5. Add cornstarch and water to a small bowl and mix until cornstarch is fully dissolved. 
  6. Add the cornstarch mixture to the small saucepan and whisk until combined. 
  7. Bring mixture to a gentle boil and stir until everything is completely mixed and sauce has thickened. 
  8. Once the sauce is complete, add the baked tofu to the saucepan. Fully coat tofu in sauce.
  9. In a serving bowl, add rice, tofu with sauce and sprinkle with fresh green onions. Serve warm.

Crispy Garlic Tofu Rice Bowl Recipe

Home Chef Tip #1: When you make the sauce, it may not look like you'll have enough. I assure you, with the amounts above, it is plenty to cover one block of tofu, and then some. If you do have extra sauce, it is delicious on a number of different dishes - such as vegetable stir fry or beef & broccoli, another one of my favourites.

Home Chef Tip #2: There are several different consistencies of tofu available on the market. The consistency you want depends on what you plan on cooking. Firm tofu can be sliced and added to stir-fry or seasoned and grilled as a meat substitute; soft tofu can be pureed and used as a ricotta cheese substitute in lasagna, or mashed and added to casseroles; and silken tofu is suitable for making dips or blended with fruit and ice to make smoothies. 

Crispy Garlic Tofu Rice Bowl Recipe

Not only is tofu 1) inexpensive to buy 2) easy to cook with, and 3) delicious, taking on the flavours of whatever you cook it in, it is also surprisingly nutritious. Tofu is high in protein, relatively low in calories, contains no cholesterol and minimal saturated fat, especially when compared to most animal sources of protein. A 3.0 oz portion (approximately the size of a deck of cards) provides 60 calories, 3.5 grams of fat and 7 grams of protein.

Many people get turned off tofu because it is not an ingredient typically found in every day cooking. But, when you find the right recipe, such as the above Crispy Garlic Tofu Rice Bowl, it really is a delicious, nutritious and inexpensive meal alternative. If you turn up your nose at tofu, I dare you to push yourself out of your comfort zone and give it a try. Your palate may be pleasantly surprised. 

Do you enjoy tofu? What's your favourite tofu recipe? I'd love to hear about it!


SHARE:

January 18, 2019

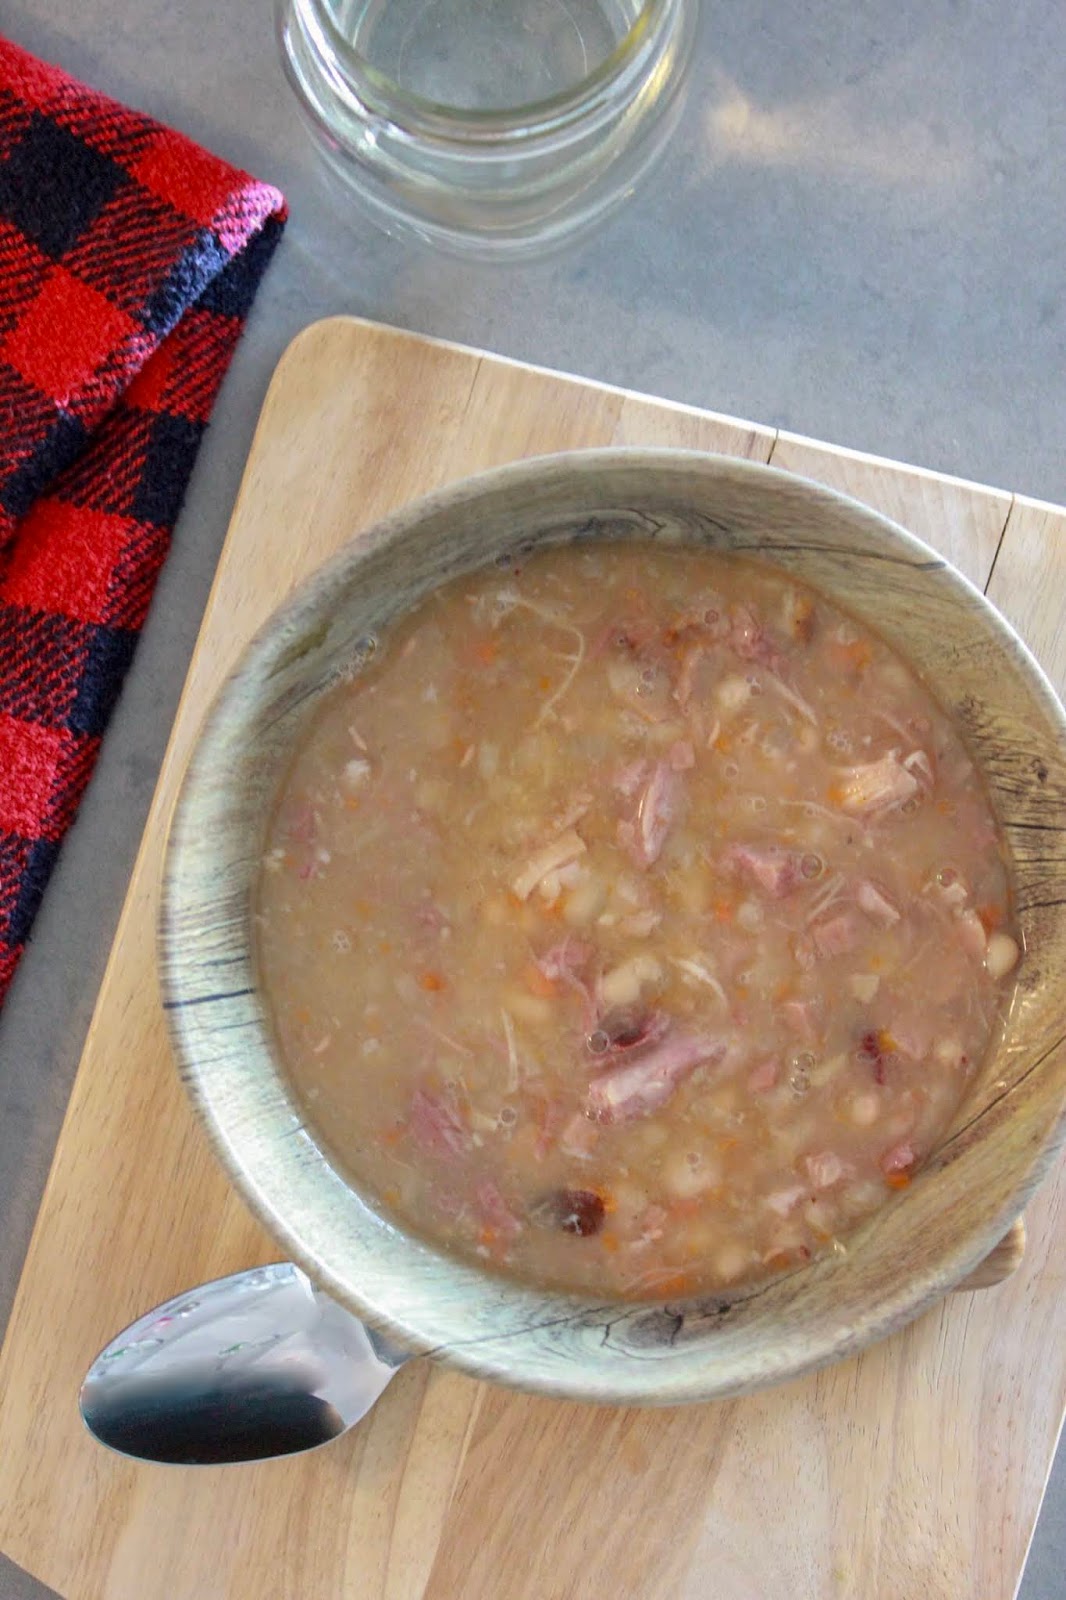
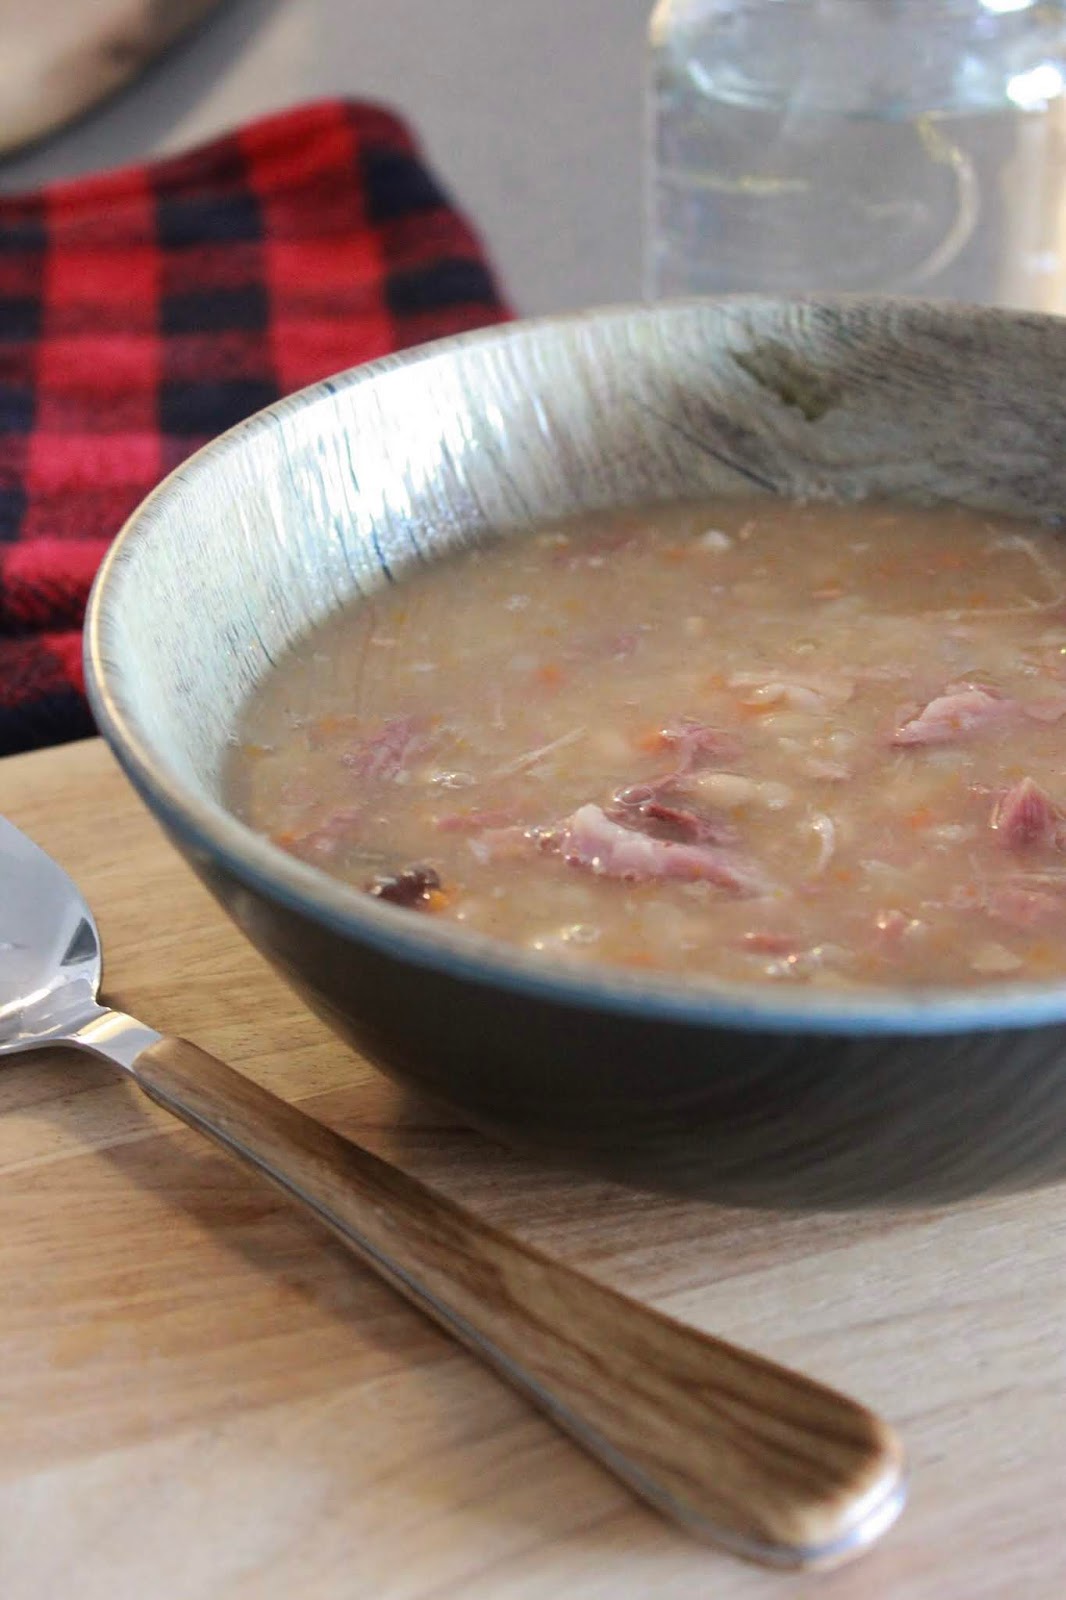
Mama's Slow Cooker Bean Soup Recipe


Love soup? Looking for the perfect winter comfort food? Check out Mama’s Slow Cooker Bean Soup Recipe. It’s sure to be a tummy pleaser!

Slow Cooker Bean Soup Recipe

If you’re like me, you have a leftover ham bone in the freezer from Christmas. Or maybe even as far back as Thanksgiving. Either way, it’s taking up space and you need to get rid of it. Am I right? 

Or, if that’s not you, maybe you just love a good recipe for comfort food? Maybe some hot soup on a cold day? A reason to bust out the slow cooker or crock pot?

Slow Cooker Bean Soup Recipe

Well, whether it’s reason a or reason b (or maybe even a combo of both), you’ve come to the right place.

Today, I’m sharing Mama’s Bean Soup recipe. And yes, that mama is me. And my mama, because I can’t take all of the credit. She taught me how to make it. 

It's easy to make, it's tasty, it's hardy and it scream winter comfort food. It's also sure to be a tummy pleaser. Hey, if a "three-nager" devours an entire bowl, you know that's a fact.

All you need is said leftover hambone (or a ham hock purchased from the store), some veggies, chicken stock and dried navy beans. 

Enjoy!

Slow Cooker Bean Soup Recipe

Mama’s Slow Cooker Bean Soup

Serves: 6-8 people

Ingredients:
  • Ham bone, with leftover ham (or ham hock)
  • 1 cup dried navy beans
  • 4 cups low sodium chicken stock
  • 4 cups water
  • 1 cup carrots, shredded or diced
  • 1 small onion, diced
  • 2 stalks celery, sliced
  • Salt and pepper, to taste

Directions:
  1. Locate the slow cooker or crock pot from back of cupboard and dust off.
  2. Add onion, carrot, celery to bottom of the slow cooker.
  3. Place ham bone on top of vegetables.
  4. Pour dried beans around ham bone.
  5. Top with chicken stock and water, so that majority of bone is covered. Add water if needed.
  6. Set on high and cook for 6-8 hours, or until beans are tender and ham is falling off the bone.
  7. Remove the ham bone. (Be sure there are no ham bone fragments in the soup.)
  8. Remove leftover ham from the bone. Cut up and add to soup. Also cut up any large chunks of ham already in the soup.
  9. Season with salt and pepper, to taste.
  10. Can be stored in the fridge, covered for one week, or can be frozen for later. 

Note 1: I use half chicken stock and half water to make my broth, mostly to cut back on the sodium. The salt from the ham will help to flavour the broth. If you like a saltier broth, instead use chicken stock for the full 8 cups. 

Note 2: If you do not have a ham bone, you can purchase a ham hock from the meat department at your local grocery store. It will work just as well to flavour the broth, however, you may not get as much meat off the bone.

Slow Cooker Bean Soup Recipe

If you enjoy soup, you may also want to check out these recipes for The Best Chicken Dumpling Soup and Fall Harvest Root Vegetable Soup.

What is your favourite comfort food recipe? Do you enjoy soup? I’d love to hear!


PIN IT:

Slow Cooker Bean Soup Recipe

SHARE:

November 1, 2018

Roasted Beet & Kale Salad


Looking for the perfect fall recipe that's both healthy and delicious? This recipe for Roasted Beet and Kale Salad is sure to be a tummy pleaser around the dinner table. 

Roasted Beet and Kale Salad Recipe

Beets. Some people love ‘em, some people hate ‘em. Personally, I’m a lover. Pickled, steamed, roasted, I love them all. 

I really don’t think beets get the credit they deserve. When roasted, they turn into this unexpectedly sweet vegetable. Perfect to pair with the bitterness of another one of my favourite vegetables, kale. 

Tip for buying and storing beets: When buying your beets, look for firm, small to medium-sized beets. To store, loosely wrap in paper towel and keep in refrigerator crisper for up to one week. 

Roasted Beet and Kale Salad Recipe

This recipe for Roasted Beet and Kale Salad is sure to be a tummy pleaser around the dinner table. And it may even convert those haters into lovers of this delicious, hearty root vegetable. 

Make this salad for a hearty weeknight meal or for lunches on the go. Wherever and whenever you eat it, it’s loaded with good-for-you nutrients to keep your body fuelled as the weather turns colder and all we want to do is hibernate.

Roasted Beet and Kale Salad Recipe

Roasted Beet & Kale Salad

Serves: 2

INGREDIENTS:
  • 1 bunch kale
  • 6 large beets
  • 1 small red onion, thinly sliced
  • 2 tbsp slivered almonds, lightly toasted
  • 1 tsp garlic powder
  • salt and pepper
  • olive oil

Vinaigrette
  • 1/4 cup olive oil
  • 1 lemon juice
  • 1/4 cup honey
  • 1/4 tsp garlic powder
  • salt and pepper, to taste

DIRECTIONS:
  1. Preheat the oven to 400 degrees F.
  2. Wash and dry the beets and kale.
  3. Prepare the kale by removing the middle rib and chopping roughly.
  4. Prepare the beets by cutting into bite size (approximately 1 inch) chunks.
  5. Toss the kale with salt, pepper and a small amount of olive oil. Place on a lightly oiled baking sheet. Roast in the oven for approximately 5 minutes. Remove from the heat and allow to cool. 
  6. Toss the beets with salt, pepper, garlic powder and a small amount of olive oil. Place the chunks on lightly oiled baking sheet. Roast for approximately 45 minutes, tossing twice.
  7. While beets are roasting, make the vinaigrette. Mix olive oil, lemon juice, honey, garlic powder, salt and pepper in small bowl and set aside.
  8. When beets are roasted to your liking, remove from the oven and allow to cool. 
  9. In a medium bowl, combine the roasted kale and beets, thinly sliced red onion and half of the slivered almonds. Toss with honey-lemon vinaigrette. 
  10. Garnish with remainder of the slivered almonds.
  11. Enjoy!

What is your favourite (healthy) fall meal? I'd love to hear!


PIN IT:

Roasted Beet and Kale Salad Recipe

SHARE:

October 11, 2018

Toddler-Friendly Oatmeal Peanut Butter Cookies


Have you ever heard of a kid that DOESN’T like chocolate? 

No? Well, they do exist. Because I have that kid… 

If you ask her, she will flat out tell you she doesn't like chocolate. If you try to trick her and hide the chocolate, she'll find it. She will instantly spit it out first bite, and you'll get the point pretty quickly. In true toddler fashion, it's extremely dramatic. 

But, I guess I should say, the apple doesn’t fall far from the tree. I don’t have much of a chocolate tooth either. So when I bake, I usually steer towards recipes that are chocolate optional. That means no chocolate chip cookies, no chocolate cake and no banana bread with chocolate chips. My poor sweets-loving husband.

Toddler-Friendly Oatmeal Peanut Butter Cookies

What my toddler does love is peanut butter and oatmeal. Combined, it’s her go-to breakfast. This toddler-friendly recipe for Oatmeal Peanut Butter Cookies combines the best of both worlds in a snack form, and always leaves her asking for more. 

And despite asking, “Where’s the chocolate?!” after taking his first bite, my husband was a fan too.

Enjoy!

Toddler-Friendly Oatmeal Peanut Butter Cookies

Oatmeal Peanut Butter Cookies

Prep Time: 10 minutes
Cooking Time: 9-11 minutes
Serving Size: approximately 4 dozen

Ingredients:

  • 3/4 cup oil (we used canola)
  • 1/2 cup creamy peanut butter 
  • 1 cup brown sugar
  • 1/2 cup white sugar
  • 1 tsp vanilla extract
  • 1 tsp baking soda
  • 2 eggs
  • 2 cup white flour
  • 1 cup quick oats
  • optional: 3/4 cup chocolate chips

Directions:

  1. Preheat oven to 375 degrees F. Line a cookie sheet with parchment paper and set aside.
  2. In a large bowl, beat together the oil and peanut butter until smooth, about a minute. Add the sugars and beat until creamy.
  3. Add the vanilla extract, baking soda and eggs, beating to combine after each addition.
  4. Add the flour and oatmeal, and beat until just combined.
  5. If using, add the chocolate chips and store to combine.
  6. Scoop approximately 1 tablespoon of cookie dough onto the prepared cookie sheet.
  7. Bake at 375 degrees F for approximately 9 to 11 minutes, or until lightly golden brown on top.
  8. Remove from the oven and allow to cool before removing from cookie sheet.

Toddler-Friendly Oatmeal Peanut Butter Cookies

What is your favourite recipe to make with your kids? I'd love to hear!


PIN IT:

Toddler-Friendly Oatmeal Peanut Butter Cookies


SHARE:
Blog Design Created by pipdig