
This shop has been compensated by Collective Bias, Inc. and its advertiser. All opinions are mine alone. #DamageFreeHoliday #CBias #CollectiveBias
Are you looking for a baby-safe Christmas tree alternative? This baby-friendly felt Christmas tree tutorial will add a festive flair to your home this holiday season, while creating a learning opportunity for your little one.

My husband, 8 month old daughter and I are currently living in a teeny tiny one bedroom apartment as we await the completion of our first home. We are so excited to celebrate baby's first holiday season, but since she is starting to become quite the mover, we are worried about her safety around the Christmas decorations in our small space.
We usually opt for a real tree complete with all of the fancy decorations, but this year we are trying something a little different. While we still have a small tree tucked out of the way for mom and dad, we have also added this felt Christmas tree to the living room wall, just for baby.
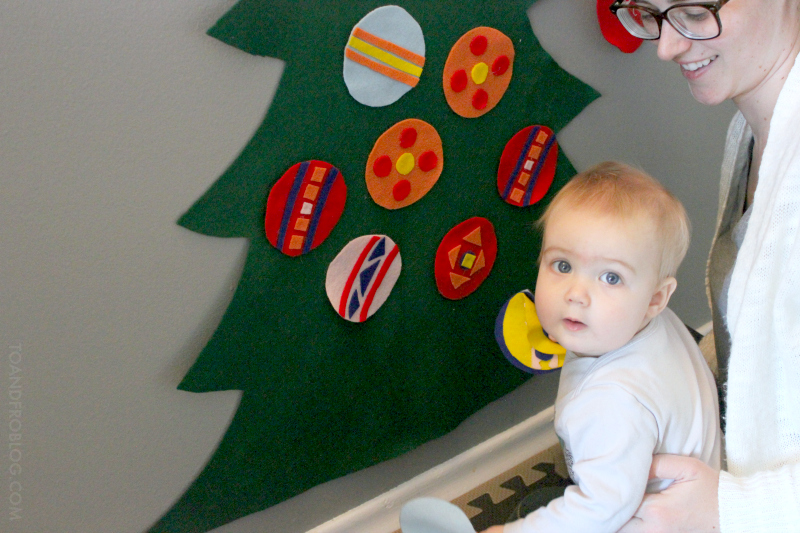
The simple to make felt Christmas tree is baby-safe, maintenance-free and decorated with lots of brightly coloured ornaments that baby can easily rip off and put back on. It adds a festive flair to our teeny tiny abode, while creating a great learning opportunity for little miss Morley.
Why not make one for your little one this holiday season?
Why not make one for your little one this holiday season?
Baby Felt Christmas Tree Tutorial
Materials
- 1 metre green felt
- Several squares of felt, assorted colours
- Square of yellow felt
- Glue gun and glue
- Scissors
- Measuring tape
- String
- Marker
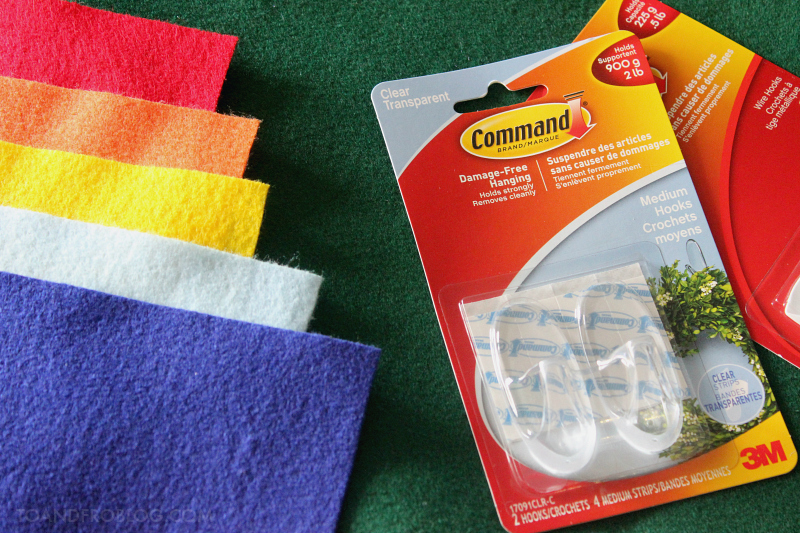
- One Command™Clear Medium Hook
Directions
I purchased the felt from my local fabric store. They sell small individual squares in a variety of colours, for making the ornaments, as well as felt by the length, which I used to make the tree.
First, make the star for the top of your tree using the yellow felt. I started with the star because I had a limited amount of yellow felt and the size I made it would determine the size of the tree.
First, make the star for the top of your tree using the yellow felt. I started with the star because I had a limited amount of yellow felt and the size I made it would determine the size of the tree.
Lay your tree fabric on the floor and fold in half vertically. Using a marker, draw the outline of your tree. Cut along the line, through both layers of green felt. Open the fabric back up to reveal your bare tree. Attach the star to the top with hot glue.
Next step is to make the ornaments. I made circular ornaments for my tree because they are easy for my daughter to grab. Get creative - you can make any size or shape you desire! Use the scrap felt to spruce up the ornaments. You won't need anything to help hang these ornaments on the tree because felt sticks to felt like magic.
The possibilities with this tree are endless. You can add as many different colours and shapes of ornaments as you wish! If you are feeling especially creative, you can even make presents to go "under the tree".

Don't worry about making it perfect - your baby is not going to judge you if the tree is not symmetrical or the colours of your ornaments don't match. They are going to love it either way!
Now it's time to hang your tree. Using the glue gun, add a loop of string to the top of the star/tree. This will be how you hang the tree on the wall.
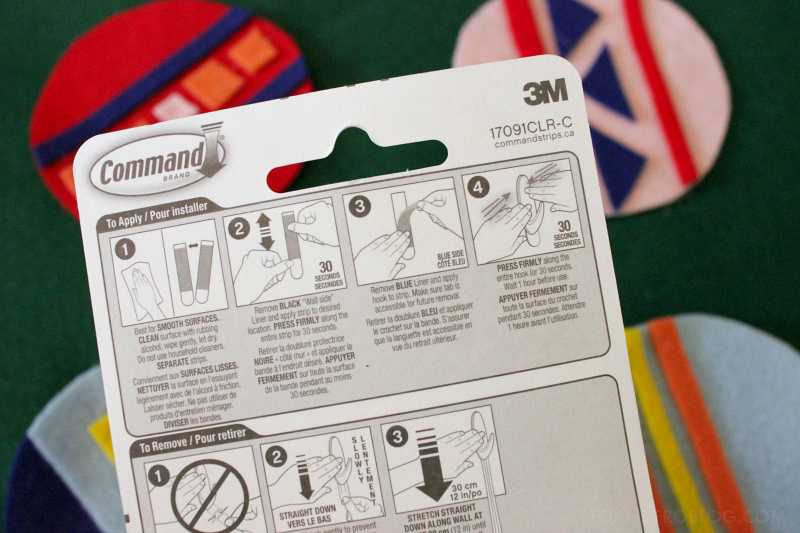
Make sure that the wall you hang the tree on is a smooth surface. With the tape measure, measure the height of your tree on the wall. Following the directions on the package, affix the Command™Clear Medium Hook to the wall.
The possibilities with this tree are endless. You can add as many different colours and shapes of ornaments as you wish! If you are feeling especially creative, you can even make presents to go "under the tree".
Don't worry about making it perfect - your baby is not going to judge you if the tree is not symmetrical or the colours of your ornaments don't match. They are going to love it either way!
Now it's time to hang your tree. Using the glue gun, add a loop of string to the top of the star/tree. This will be how you hang the tree on the wall.
Make sure that the wall you hang the tree on is a smooth surface. With the tape measure, measure the height of your tree on the wall. Following the directions on the package, affix the Command™Clear Medium Hook to the wall.
Hang the tree on the Command™Clear Medium Hook. Since our apartment is so dry, the felt automatically clings to the wall. However, you can repeat the above steps with a few more Command™Clear Medium Hooks to support the branches, if needed. Ensure the weight of the tree is evenly distributed across the hooks.
The great thing about using Command™Brand products for this tree is that if you don't like the placement, or need to move it for any reason, you can do so without the fear of holes or damage!

The great thing about using Command™Brand products for this tree is that if you don't like the placement, or need to move it for any reason, you can do so without the fear of holes or damage!
Using leftover felt, hot glue, string and glitter paint, I also created a small stocking and affixed it to the wall beside the tree using a Command™Small Wire Hook.

Now it's time to let baby play and have some fun with their new tree! But please remember, do not leave your child unattended while doing this activity.
Command™ Brand products provide an easy transition throughout the holidays, removing cleanly from the walls. At the end of the holiday season, simply remove the hook from the wall, fold up the felt ornaments and tree and store in your Christmas bin for another year!
Since we've never had a permanent space to call our own, we've always used Command™Brand products in our indoor decorating, instead of having to patch holes and touch up paint. They’re easy-to-use, come off clean, and can handle any decorating task I put them up to, including hanging photos on the walls to personalize our space. The ability to remove hooks without a scratch and paint touch-ups makes them a win for those in a temporary space.

Command™ Brand products, including the Command™ Clear Medium Hook and Command™ Small Wire Hook used in this tutorial, can be found in the holiday section at your local Walmart. Make sure to stock up for all of your decorating needs this holiday!

For more baby-friendly activities, check out this recipe for baby-safe paint.
Command™ Brand products, including the Command™ Clear Medium Hook and Command™ Small Wire Hook used in this tutorial, can be found in the holiday section at your local Walmart. Make sure to stock up for all of your decorating needs this holiday!
For more baby-friendly activities, check out this recipe for baby-safe paint.

What are some of your tips and tricks for decorating your indoor spaces around the holidays? I'd love to hear!
