June 23, 2018

5 Reasons to Visit Algonquin Provincial Park


When you think of the outdoors in Canada, where does your mind go? To the picturesque views of the west coast’s Rocky Mountains? To the shores of the Maritimes? Or, how about to the golden hues of the fall leaves in Ontario’s Algonquin Provincial Park?

While the mountains have my heart, Ontario is where I call home. And to me, there’s not much more stunning (and quintessentially Canadian) than Algonquin Provincial Park. It’s also only 3(ish) hours from Toronto, making it the perfect long weekend escape from the big city. 

5 Reasons to Visit Algonquin Provincial Park, Ontario, Canada

Established in 1893, Algonquin was created as a wildlife sanctuary to ultimately protect the headwaters of the five major rivers which flow from the Park. 


As one of the oldest and largest provincial parks in Ontario, Algonquin is diverse, protecting a variety of natural, cultural and recreation features and values. It also offers something for nearly everyone. Whether it be a family camping trip, a back country portage or even just a day hike, there are many reasons why YOU must visit Algonquin Provincial Park. 

Here are just 5 (of many).

Canoeing
Whether you’re an experienced voyageur or have never touched a paddle in your life, Algonquin is the perfect place for canoeing. With 2,000 kilometres of routes and portages, so you can choose something short or plan something epic.

Canoeing in Algonquin Provincial Park

Wildlife Viewing
Having lived in Alaska, we took seeing moose on the daily for granted. In Ontario, that’s not so much the case. Algonquin is not only the perfect place to view a moose or two, but is also home to red fox, grey wolves, river otters, beaver, black bear, white-tailed deer and more. 

Oh, and the sunsets aren't too shabby either. 

Sunsets in Algonquin Provincial Park

Fishing
With 1,500 lakes and 1,200 kilometres of streams, it’s no surprise that Algonquin boasts some of the best brook and lake trout fishing around. Trout aren’t the only fish thought - there are a recorded 54 different species of fish in the park! 

If you’re looking to go fishing in Algonquin, spring provides some of the best fishing opportunities of the year. Don’t forget your license!

Fishing in Algonquin Provincial Park

Hiking
There are 19 interpretive hiking trails, each allowing you to explore a different aspect of Algonquin’s natural environment. Interpretive trails are open year-round, clearly marked and easy to navigate. Be sure to pick up a trail guide booklet, found at all trail heads and park bookstores, before you start. 

And if you're not into hiking, there are also several beaches, such as the one at Canisbay Lake Campground, to explore. Which when you have a toddler, totally counts as a hike. 

Hiking in Algonquin Provincial Park

And last, but definitely not least…

Camping
Camping is one of Algonquin’s most popular activities. Camping opportunities are grouped into two main categories based upon the mode of transportation to get you to the camping location - drive to camping and backcountry camping. Drive to camping includes developed campgrounds (aka those with sites), yurts, ranger camping, RV camping and lodges, whereas backcountry camping includes portaging, backpacking and paddle in campsites. 

In Algonquin, you can camp (just about) anywhere. First, pick your ideal type, then pick your location. If you are keeping it safe with car camping, you have 9 different locations to chose from. Our personal favourite is Canisbay Lake, located at km 24 of the park. It offers an access point for portaging, paddle in campsites and a developed campground (with sites that can accommodate both tents and trailers). 

Word to the wise, start planning early. You can reserve your spot up to five months in advance on the Ontario Parks website. The good ones go fast!

Camping in Algonquin Provincial Park

You may also like >> Disconnecting in Algonquin

Did you know, Ontario’s provincial parks are turning 125 in 2018?! And it all started back in 1893 with the creation of Canada’s first provincial park, Algonquin. Today, Ontario Parks protects 340 provincial parks, which encompasses just under 8% of Ontario, an area larger than Nova Scotia and Prince Edward Island combined.

Make 2018 the year to visit the stunningly beautiful landscapes of our province, carry on traditions and make new memories. I highly recommend starting with Algonquin. 


Have you explored Ontario’s Parks? Which one is your favourite? I’d love to hear!


SHARE:

June 13, 2018

Simple DIY Mountain Wall Mural


When designing our toddler’s first “big girl” bedroom, we knew it had to be special. We knew that if she didn’t love it from the get go, the transition to her own room and her own bed would be much more of a challenge. 

Inspired by our love of the outdoors, we decided on an outdoor-themed bedroom

Initially we were going to add birch tree wallpaper to one wall as an accent, but seeing as wallpaper can be fairly tedious (and, ahem, I get frustrated easily, ahem), we instead opted for this simple DIY mountain wall mural.

How to Paint a Simple DIY Mountain Wall Mural

Below is the list of materials we used and complete step-by-step instructions on how you too can create this simple and inexpensive DIY home project. No art skills required.  

DIY Mountain Wall Mural


Materials

  • Painter’s tape
  • Paint in four (4) colours (*colours and amounts used listed below)
  • Large roller
  • Small roller 
  • Small sponge brush
  • Paint trays
  • Damp cloth

Tips for Choosing Paint:


  • Main wall: lighter than mountains, but darker than peaks
  • Forefront mountains: darkest colour
  • Background mountains: lighter than front mountain, but darker than back wall
  • Mountain peaks (optional): lightest colour, or even pop of colour for an accent

The amount of paint you need depends on your wall size, but this is what we used for the 10’x10’ room (and similar-sized wall):

  • Main wall: 1.5 gallons used on entire room
  • Forefront mountains: 1/2 gallon
  • Background mountains: sample size
  • Mountain peaks: sample size

Note on amount: We really didn’t end up using a lot of paint for this project. Because we were painting our entire condo at the same time, we were able to pull paint from other rooms to use. For example, the colour of the peaks is our master bedroom colour and the background mountains are the same colour as our living room. The only additional paint we had to buy was the forefront mountains (1/2 gallon).

When selecting paint, we opted to use BEHR PREMIUM PLUS® Interior Eggshell Enamel paint, from The Home Depot Canada. This paint plus primer is self-priming over properly prepared uncoated and previously painted Interior surfaces. The soft, subtle sheen of the eggshell enamel resists dirt and grime, so it's perfect for all of your home's busiest rooms, including toddler destruction.

Scroll down to step 6 to see what Behr Premium Plus paint colours we used.

How to Paint a Simple DIY Mountain Wall Mural

How to Create Your Mountain Mural


Step 1: Paint the room.
First step is to paint the entire room, your colour of choice. We opted for a light grey colour so that the mountains stood out. When it comes time to reveal your mural, this colour will also act as the space between the forefront and background mountains (if you choose to leave a space). 

How to Paint a Simple DIY Mountain Wall Mural

Step 2: Tape out the forefront mountains.
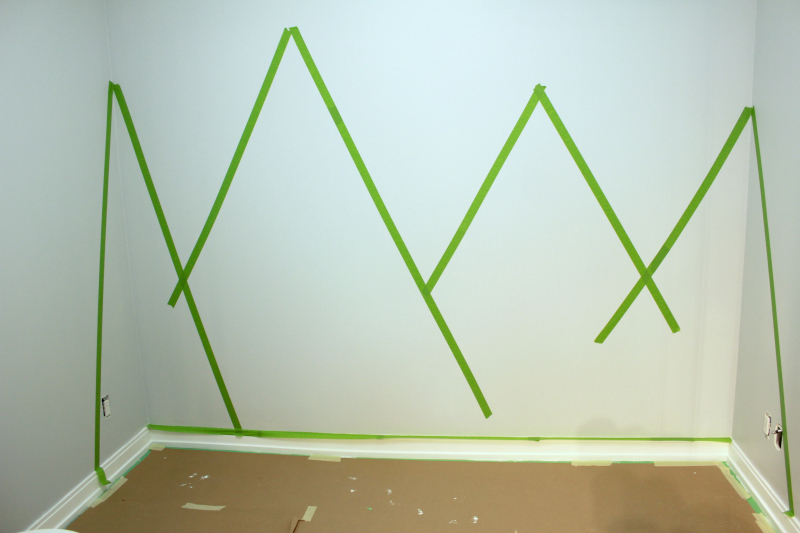
Start by deciding how many mountains you would like, and whether or not they will stay on one wall or onto surrounding walls. We decided on three forefront mountains on the main wall, and then carried them onto the surrounding two walls to give the mural a bit more dimension.

Using the painter’s tape, we created the outline for the forefront mountains. You can always draw out the mountains ahead of time, or just freehand them, which is what we did. It is very important that you are using good quality painter’s tape, such as FrogTape, which will prevent paint bleed and give you cleaner lines. It will also be easier to remove the tape when the time comes. Spend a few extra dollars on the good stuff, it's worth it.

When taping the mountain outline, carry the tape all the way down to the baseboard.

When you have taped out your forefront mountains, take a step back and make sure you like them. This is the time to adjust the tape if needed. For example, at first attempt, our mountains were too symmetrical, so we adjusted the tape to change the height and width of each mountain. 

How to Paint a Simple DIY Mountain Wall Mural

Step 3: Tape out the background mountains.
After creating your forefront mountains, tape out the rear mountains. Be sure to make them different heights and widths, and vary the number between forefront mountains.

Step 4: Tape out the forefront mountain peaks.
Using smaller pieces of tape, tape out the peaks of the forefront mountains. This step is completely optional, but adds some dimension to the mural. 

Trim the tape where needed.

Step 5: Go over the tape with a damp cloth.
Using a damp cloth (and I mean damp, NOT sopping wet), go over the tape. This will help give you the most crisp lines and further prevent paint bleed. 

How to Paint a Simple DIY Mountain Wall Mural

Step 6: Paint the mountains.
Using a large roller, we first painted the forefront mountains. The background mountains were painted using a small roller and the peaks using a small sponge brush. We opted to add peaks to the forefront mountains, but left the background mountains as is.

By the time we had painted the background mountains and peaks, we were able to do a second coat on the forefront mountains. 

Colours Used

*all Behr Premium Plus Interior

  • Main wall: Behr Sterling (780E-3)
  • Forefront mountains: Behr Shark Fin (PPU24-19)
  • Background mountains: Behr Silver Mine (PPU26-18)
  • Mountain peaks: Behr Silver Polish (BL-W13)

How to Paint a Simple DIY Mountain Wall Mural


Step 7: Remove tape and do touchups.
Allow paint to partially dry, approximately 30-60 minutes. Do not let the paint dry completely, it may cause some of the paint to lift when removing the tape. Carefully remove the tape. 

If needed, go back over the edges by hand to clean up the lines.

Optional: Fill in any gaps.
We liked that there was a gap where the tape was, between the forefront and background mountains, so we left as is. However, if you don’t like the gap, you can always go back and fill it in with the background paint colour. 

How to Paint a Simple DIY Mountain Wall Mural

Project Budget


Item
Quantity
Cost
1
$11.47
1
$39.97
1
$19.97
BEHR Premium Plus Interior Eggshell Enamel - sample size
2
$9.94
Performance Select Silver Paint Kit (5-Piece incl. tray, roller, cage)
1
$11.97
1
$7.97
1
$1.08
TOTAL COST
$102.37

*based on materials listed above, with paint for entire room

** prices subject to change

How to Paint a Simple DIY Mountain Wall Mural

The Result

This was such an simple, quick and inexpensive project to tackle, and one that added a pop of character to our little gal’s first big kid bedroom. 

We couldn’t be happier with how our mountain mural turned out, and we're happy to see that Morley’s a big fan too. Little gal is sleeping as snug as a bug in the mountains every night. 

Now if only hanging the decor was as easy as this mural...

Stay tuned for the entire room reveal, coming soon!

Have you tackled a recent DIY home project? I’d love to hear about it!


Disclosure: To & Fro worked with Home Depot Canada to create this special space. Product and/or compensation was received in exchange for this post, however, all opinions are 100% that of To & Fro. This post also contains affiliate links.

Pin This:


How to Paint a Simple DIY Mountain Wall Mural


SHARE:

June 8, 2018

The Adventures of Moving with a Toddler


This spring and summer are ones full of transitions for of our toddler. Not only is she going through the usual “two year old phase” - finding her attitude, her likes, her dislikes and her independence, we’re throwing a whole whack of new changes at her that many other two year olds may not experience. At least, not all at once.

Tips for Moving with a Toddler

On top of getting a new brother or sister this August, earlier this month she said goodbye to her favourite teachers and first friends at daycare, moved into “Morley’s new house”, got her own bedroom and her first big girl bed and (finally) got off the bottle. She also started at a new school, with new teachers and new friends. All that’s left to add to the list is potty training (which, is a whole other story). 

Holy moly, right?!

Tips for Moving with a Toddler

So, I know you’re dying to know - how did she do?!

I tell ya, while set in their ways, toddlers are pretty damn resilient.

We've been in our new house for about two weeks now, and while she occasionally (heartbreakingly) asks to go back to “Morley’s ’notha house”, I can successfully report that she has slept in her new bed from day one, frequently talks about how much she likes her new house (and the park and dogs that she thinks came with it), weaned her own self off the bottle and jumped head first into a new group of friends and teachers. Like a champ is a safe way to describe it. 

Baby girl continues to amaze me.

Tips for Moving with a Toddler

And while I don’t want her to grow up any faster than she already has, I now believe that being able to check these transitions off the list in one giant swoop has made things much easier than anticipated. We started a totally brand new routine (for all three of us) all at once, rather than in baby steps. Like ripping off a bandaid. 

I will admit, we didn't just jump in blind. She did have some help from mom and dad along the way. There was a bit of planning and plenty of Googling “moving with a toddler” prior to. And while it worked for us (for the most part), tackling it this way may not work for others. I’m sure there are things that we could have done differently, but considering our fairly laid back parenting style (at least that’s what I like to believe), these steps worked for us.

Some steps that worked for us include, 
  • As we packed up our belongings, we constantly talked about “Morley’s new house”, in hopes that it would get her excited.
  • She recognizes places that we frequent, so seeing as our new house is right around the corner from grandpa, we would drive past during construction, pointing out where we would be living (including Morley’s new park across the street).
  • When it came time, we took her with us for the pre-inspection and finally to get the keys, which allowed her to see the space when it was empty.
  • We kept her in school for a few days after getting the keys, allowing us time to get some errands and the majority of painting done. 
  • We pulled her out of her first day care two weeks prior to starting her new daycare. This allowed her to have some “down time” at home with us as we set up the new house. (It also saved us two weeks’ worth of daycare fees.)
  • The first project we tackled was her bedroom, painting her walls and assembling her new bed. All that’s left is to hang some decor. (The BIG reveal to come soon.)
  • During the whole moving process, we made sure to take some time to relax and enjoy the new space, including morning trips to the park and walks to Starbucks (yes, those frequent locations we visit that she now knows include Starbucks).

And while it has gone as smooth as we could have hoped, it hasn't been all rainbows and unicorns. There have definitely been some challenges, including expressing her attitude and pushing the boundaries of what she is allowed to do and not do in her new house. But to be expected, she is only two after all. 

Now on to Googling the next big change - how to introduce a toddler to their new sibling without them hating him/her. Wish me luck. 


Have you moved with young children? Any tips or tricks? I’d love to hear!


SHARE:

June 5, 2018

The Adventures of Summer Soccer (& Essentials in Our Bag)


*This post is sponsored by Bayer®. To make sure Bayer® products are right for you, always read and follow the label.

Earlier this spring, I successfully checked one of my #momgoals off the list - to become, a soccer mom. 

As someone who played soccer both recreationally and competitively for the majority of her life, seeing my mini don her red and white uniform and kick the ball for the first time made me one proud mama.

Summer Sports League Essentials

Ok, so maybe there wasn’t as much “soccering” going on as there was longingly staring at the play structure next to the field or running off through the dirt, but it was still soccer.

While I would love to call it a summer sports league, a bunch of toddlers running wild really is anything but. However, it is a way for her to be active, introduce her to a new activity, get outside, meet new friends, learn her independence and, most importantly, have fun! 

Summer Sports League Essentials

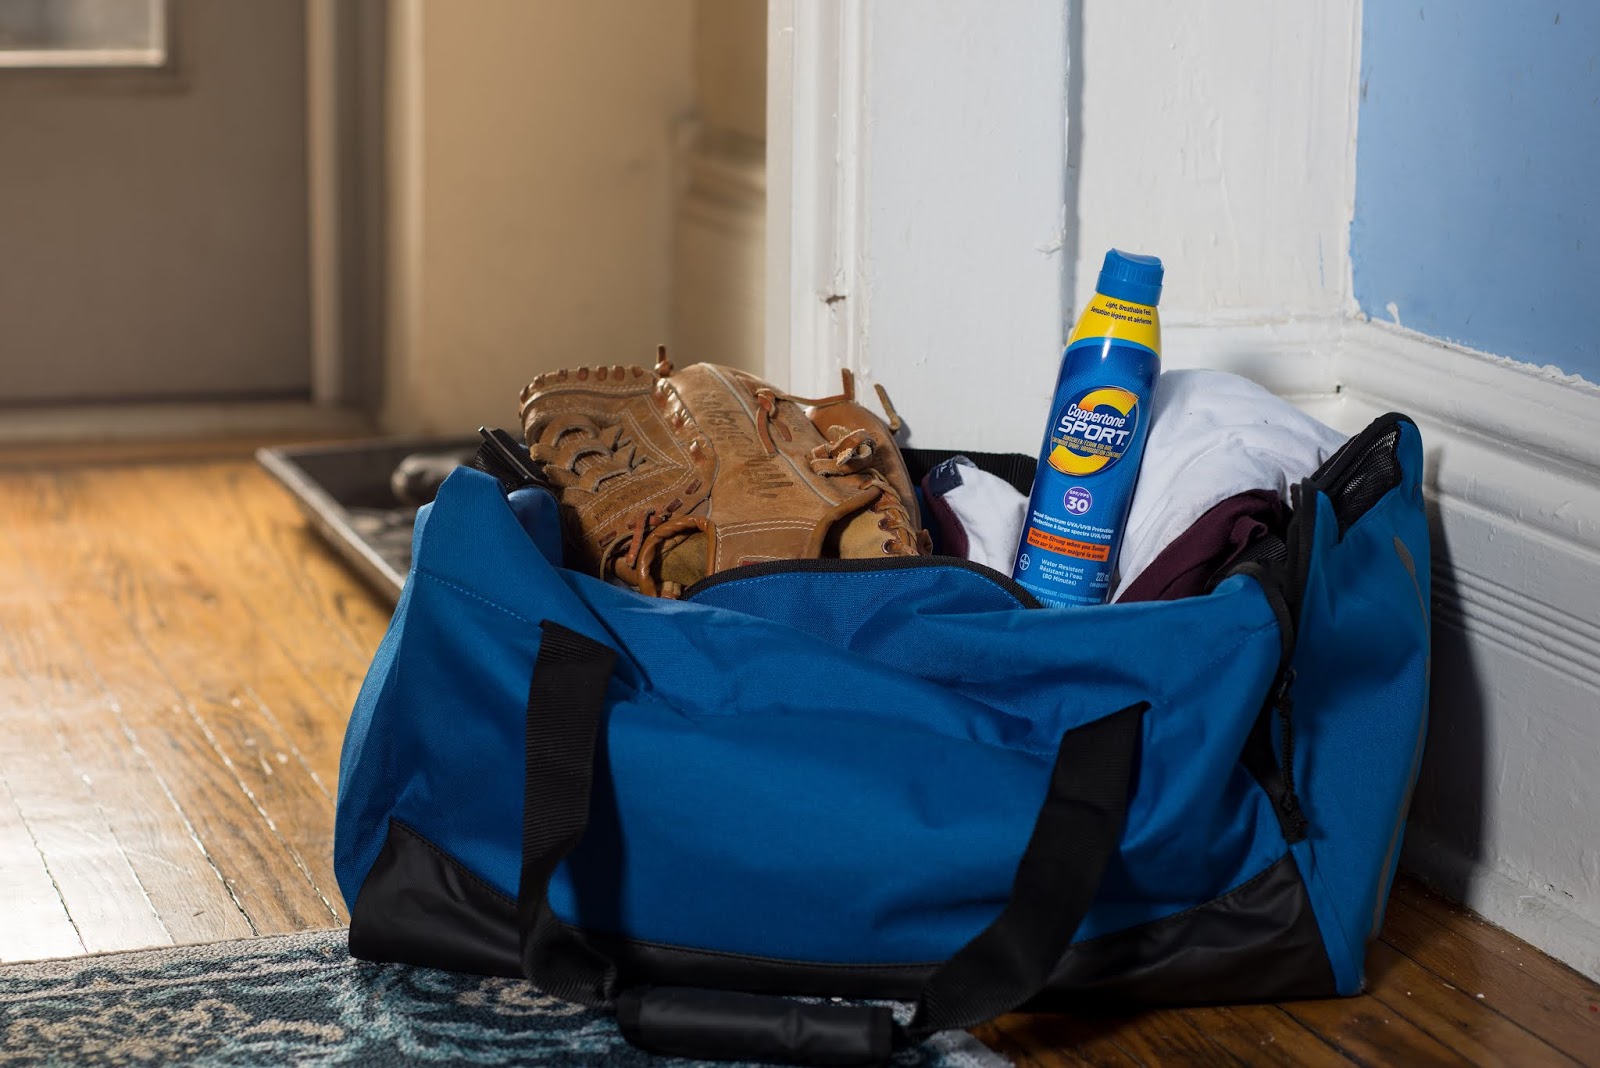
No matter what sport you or your children are signed up for this summer, there are a few essential items you’ll want to bring along in your bag. Check out this handy list for tips on packing for your time on the field (or wherever the sport takes you).

Water Bottle
Hydration is no joke, especially when it gets hot out there. Make sure to bring your own reusable bottle of water. Look for an insulated stainless-steel water bottle to keep your water cold for hours under the sun. To avoid the dreaded summer sickness, make sure to not share your water. 

Safety Equipment
Sports-related injuries can be serious, and could keep you on the side lines in the short term, or lead to long-term problems if not treated properly. Protective equipment like helmets, elbow and knee pads, eye protection and mouth guards (depending on the sport) can help to reduce your chances of getting hurt or the severity of the injury. Be sure to find out what gear you need before your first game so that you’re prepared.

Spare Clothes
Keeping an extra pair of clothes on hand keeps you dry and comfortable on your way home after the key. As an added bonus, you’ll be ready for an impromptu post-game team celebrations. 

Summer Sports League Essentials

Sunscreen
Sun protection is key year round, but especially if your game takes you out in the hot summer sun for a couple of hours. Apply your sunscreen before you get dressed for the game to ensure all spots are covered and keep it on sidelines to reapply after 80 minutes of swimming or sweating. Also reapply immediately after towelling off. 

So you don’t miss a minute of the game, try a spray like Coppertone SPORT® Sunscreen Continuous Spray SPF 30. This sweat-resistant sunscreen is hypoallergenic and can help boost skin’s hydration. Apply just 15 minutes before sun exposure. It goes on fast, has a light breathable feel and stays on strong when you sweat. Keep in mind, sprays should be rubbed into the skin for complete coverage. 

For a small portable option, pick up the new Coppertone SPORT® Sunscreen Stick SPF 50, it provides a broad spectrum UVA/UVB protection and won’t run into your eyes when your sweat. It’s small size also allows you to tuck it into any size sport bag (or purse). 

First-Aid Kit
The type of first-aid kit you’ll need obviously varies by the sport, but there are a few general supplies that will come in handy no matter what. This includes instant cold packs, bandages and cleansing wipes for cleaning wounds. For the adults, you can even pack a pain medication like ALEVE® Pain Relief Caplets to give you 12 hours of relief and keep you in the game.

ALEVE® is an over-the-counter pain reliever (with active ingredient Naproxen Sodium) indicated to quickly and effectively relieve aches and pains due to arthritis, headache, muscular aches, toothache and backache.

Have you joined a sports league this summer? What are the most important things in your bag? I’d love to hear!


*This post is sponsored by Bayer®. To make sure Bayer® products are right for you, always read and follow the label.
SHARE:
Blog Design Created by pipdig