
If you're looking for a stylish yet minimalist plant stand, this inexpensive do it yourself mid century modern-inspired plant stand is a simple solution for your indoor plant needs.

While living in a big city has some challenges to getting outside into nature, one way we cope is by bringing nature to us, and filling our house with greenery. Not only do plants held purify the air, but they also help to reduce stress (yet another “side effect” of living in a big, busy city). I haven’t yet achieved “crazy plant lady” status, but I’m well on my way.
Since we moved into our new house, I’ve been on a little bit of a plant buying kick. And with all of the new plant babies, I was needing some planters that would be worthy AND kick my plant cred up a bit.
I’ve seen these mid century modern-type plant stands being sold at fancy retailers for in the hundreds of dollars. I’ve always loved the look of them, but not the pricey tag associated. I knew it was something I could easily make myself, for a fraction of the cost. So, a DIY it was.

Here’s how to make your own Mid Century Modern Plant Stand (with a custom plant pot)
What You’ll Need
For the pot:
plant
pot
white spray paint
accent paint (optional)
brush
painter’s tape
gravel (if pot lacks drainage)
For the plant stand:
1 - 1’’ x 2’’ x 8ft select pine board
1 - 1’’ x 2’’ x 6ft select pine board
4 - 3/8’’ wood dowels
1/2’’ wood chisel
drill
saw
wood glue
sand paper
rag
wood stain
clamps
What You’ll Need to Do
First step is to pick your plant, and the pot it will go in. This will determine the size of your stand.
For the plant, I opted for a Dracaena marginata, better known as a Dragon tree. This plant is an attractive, stiff-leaved plant with green sword-like leaves edged with red. They are perfect for a beginner crazy plant lady (like myself) because they're very easy to grow indoors.
I bought my pot at a local thrift store, for $4.99. I liked it’s unique shape. Try to find a pot that does not have drainage holes in the bottom. If it does, you will have to add a tray underneath (which may not fit in the plant stand) or risk water on the floor. Of course you could opt for a store bought, plain old Jane pot, but what’s the fun in that?!
*Skip ahead to the plant stand portion if you are not customizing your pot.
Now it’s time to create your custom pot. Spray paint your pot white (or colour of your choice). I used Rust-Oleum Painter’s Touch 2x Ultra Cover Paint + Primer (spray paint) in flat white. It is fast drying, and even bonds to plastic if that’s the type of pot you’ve chosen.

Since you won’t be completely filling the pot with dirt, make sure you spray inside of the pot, approximately 1-2’’ down from the top. A note about spray painting the pot – don’t hold the can too close to the pot or the paint will run! If it runs, quickly wipe the drips with a rag.
Once the pot is dry, use painter’s tape to create your design. My pot has a very prominent top, so I opted for a simple stripe design.
Add your accent colour. I used Behr’s 2020 Colour of the Year “Back to Nature” (S340-4) to add a little pop of colour. I was instantly drawn to the name, and knew it would help to add some warmth and comfort to our house in the times that we cannot actually get back to nature.
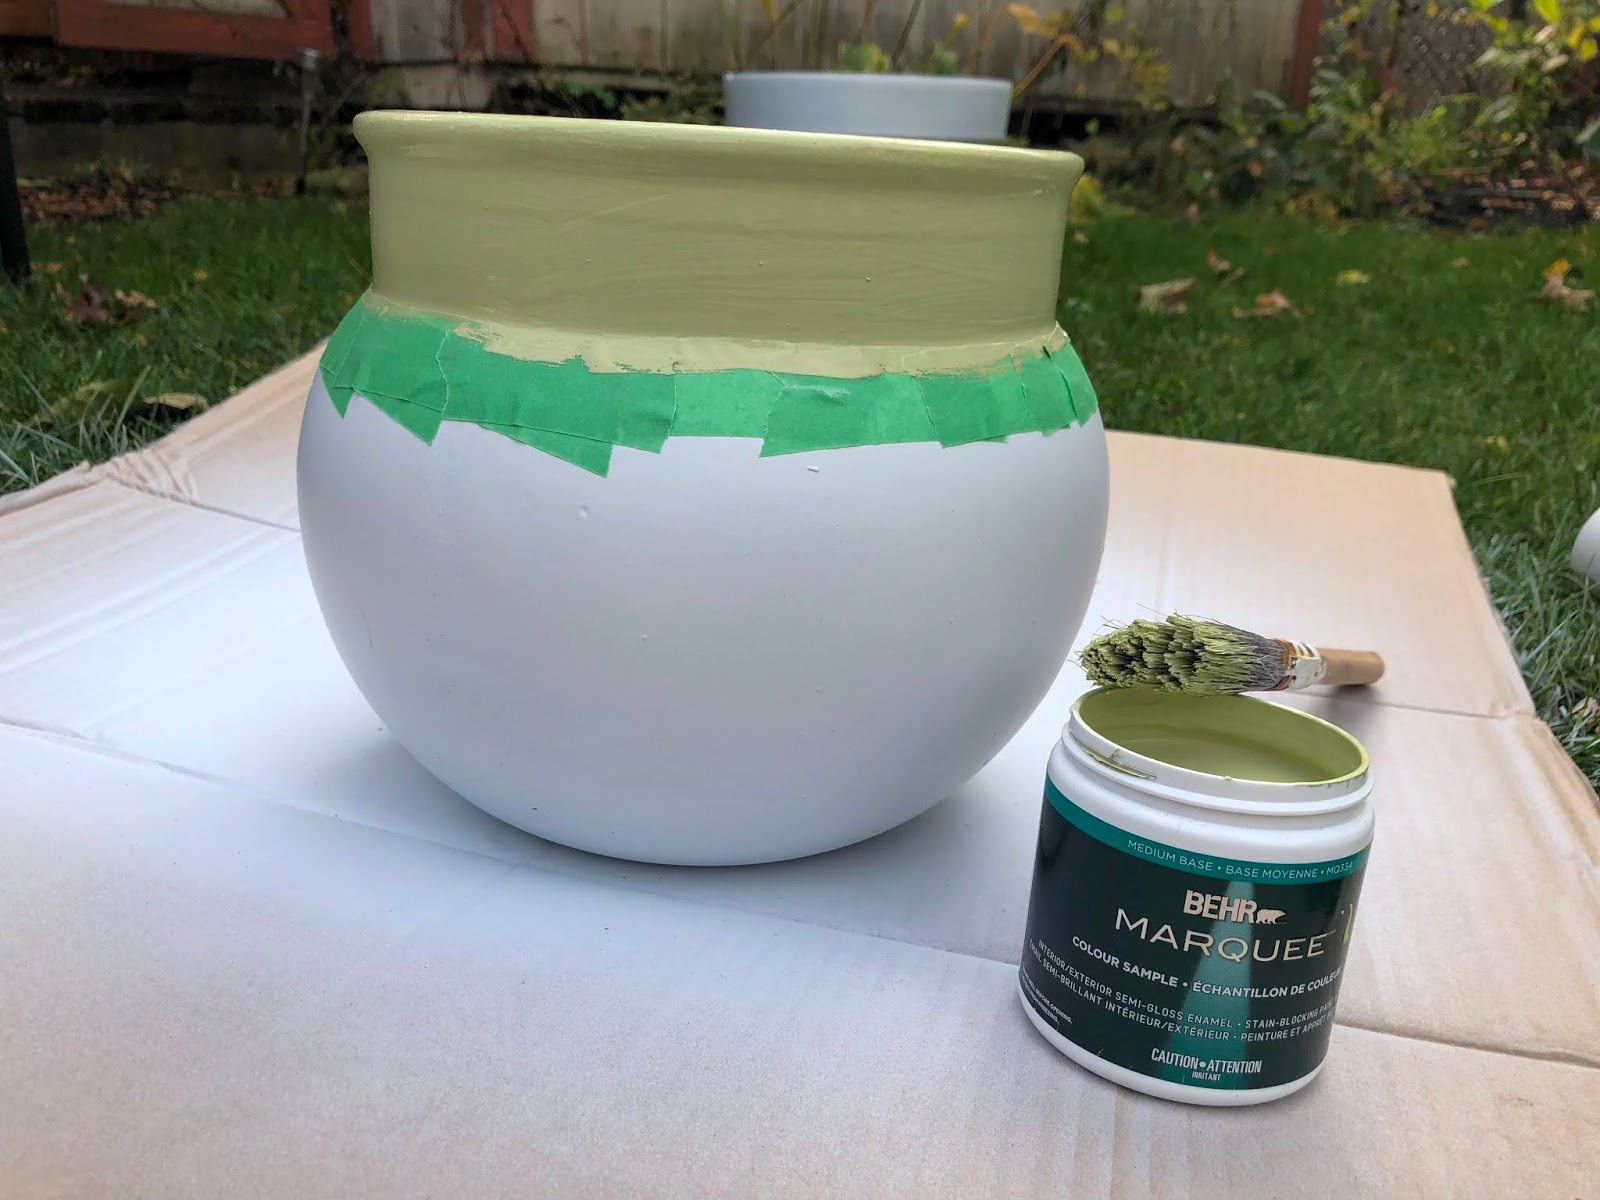
Once the pot is dry, remove the tape to reveal your design. (The shape of the pot made it a bit difficult to apply the tape in a straight line, so the green paint did slightly bleed and the line was not crisp. I did have to touch it up with some white spray paint.)
Pot the plant. If you pot does not have drainage holes, add some loose gravel to the bottom to collect any standing water.
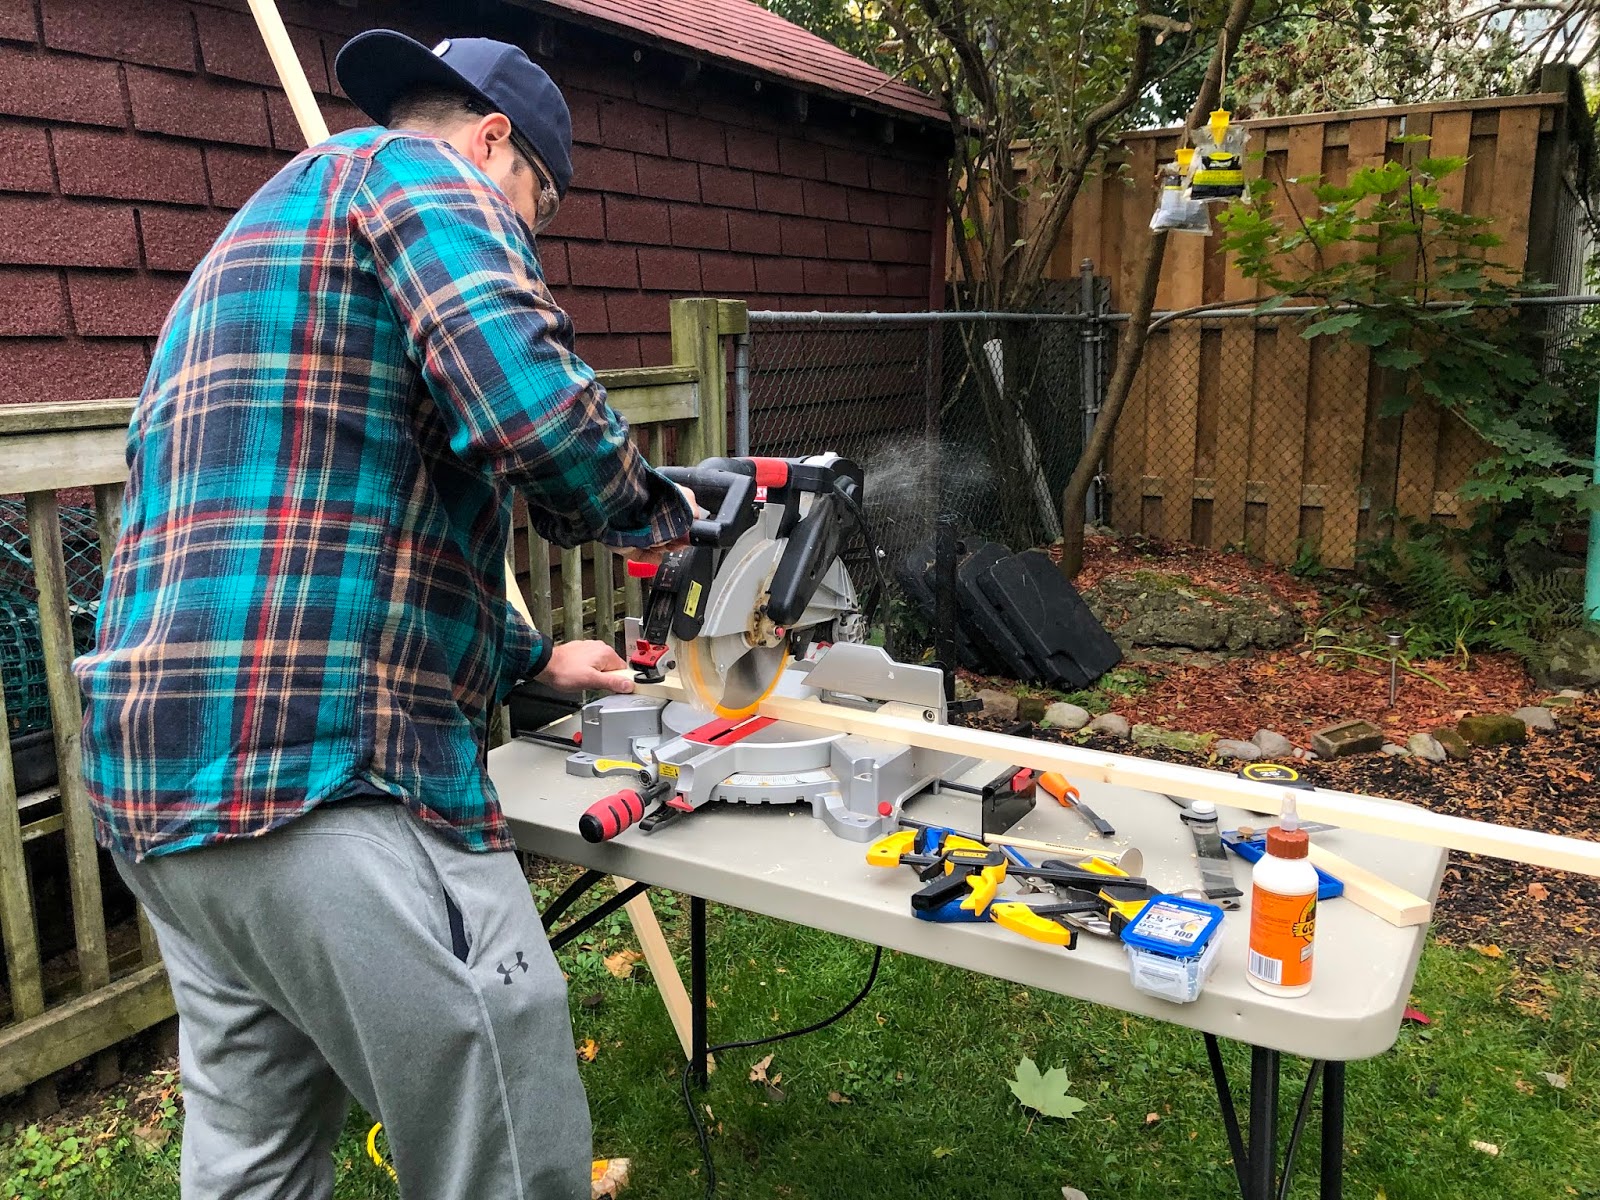
Now for the main piece, the mid-century modern plant stand itself. For help with this, I brought in some reinforcements (also known as, my husband).
Measure out how high you want your plant stand. We opted for window level (approximately 24’’). Using a saw, cut this measurement (x4) from the 1’’x 2’’x 8ft. Since the legs were to be 24’’ each, we used the entire piece of wood for the legs. For ease, we just cut it evenly in 4 pieces.


To make the piece that the pot will sit on, measure the diameter of your pot and add one inch. If your pot does not have straight sides, measure the widest part of the pot. This is the length you will be cutting your 1’’x 2’’x 6ft board into. You need two of these pieces cut. For reference, our pieces were 11’’ wide each.
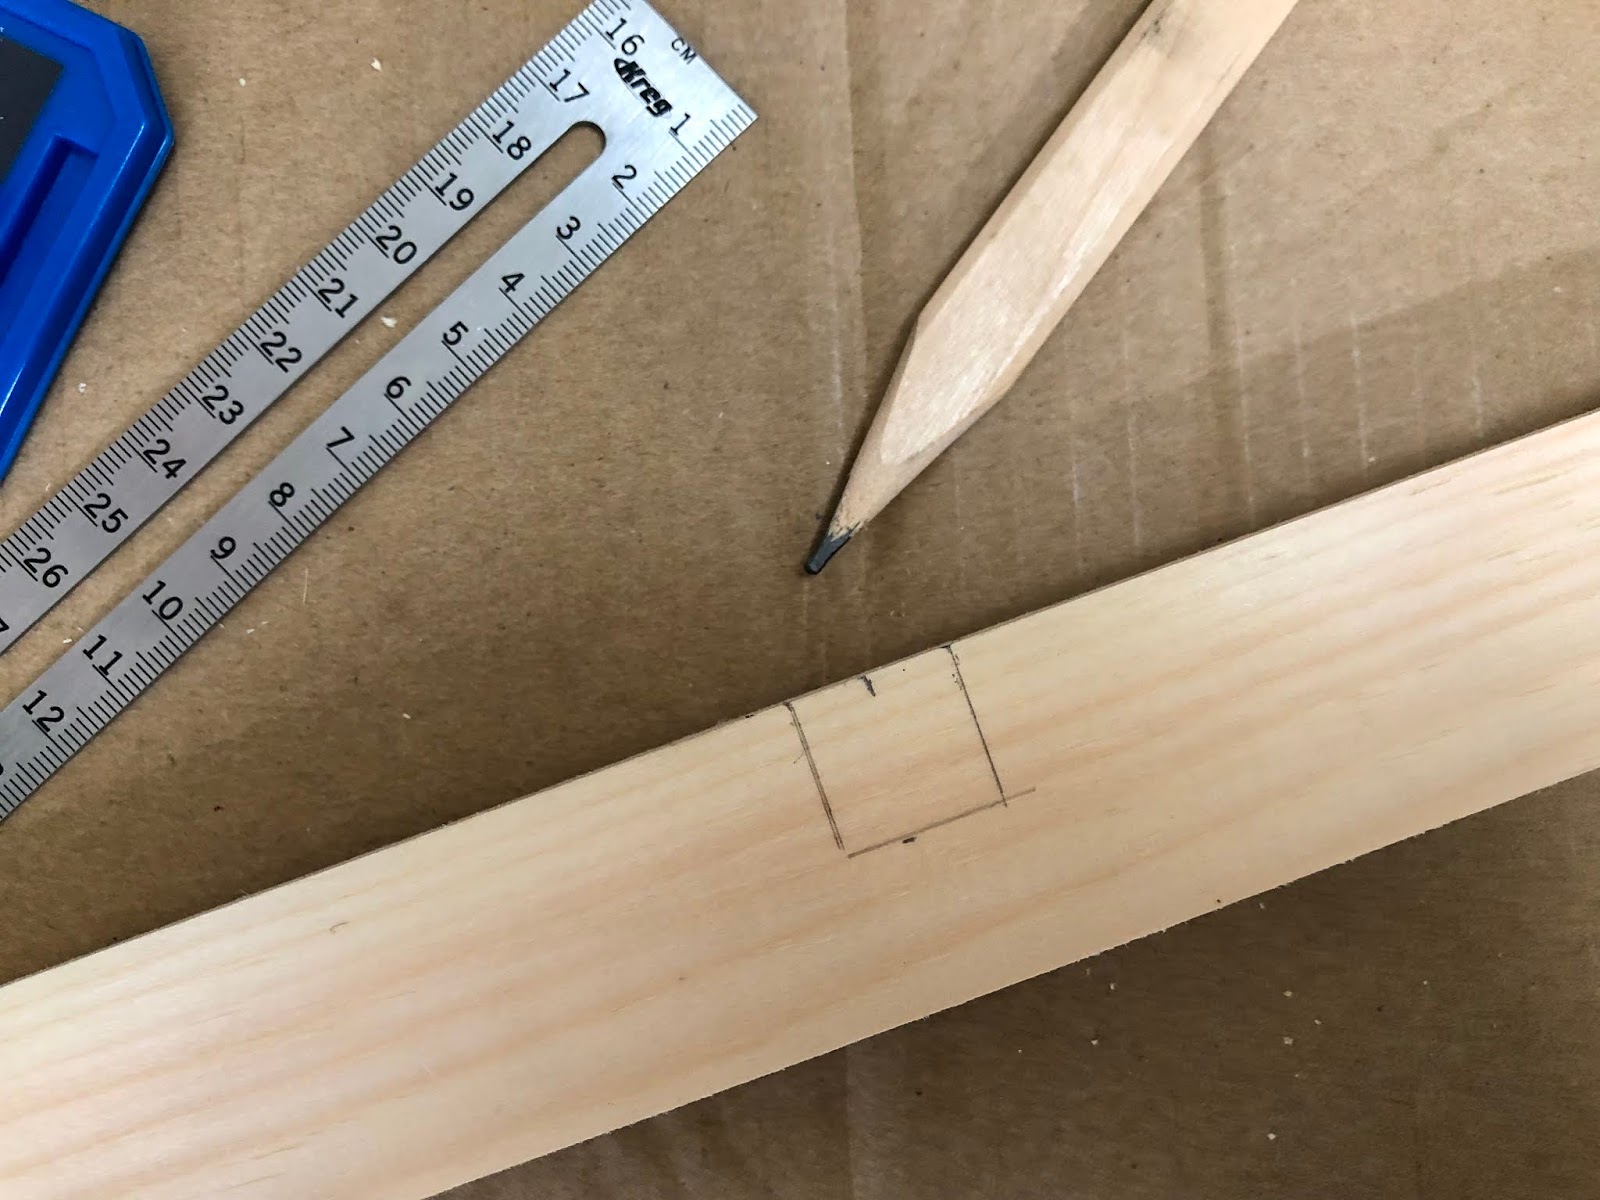
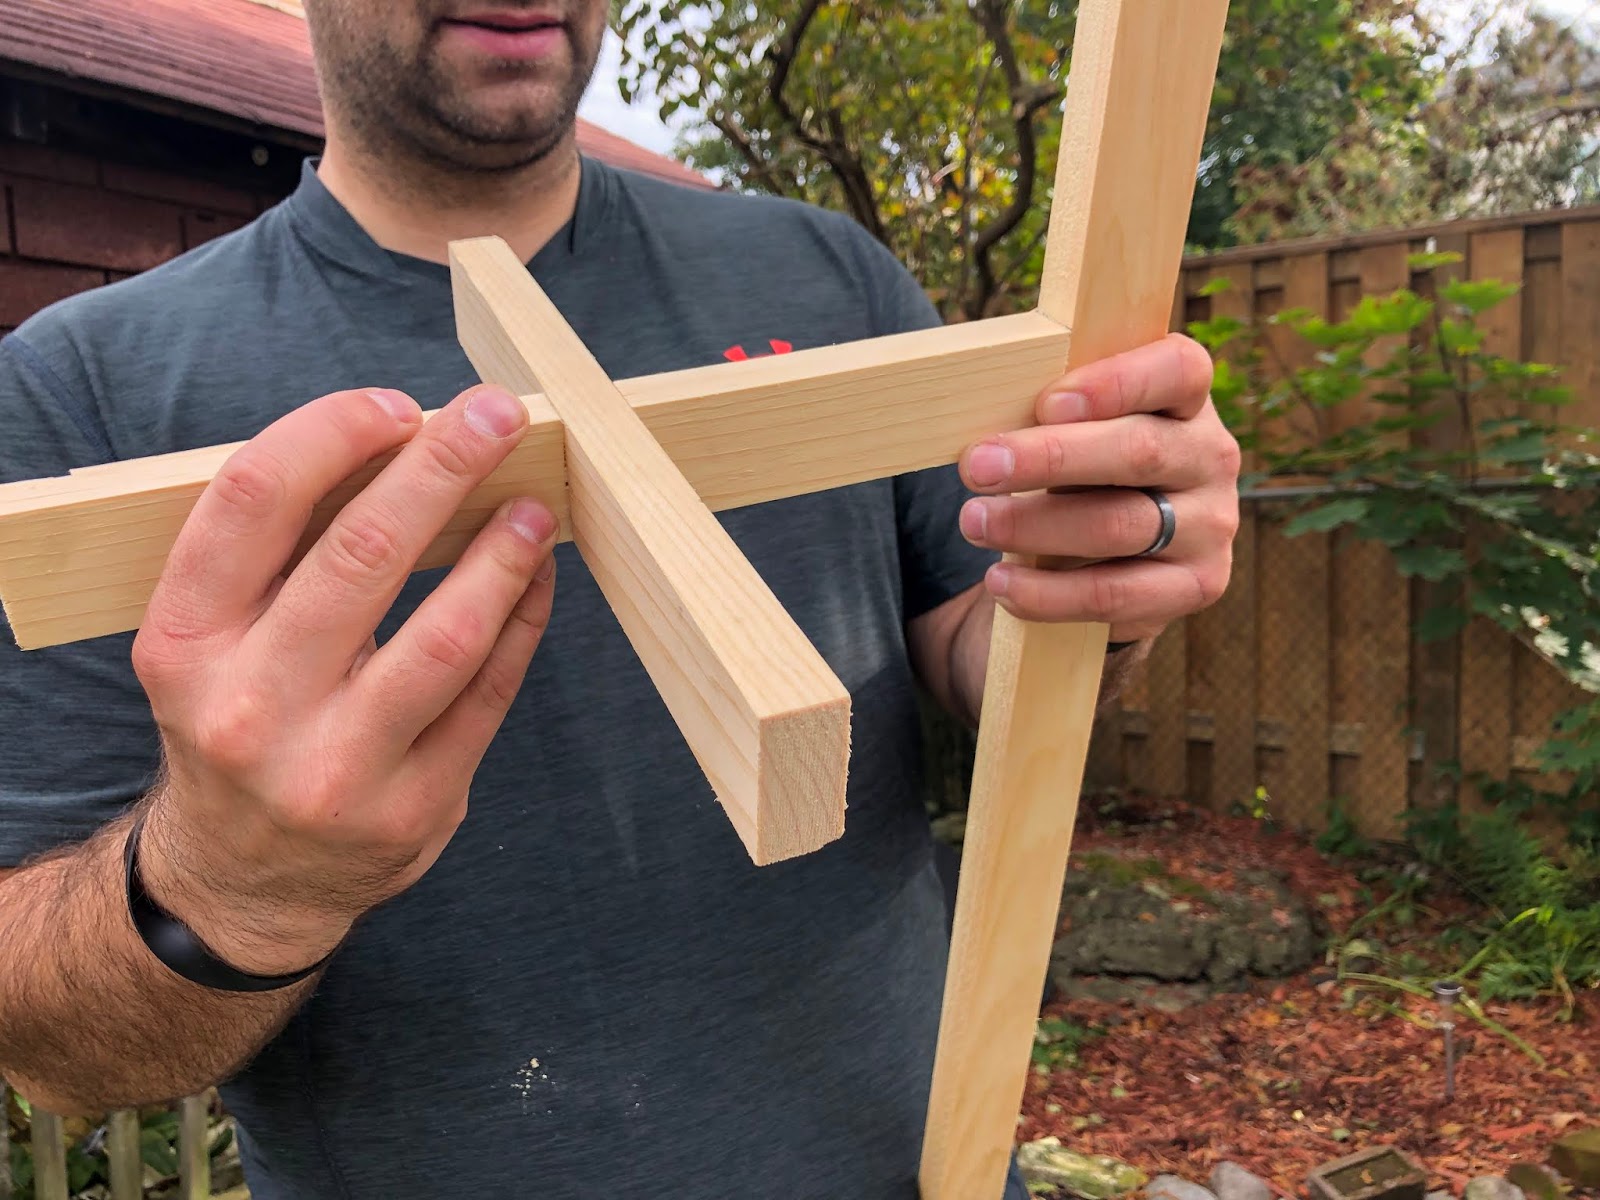
Using a ruler, measure to the middle of the boards and draw out a 3/4″ square on each board (see photo below for reference). Use the wood chisel to carefully remove this piece.
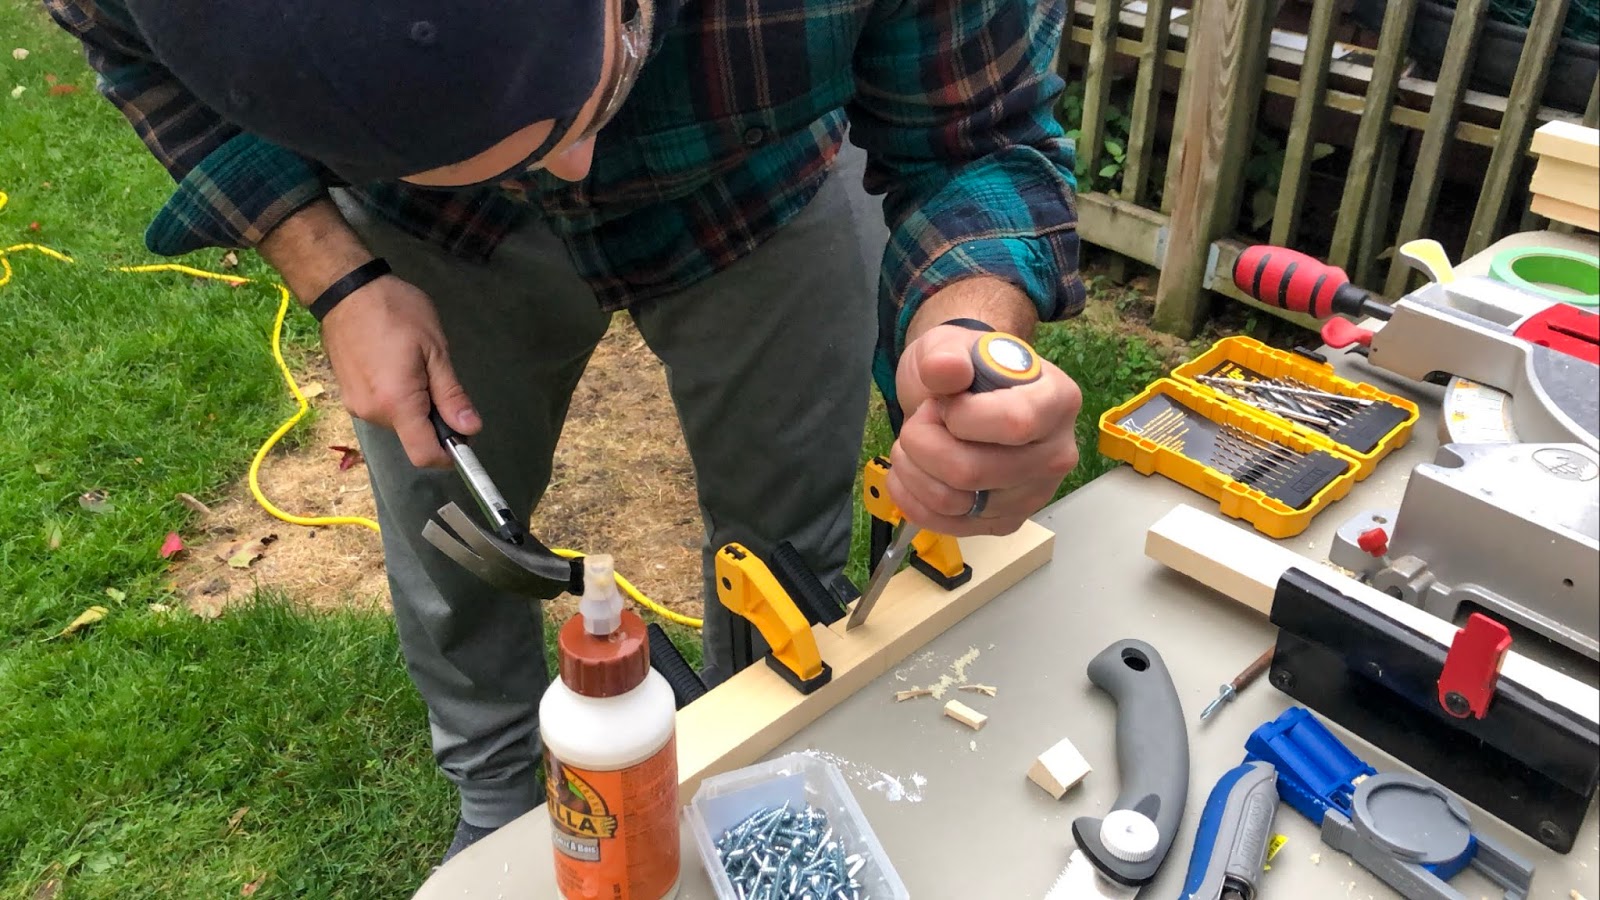
Lay the two pieces into one another. They should fit snugly without too much play and the top should be level. If your cut was not 100% accurate, you may need to sand a little to get them to line up evenly. Do not attach them two pieces just yet.
Now to attach the cross piece to the legs. Measure the height of your pot and remove 1-2’’. You want the top of the pot to be higher than the legs of the stand. Mark where the cross pieces will rest on the legs.
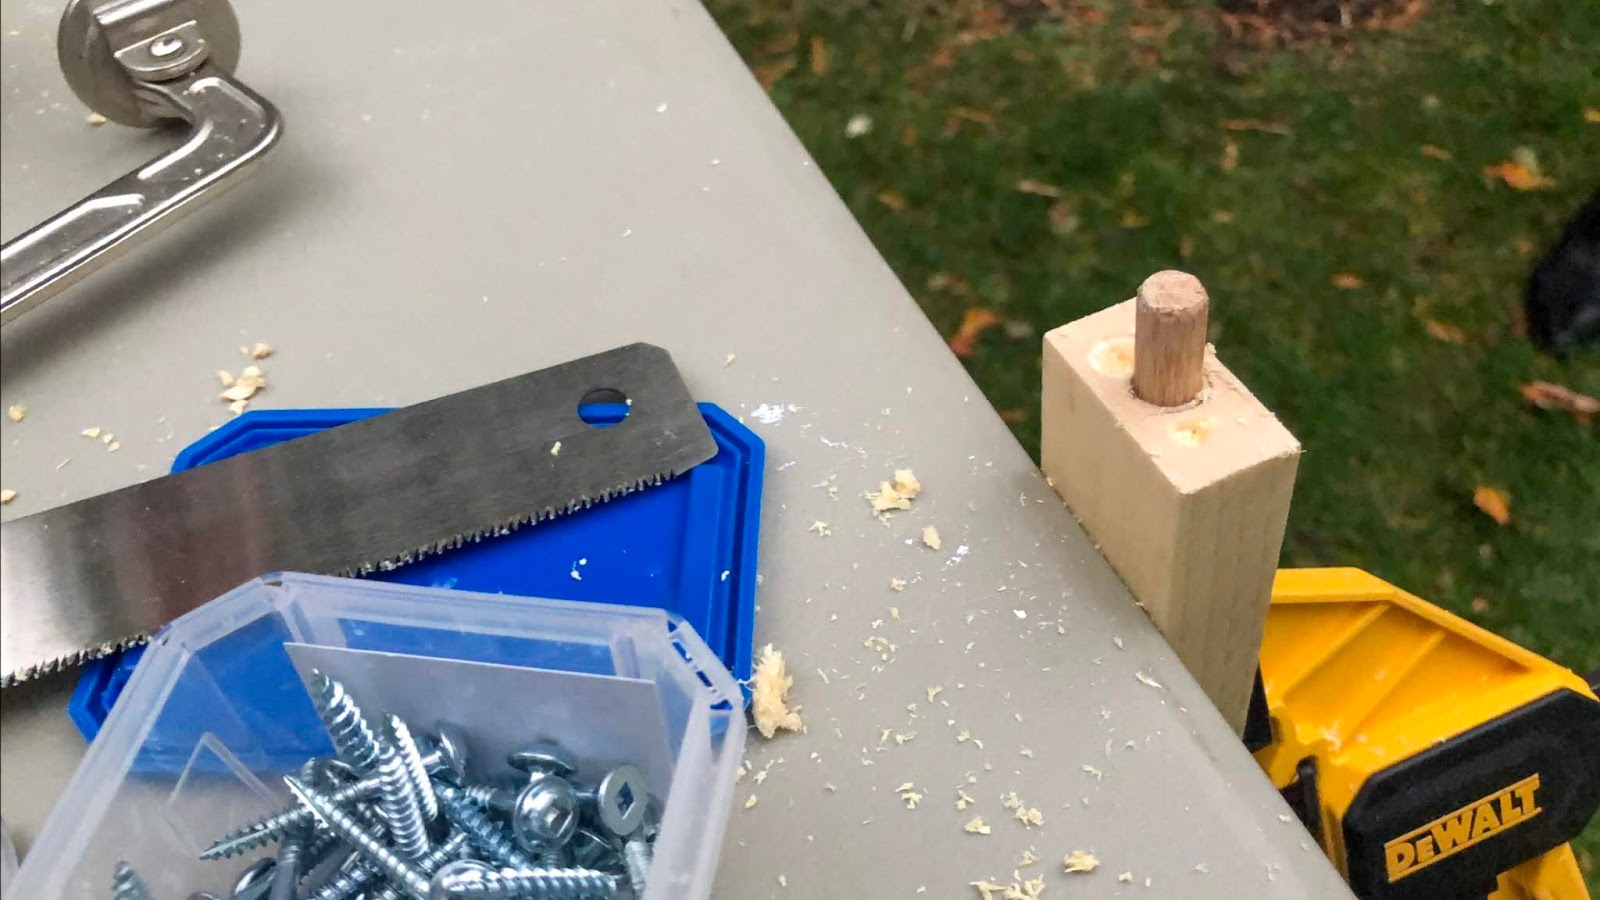
Using a drill, make a hole in the end of the cross pieces. Insert the 3/8’’ dowel. Add wood glue if needed. Depending on where you would like the pot to sit, drill holes in each of the four legs. For reference, the cross piece of our stand sits 6’’ down.
Attach the legs to each of the cross pieces by inserting the dowels and adding wood glue to ensure they stay attached. Fasten a clamp and allow to sit until glue is dry.
Once the glue is dry, remove the clamps. Using a rag, generously rub your stain colour of choice on the wood. After approximately 5 minutes, wipe excess stain off. Repeat if needed. We used Varathane Classic Penetrating Oil-Based Wood Stain in Special Walnut.
Once the stain is dry, fasten the two pieces together. You can fasten with a screw, or by simply adding wood glue. Allow to dry before putting your pot on the stand.
And, voila! Your mid-century modern plant stand, all for under $55!
Let’s break down the cost…
Rust-Oleum Painter’s Touch 2x Ultra Cover Paint + Primer (flat white) - $8.97
Pot (thrifted) - $4.99
Behr Marquee Ultra Pure White Semi-Gloss Paint Sample w/ Primer - $4.97
1x2x6 Select Pine - $4.18
1x2x8 Select Pine - $5.80
Alexandria Moulding Hardwood 3/8’’x 2’’ Dowel Pins (bag of 18) - $4.83
Varathane Classic Penetrating Oil-Based Wood Stain (Special Walnut) - $9.47
HUSKY Steel Butt Wood Chisel - 1/2’’ - $9.47
Total Cost (plant stand + custom post) = $52.68
Note: All items, unless otherwise noted, were purchased from the Home Depot Canada. Items without a cost or not listed we already had at home. Total cost in Canadian dollars, not including tax. Prices and availability may vary depending on location.

The project supplies themselves were fairly inexpensive. The biggest cost was our time. While we love the final project, it did take a bit of time to finish. Between painting the pot, allowing it to dry, cutting, drilling, gluing, staining, drying and joining the wood, the project was completed over a few days.
It must also be noted, while I would love to say this was an easy project it did cause a few headaches. All of the tutorials I came across on the internet said it was easy. But it wasn’t. Maybe it was the tools we were using, maybe it wasn’t. But despite this costing us less than $55 to make, I started to understand why the fancy retailers charge well over that. It took a bit of trial and error in terms of the best way to attach the legs to the cross piece the pot would rest on, and ensure it held.
But that being said, despite the trial and error, we finally go it and are so happy with the newest addition to our (growing) plant collection!
Now, onto the next project…
Have you done any home DIYs lately? I’d love to hear what it was!

Disclosure: I received product and/or compensation in exchange for this post. However, all opinions are 100% that of To & Fro. Thank you Home Depot!
PIN IT:
