March 26, 2021

Visiting the Toronto Islands During the Pandemic - What You Need to Know


Now that spring is in the air, we are craving ways to get outside, safely. And if you live in the Toronto-area, a visit to the Toronto Islands may be on your list. But how has visiting the Islands changed during the pandemic? Read on to learn what you need to know about visiting the Toronto Islands during the pandemic.

What You Need to Know About Visiting the Toronto Islands During the Pandemic

Back at the beginning March, we decided we were in need of an outdoor adventure. With the weather in our favour, we booked tickets to visit the Toronto Islands. Complete with a picnic lunch on Ward's Island Beach, it was a pretty special day - and just what our mental and physical health needed after months of isolation. 

If you have never heard of the Toronto Islands, you're missing out. They are truly a hidden gem of the city. 

But what exactly are they? And where are they located?

The Toronto Islands are a chain of 15 small islands in Lake Ontario, south of mainland Toronto, Ontario, Canada. Comprising the only group of islands in the western part of Lake Ontario, the Toronto Islands are located just offshore from the city's downtown area and provide shelter for Toronto Harbour.

FUN FACT for all you baseball fans - in the 1890s-1910 a baseball stadium with capacity for 10,000 spectators was built on the west side of the Islands. Babe Ruth hit his first professional home run here.

What to Know About Visiting the Toronto Islands During the Pandemic

As the weather continues to get nicer and nicer, no doubt the Islands will get busier and busier, bringing up concerns for visitors' safety during the current state

From the IG stories I shared about our day on the Islands, I had a few questions regarding how visiting has changed during the global pandemic and under currently provincial health and safety measures. Here is what you need to know, as stated on the City of Toronto website AND based on our own personal experience. 

What You Need to Know About Visiting the Toronto Islands During the Pandemic 

From the City of Toronto Website

Under current provincial lockdown measures to reduce the spread of COVID-19, physical distancing is required when using City of Toronto parks and squares. At the time date of post publication, these are some of the COVID health and safety protocols in place when visiting the Toronto Islands via ferry.

  • The ferry service is operating at half capacity and on a reduced winter schedule.
  • Passengers are required to wear masks or face coverings.
  • Washrooms on the ferry are closed. Washrooms are open at the Jack Layton Ferry Terminal (downtown Toronto side) and on Toronto Island Park
  • Before using the ferry, every visitor must do the Ontario Ministry of Health self-assessment for COVID-19. If they do not pass the assessment, they should not board the ferry.
Please note, some attractions and areas on the Islands are not operating until further notice, including Centreville, Far Enough Farm and Toronto Island Camps. The Boat House and Tram Tours are also closed until further notice. Permitted activity is currently not allowed on the Island.

Ferries leave the city from the Jack Layton Ferry Terminal, located at the foot of Bay Street at Queens Quay. During the winter schedule (late-October/early November until mid-April), the ferry goes to Ward’s Island only. Some facilities may be closed. 

The current schedule can be found here

What to Know About Visiting the Toronto Islands During the Pandemic

From Our Experience

  • Tickets must be booked online in advance and are only good for the day on the ticket. Limited number of tickets sold per day to reduce crowding on the islands.
  • Self-screening is in place prior to boarding.
  • No clear social distancing markers in the boarding area. (If you've tried to board the ferry on a normal day, it's a cluster, like herding cattle into a squeeze. Despite knowing you should keep 6 feet apart, people were still crowding to get on.)
  • Masks are mandatory on board the ferry. (And frankly, that shouldn't be a surprise.)
  • The ferry schedule is modified. Only the open-air vehicle ferry is currently running to and from Ward's Island (the residential, east side). (We were on the winter schedule at the time of visiting, so this could change come mid-April.)
  • The ferry service is operating at half capacity
    • *This was our biggest complaint of the whole trip. While staff did take time to sanitize the ferry before disembarking (we watched them do this with a sprayer prior to heading back to "mainland"), we felt that it was still too crowded to possibly be at half capacity. Additionally, people tend to crowd on the outside of the boat to take photos of the Toronto skyline (guilty). 
  • While I cannot comment on the washrooms onboard, the two small indoor seating areas on the open air ferries were open. Windows were cracked for ventilation
  • Washrooms were open on the Island. Other facilities, such as food, were limited. Attractions were all closed.
What to Know About Visiting the Toronto Islands During the Pandemic

Recommendations Based on Our Experience

  • Bring a cooler and blanket for a picnic lunch. Before heading to the ferry terminal, we highly recommend stopping off at the St Lawrence Market to pick up your picnic supplies. (Please keep in mind, St Lawrence Market also has their own set of protocols in place, and there will likely be a lineup to get in.)
  • Bring your own hand sanitizer. You will be outside majority of the time, but it is not widely available on the Islands. 
  • Go early to avoid peak times. 
  • Once disembarking on Ward's Island, head straight to Ward's Beach (follow the signs, a few minutes walk). Public washrooms are located near the beach. (It was also significantly warmer on this side of the island than the north, city side).
  • Dogs are welcome to take the ferry and explore the Island, as long as they remain on a leash. 
  • Have fun! 
  • Oh, and don't forget your masks. 
What to Know About Visiting the Toronto Islands During the Pandemic

Sometimes its easy to forget that isolation doesn't mean you have to stay indoors. The outdoors is good for your immune system and even better for your mental health.

Take the dog for a walk. Dust off the bikes. Turn on your favourite podcast and take a stroll around the block. Or, plan your visit to the Toronto Islands.

As the weather gets nicer, there's not excuses - just GET OUTSIDE.

You may also like:
5 Ways to Get Outdoors in Toronto

I'd love to hear - - What are the outdoor "hidden gems" where you call home? Have you visited the Toronto Islands, or do you have plans to this spring/summer?


PIN IT

What You Need to Know About Visiting the Toronto Islands During the Pandemic


SHARE:

September 14, 2016

Fruit Filled Adult Pop Tarts

Pop tarts bring back many childhood memories. You knew it was going to be a good day if you had a pop tart for breakfast. However, as an adult, my taste buds have clearly changed. If you were to give me one today, you'd probably have to pay me to eat it. How did I actually enjoy eating that processed, sprinkle-covered, particle-board like rectangle we called breakfast? 

I’m all about taking advantage of local produce during the summer months. And as the summer comes to an end, I find myself scrambling to get one last fix before the fruit growing season is over.  One of my favourite local fruit is peaches, grown in Ontario’s Niagara Region. Combined with local yellow plums, I made these delicious fruit-filled adult pop tarts.  These ooey gooey (non particle board-like) fruit filled tarts are perfect for a grab and go breakfast, to accompany your morning coffee or warmed with a little ice cream for dessert. 

Fruit Filled Adult Pop Tarts Recipe


Fruit-Filled Adult Pop Tarts


Yields: approximately 12 tarts


Ingredients
  • 2 cups fruit of choice, sliced thinly
  • 1 tbsp white sugar + reserve for sanding
  • 2 tsp orange zest
  • juice 1/2 orange
  • pinch of salt
  • 1 tbsp cornstarch
  • 2 10 inch pie crusts, thawed
  • 1 egg, lightly beaten

Directions
  1. Preheat oven to 375 degrees F. 
  2. Line two baking sheets with parchment paper and set aside.
  3. In a large bowl, mix together fruit, sugar, orange zest and juice, salt and cornstarch until well combined. Set aside.
  4. Remove one pie crust from tin. On a lightly floured work surface, roll out into an approximate 15x10 inch rectangle. Cut into six 5 inch squares. Repeat with second pie crust.
  5. Working with one square at a time, place approximately two tablespoons of fruit mixture in the centre or the dough. 
  6. Brush two connecting edges with beaten egg and fold on the diagonal over filling, pressing the seal. Repeat with remaining squares.
  7. Place triangle-shaped pies on prepared baking sheet. Brush lightly with remaining egg wash and sprinkle with sugar.
  8. Using a pair of clean kitchen scissors, make a small cut in the centre of each pie to allow steam to escape when baking.
  9. Bake until crusts are golden brown and filling is bubbling, approximately 25 to 30 minutes.
  10. Cool on a wire rack. Serve warm.

Fruit Filled Adult Pop Tarts Recipe

Home chef tips: 

The secret to making this recipe easier is using store bought frozen pie crust for the pastry. Ain’t no body got time to make the homemade stuff. Unless you do, then kudos to you.

The fruit used in these pop tarts doesn't need to be limited to plums and peaches like the ones I made. You can really add whatever fruit you'd like. I would love to try them with apples or berries!


Fruit Filled Adult Pop Tarts Recipe

Who says pop tarts are just for kids?!

Are you a pop tart fan? What is your favourite fruit flavour? I’d love to hear!


If you enjoy taking advantage of local produce, be sure to check out these recipes:

 photo TampF sig_zpsi50j9kbk.jpg
SHARE:

August 24, 2016

Fresh Peach Crisp Recipe

Do you want to hear a sad story?

My sister has a 'birch sensitivity'. A what? Ya, exactly. It means that she reacts to fruit in the Rosacae family, or more simply, she can't eat cherries, apples or peaches. Her mouth gets all itchy and its not pleasant.

Bummer, right?

Well, good thing I still can still eat all of the cherries, apples and peaches I want. (Sorry, Kenz.) And that's why today, I'm sharing one of my favourite summer dessert recipes, a Fresh Peach Crisp.

Fresh Peach Crisp Recipe

In Ontario, our peaches come from the Niagara region, an area typically known for their grapes and, more importantly, wine.

This fresh peach crisp recipe is similar to my recipe for the perfect strawberry rhubarb crisp, but with fresh peaches instead.

Fresh Peach Crisp Recipe

Fresh Peach Crisp


Ingredients:

  • 1 cup white sugar
  • 1 1/2 cups + 3 tbsp all purpose flour
  • 6 cups fresh, ripe peaches, sliced
  • 1 cup packed brown sugar
  • 1 cup butter (at room temperature)
  • 1 cup rolled oats

Directions:

  1. Preheat oven to 375 degrees F.
  2. Slice the peaches (see below for tips). 
  3. In large bowl, combine white sugar, 3 tbsp all purpose flour and peaches, and mix well. Place the mixture in a 9x13 inch baking dish.
  4. In a separate bowl, mix 1 1/2 cups flour, brown sugar, butter and oats until crumbly. Spread mixture evenly on top of the rhubarb and strawberry mixture.
  5. Bake in oven for 45 minutes, or until crisp and lightly browned. 
Fresh Peach Crisp Recipe

I recommend putting the baking dish on a baking sheet while baking, just incase the crisp bubbles over and onto the bottom of your oven. Messy!

I will admit, this recipe is by no means healthy. But crisp shouldn't be. Instead, it is a refreshing summer treat that takes advantage of the abundance of fresh, local produce. While peaches are delicious in pies, cobblers, crisps and as preserves, along they also make the perfect afternoon snack - one medium-size peach contains 37 calories and is a source of Vitamin C.

How to Slice a Peach
For this recipe, the peaches should be ripe, but not overly soft. Similar to slicing an avocado, using a paring know, start at the stem end of the fruit and cut through to the pit. Run the knife all the way around the fruit, keeping the blade against the pit, finishing where you started. Holding the fruit in your hands, gently give each half of the peach a twist in opposite directions and pull apart. The pit should remain in one side of the peach. Using your thumb, pop out the pit. Cut into thin slices. 


Fresh Peach Crisp Recipe

Look at me over here, just upping my crisp game.

What is your favourite local produce? And your favourite recipe to make with it?


 photo TampF sig_zpsi50j9kbk.jpg
SHARE:

August 10, 2016

Garlic Scape Pesto

Garlic Scape Pesto Recipe

Have you ever heard of garlic scapes? I hadn’t either until I discovered them in a local produce delivery I received from a friend. I love trying new things, so I immediately knew I had to figure out a way to incorporate these curly, green stalks into an upcoming family dinner.

Garlic scapes are know as the under appreciated part of the garlic plant, or more specifically, the stalks that grow from the bulbs of garlic plants. Snipping them off before the flowerheads mature allows the garlic plant to direct more energy into the developing garlic bulb. They are typically harvested mid-June to July, and can often be found at your local farmer’s market, sold in bunches. 

Garlic Scape Pesto Recipe

Alone, garlic scapes have a crisp texture. They taste somewhat sweet, like a scallion, but with a mild garlicky flavour, much softer than their eventual bulbous counterpart. Combined with basil, they make the perfect garlic scape pestoThis pesto is delicious on bread, chicken, beef or fish, as pizza sauce, or my favourite, pasta!

Garlic Scape Pesto

Makes approximately 2 cups


Ingredients
  • 1 cup garlic scapes, coarsely chopped
  • 2 cups fresh basil leaves
  • 1/4 cup pine nuts
  • 1/4 cup parmesan cheese
  • 1/2 cup olive oil
  • salt and pepper, to taste

Directions
  1. Place the garlic scapes, basil, pine nuts, salt and pepper in a food processor or blender and pulse until fairly well combined.
  2. Add the olive oil, and pulse until incorporated.
  3. Transfer pesto to a bowl and stir in the parmesan cheese.
  4. Store in an airtight container the fridge until ready to use, up to 1 week.

Adding the basil helps tone down the garlicky taste of the scapes. Don’t worry if it’s still a little garlicky once you’ve made the above recipe, adding the cooked pasta will tone down the garlic flavour even more. Of course, if you’re a big garlic fan, you could forgo the basil all together. 


How to Freeze Pesto

If you're not using the pesto right away, not to worry, it freezes very well. To freeze for later, put the pesto in an empty ice cube tray. Top the pesto off with a little bit of olive oil, to prevent it from browning. After it is frozen, remove from tray and place the cubes in a freezer bag. Before putting the cubes back in the freezer, label the bag with the date. Frozen pesto can last up to 6 months in the freezer. 

Garlic Scape Pesto Recipe

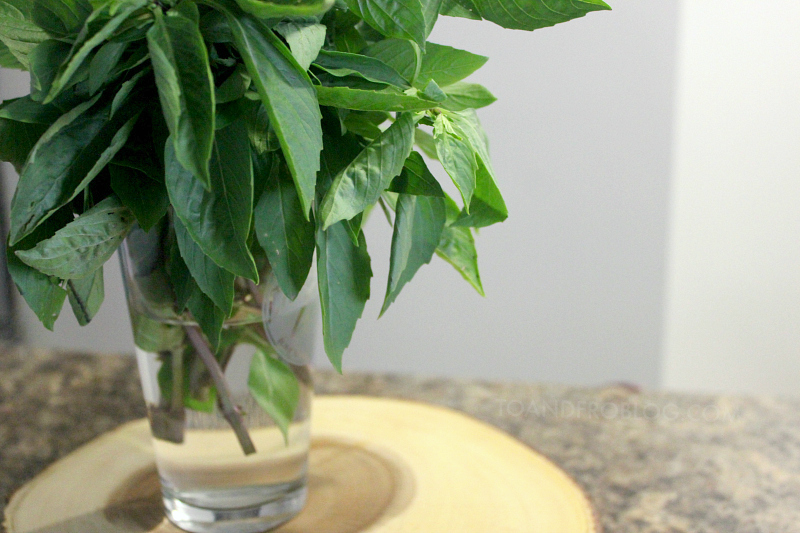
How to Store Fresh Basil


When buying basil, it usually comes in fairly large bunches. If you do not use all of the basil for this recipe, the easiest way to store it is to trim the stems and place in a glass or jar of water (pictured below), just like cut flowers. You can loosely cover it with a plastic bag and leave it on the counter, not in the fridge. It will store for up to a week with this method.

How to Store Fresh Basil


Have you had garlic scapes before? What new recipe ingredient have you tried lately?


 photo TampF sig_zpsi50j9kbk.jpg
SHARE:

June 6, 2016

Slow Cooker Pulled Pork Taco Bowls

This shop has been compensated by Collective Bias, Inc. and its advertiser. All opinions are mine alone. #CreateYourBowl #CollectiveBias

Slow Cooker Pulled Pork Taco Bowls

I grew up in a house where sitting down around the table for dinner as a family was extremely important. It not only brought us together, but allowed us to unwind and discuss our day and the week ahead. Now that I have my own little family, I look forward to continuing this tradition. However, with busy, and sometimes opposite, work schedules and long commutes, doing so is sometimes easier said than done. So, when we do get the opportunity to enjoy a meal together, it is especially cherished. 

One of our favourite summer family activities is to visit the local farmer's market. My husband and I love creating new recipes made with only the freshest, local ingredients inspired by our market visits. We can't wait to introduce our daughter to this summer activity and create recipes that, in the future, she enjoys to eat as well. 

Slow Cooker Pulled Pork Taco Bowls

One of our favourite family cuisines is Mexican. Not only is it simple to make (perfect for this busy family), it is so varied - from tacos to enchiladas to rice dishes - and is often accompanied by fresh produce. On a recent trip to the market with my little family unit, I was inspired by the locally grown and raised onions and pork to create these delicious pulled pork taco bowls. If you're into fresh ingredients, supporting local, slow cooker meals or just trying something new, this recipe is for you. It may look like a lot of ingredients, but trust me, using the slow cooker makes it easy - just set it and forget it - giving you more time to enjoy with your family. 

Slow Cooker Pulled Pork Taco Bowls

Slow Cooker Pulled Pork Taco Bowls
Serves: 4 

Ingredients:
Pulled pork:
  • 1 pork tenderloin
  • 1 127mL can of OLD EL PASO chopped green chillies
  • 1 medium onion, minced
  • 1 tbsp chilli powder
  • 1 tbsp garlic powder
  • 1 tbsp onion powder
  • 1 tsp salt
  • 1 tsp pepper
  • 1-2 cups chicken stock

Toppings:
  • 2 avocados, peeled and sliced
  • 1/2 cup mayo
  • 2 tbsp sriracha
  • 1 cup cabbage, shredded
  • 2 limes, sliced into wedges
  • green onion, cilantro or parsley (optional garnishes)
  • 8 OLD EL PASO tortilla bowls

Slow Cooker Pulled Pork Taco Bowls

Directions:
  1. Combine the seasonings (chilli powder, garlic powder, onion powder, salt and pepper) to make a dry rub. 
  2. Pat dry the pork and rub on the seasoning mixture.
  3. Heat a small amount of oil in a skillet on high heat. Brown the pork on all sides.
  4. Immediately after removing the pork from the pan, deglaze with a bit of stock or white wine. Add the deglazed bits to the slow cooker.
  5. Add minced onion, green chillies, chicken stock and pork to the slow cooker. Set on low heat and allow to cook for 6-8 hours. 
  6. Once pork is cooked, use two forks to shred. Toss shredded pork in liquid to combine. Keep warm in the slow cooker.
  7. Meanwhile, combine mayo and sriracha to make a spicy mayo sauce. 
  8. Warm OLD EL PASO tortilla bowls in the microwave for approximately 10 seconds to soften.
  9. Assemble the bowls by layering pulled pork, shredded cabbage, sliced avocado and drizzle of spicy mayo. Garnish with a sprinkle of chopped green onions, sprig of cilantro or parsley and wedge of lime.
  10. Serve immediately and enjoy!
Slow Cooker Pulled Pork Taco Bowls

I like to use pork tenderloin in the recipe because it is a relatively inexpensive cut of pork. However, it is also very lean, which means you may need to add additional liquid (stock) to the slow cooker throughout the cooking process.

OLD EL PASO tortilla bowls can be found at your local Loblaws in the Mexican food aisle. They are easy to fill and eat, and can be used for a variety of recipes and meal occasions - perfect for bringing the entire family together!


Slow Cooker Pulled Pork Taco Bowls


What is your favourite family meal? What would you add to OLD EL PASO tortilla bowls?


SHARE:

September 10, 2014

Batty's Bath: Skin Mapping

This month I'm welcoming Batty's Bath back to t.o. & fro! Batty's Bath is a botanical skin care and soap company based in southern Ontario and every single product is lovingly hand-crafted using planet-friendly, people-friendly and animal-friendly ingredients. 

I recently purchased my first order of Batty's Bath products and can already say I'm in love. But, in order to know which Batty's Bath products would suit my skin care needs, I first had to do my research. So, I dove into Batty's blog, which is full of extremely useful information for people with all skin types, including Q&A, customer product reviews and plenty of videos and helpful articles. The one article that I found especially intriguing was her skin mapping guide. I instantly wanted to know more. Do you always break out in the same places? If so, then this chart may be for you...


According to the skin mapping chart, the acne spots on your face can give you clues to underlying issues. The purpose of this chart is to give you another tool in your resource kit for tackling skin care problems, and tells you what internal systems may be playing a role in any skin issues that are visible on your face. 

Recently, my skin care problems have been focused around my mouth and chin, which according to Batty's chart, suggest it is related to the reproductive organs and/or a hormonal inbalance. Interesting, and probably spot on, for this late 20 year old woman.

Making the switch to an all natural skincare routine by choosing Batty's products is just the first step in my skin transformation.  Finding an internal balance and emotional well being/stress reduction play an equally important part and are both something that I will need to start working on. According to Batty, focusing our efforts evenly between these key areas will give us a leg-up on the problem skin. 

Interested in trying some of Batty's Bath skin care products? Sign up for the Batty's Bath newsletter to receive a free shipping code! Stay tuned for her North American free shipping day on December 1, 2014, just in time for Christmas :)

Find out more about skin mapping:
Video: Internal causes of skin care problems
Skin mapping chart

Other Batty's Bath posts:
Where to find her:
Website  |  Shop  |  Blog  |  Twitter  |  Instagram


Did you find Batty's chart helpful?


 photo marsignature_zpsfb974fa3.jpg
SHARE:

August 24, 2014

simple, local & fresh 'sangria'

This is my absolute favourite time of the year - farmer's markets and grocery store shelves are loaded with seasonal and local produce. Simple. Local. Fresh. Food doesn't get much better.

Blueberry and raspberry season is in full swing, and during my recent visit to British Columbia,  I was inspired to create this simple, local and fresh 'sangria'. Niagara white wine with British Columbia berries. Yum. Being surrounded by the mountains as I sipped this summer treat made it that much better.

berry sangria recipe

Doesn't that picture just make you want to be there - sitting on the patio, in the mountains, with a glass of 'sangria' in hand? Ya, me too. I wish I could snap my fingers and go back.


I know traditional sangria typically contains red wine, fruit, sweetener and brandy. But, sometimes, you've gotta work with what you've got.

What you need:
+ handful of local berries (your choice - raspberries, blueberries, strawberries, blackberries)
+ glass of local white wine (your choice - chardonnay, sauvignon blanc, pinot grigio, riesling)
+ optional: sweetner

What to do:
+ add a handful of berries to a chilled glass of white wine
+ allow to sit for a few minutes
+ enjoy!

Simple, right? Also delicious.


 photo marsignature_zpsfb974fa3.jpg

SHARE:

June 5, 2014

What the Fiddlehead?!


What the fiddlehead is a fiddlehead?!

Fiddleheads are some of the world's coolest greens. The new, unfurled edible fronds of the wild ostrich fern, which get their name because of the striking resemblance the head of a fiddle or violin, are a seasonal delicacy in many parts of North America. Depending on the weather, they begin to appear in early spring, when ferns grow their new shoots (around late April to early May), along river and stream banks, in open woodlands and at the edges of swamps and marshes across parts of North America.  

These springtime gems are loaded with iron and potassium, and are a good source of omega-3 and omega-6 fatty acids. They contain twice as many antioxidants as blueberries and around 7 grams of fiber per cup! Their flavour is often compared to asparagus - grassy, earthy, and totally spring. 


Have you ever gone wild foraging? I wish I could say we picked these ourselves, but instead receive them from the sustainably-sourced weekly produce program my sister-in-law belongs to.  An important tip to remember if you do go foraging for fiddleheads - other ferns can be toxic, so never forage without an experienced guide.

How to cook fiddleheads

Fiddleheads have a grassy, spring-like flavor with a hint of nuttiness. Many people agree that they taste like a cross between asparagus and young spinach. I would even say green beans.


Fiddleheads should never be consumed raw.  Preparation is super easy - Carefully remove brown scales then wash well under cold running water to remove dirt before cooking. Trim woody stems from the ends. In order to highlight their unique flavour, fiddleheads are arguably best prepared by boiling for 10 minutes, or steaming for about 20 minutes, then tossing with melted butter, a squeeze of fresh lemon juice and a pinch of salt. Because fiddleheads are grown in the wild, they are at risk of carrying contaminants that may cause illness. So, however you cook them, please always remember to boil them first.

Serve at once as a side with something yummy, like my fave pork chops with apples and onions and roasted sweet potatoes. (Find the pork chop recipe here. FYI, it only costs around $5 for 2 servings.)


 photo marsignature_zpsfb974fa3.jpg
SHARE:

October 1, 2013

Forks of the Credit

I've come to learn that different is good.  Change is good.  Take for example, our love of hiking - we can still take advantage of the many trails Ontario offers, but it is different than it was in Alaska.  Different terrain, different flora, different fauna... a change. 


This past weekend we explored Forks of the Credit, a provincial park just north of Toronto in Caledon, ON.  Located on the Niagara Escarpment and famous Bruce Trail, this park surrounds a stretch of the Credit River as it narrows and rushes through a deep gorge, plunging over falls.  There is a network of trails to explore throughout park that take you through rolling hills, grassland, coniferous forests, past small lakes created by glaciation and up some fairly steep grades.


The entire area is remarkably beautiful and feels completely remote.  As you wander the trails, it is easy to forgot that you are just a short drive from Toronto.  This protected oasis is an absolute gem and a must visit for anyone in the area looking to get outdoors.

How to get there from Toronto:


  1. Take Hwy 410 N past Brampton
  2. Continue onto Hwy 10/Hurontario St
  3. Turn left onto Forks of the Credit Rd/Regional Rd 11
  4. Turn right on McLaren Rd
  5. Turn left into park

Cost: $14 per vehicle for a day pass (automated machine, coin or card only)


Have you ever been to Forks of the Credit? What is your favourite outdoor space? I'd love to hear!


SHARE:
Blog Design Created by pipdig