December 6, 2016

Felt Christmas Tree Tutorial - Perfect for Baby!

This shop has been compensated by Collective Bias, Inc. and its advertiser. All opinions are mine alone. #DamageFreeHoliday #CBias #CollectiveBias

Are you looking for a baby-safe Christmas tree alternative? This baby-friendly felt Christmas tree tutorial will add a festive flair to your home this holiday season, while creating a learning opportunity for your little one.


Baby-Friendly Felt Christmas Tree Tutorial

My husband, 8 month old daughter and I are currently living in a teeny tiny one bedroom apartment as we await the completion of our first home. We are so excited to celebrate baby's first holiday season, but since she is starting to become quite the mover, we are worried about her safety around the Christmas decorations in our small space. 

We usually opt for a real tree complete with all of the fancy decorations, but this year we are trying something a little different. 
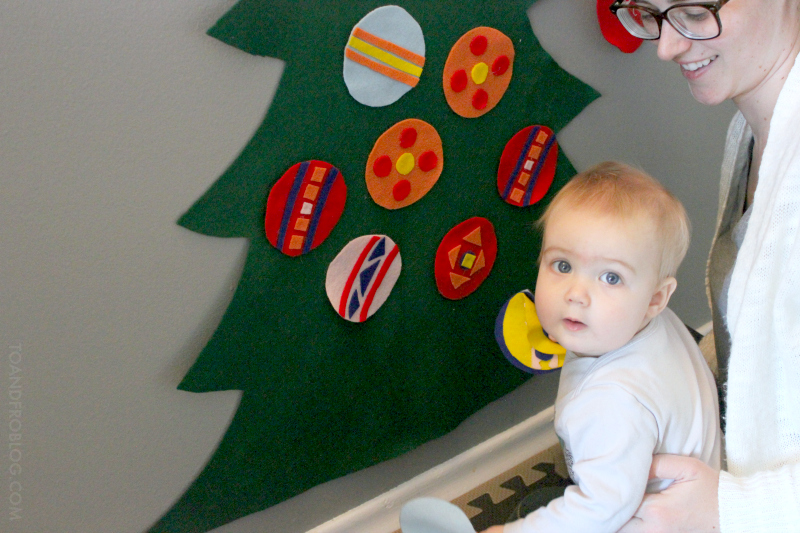
While we still have a small tree tucked out of the way for mom and dad, we have also added this felt Christmas tree to the living room wall, just for baby. 

The simple to make felt Christmas tree is baby-safe, maintenance-free and decorated with lots of brightly coloured ornaments that baby can easily rip off and put back on. It adds a festive flair to our teeny tiny abode, while creating a great learning opportunity for little miss Morley. 

Why not make one for your little one this holiday season?

Baby Felt Christmas Tree Tutorial


    Materials

    • 1 metre green felt
    • Several squares of felt, assorted colours
    • Square of yellow felt
    • Glue gun and glue
    • Scissors
    • Measuring tape
    • String
    • Marker
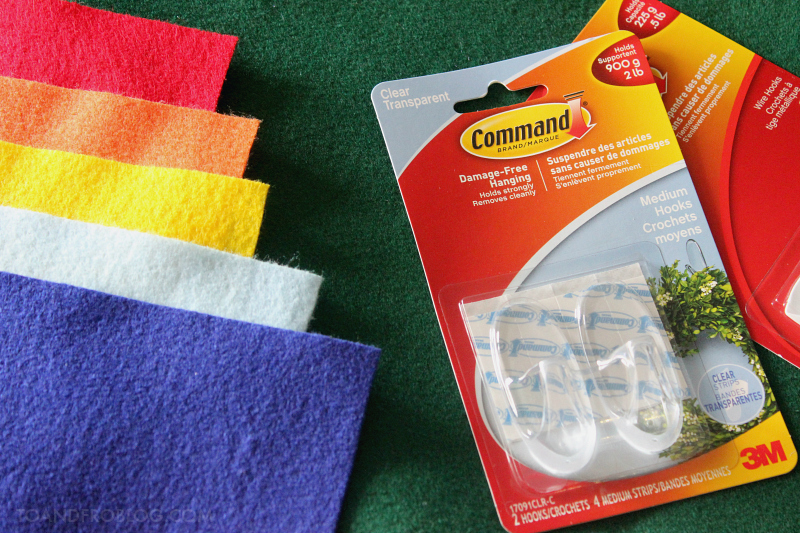
    • One Command™Clear Medium Hook 

    Baby-Friendly Felt Christmas Tree Tutorial

    Directions

    I purchased the felt from my local fabric store. They sell small individual squares in a variety of colours, for making the ornaments, as well as felt by the length, which I used to make the tree.

    First, make the star for the top of your tree using the yellow felt. I started with the star because I had a limited amount of yellow felt and the size I made it would determine the size of the tree. 

    Lay your tree fabric on the floor and fold in half vertically. Using a marker, draw the outline of your tree. Cut along the line, through both layers of green felt. Open the fabric back up to reveal your bare tree. Attach the star to the top with hot glue.

    Next step is to make the ornaments. I made circular ornaments for my tree because they are easy for my daughter to grab. Get creative - you can make any size or shape you desire! Use the scrap felt to spruce up the ornaments. You won't need anything to help hang these ornaments on the tree because felt sticks to felt like magic.

    The possibilities with this tree are endless. You can add as many different colours and shapes of ornaments as you wish! If you are feeling especially creative, you can even make presents to go "under the tree".

    Baby-Friendly Felt Christmas Tree Tutorial

    Don't worry about making it perfect - your baby is not going to judge you if the tree is not symmetrical or the colours of your ornaments don't match. They are going to love it either way!

    Now it's time to hang your tree. Using the glue gun, add a loop of string to the top of the star/tree. This will be how you hang the tree on the wall.

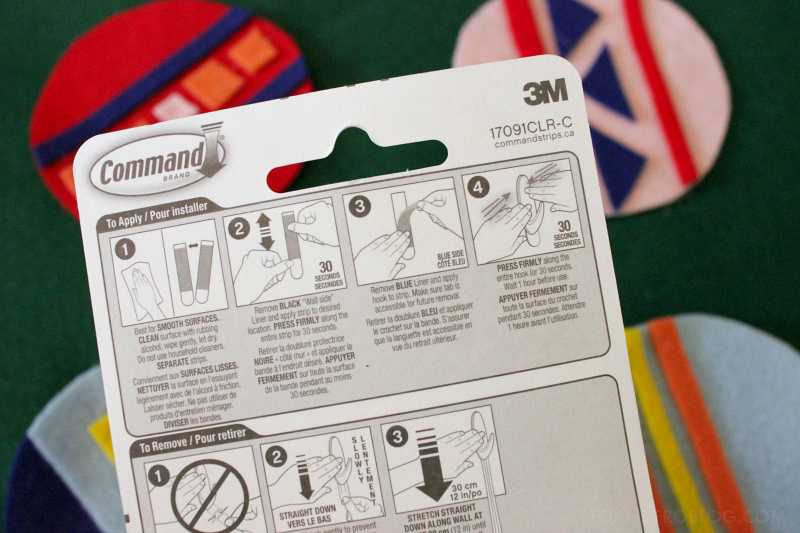
    Make sure that the wall you hang the tree on is a smooth surface. With the tape measure, measure the height of your tree on the wall. Following the directions on the package, affix the Command™Clear Medium Hook to the wall. 

    Baby-Friendly Felt Christmas Tree Tutorial

    Hang the tree on the Command™Clear Medium Hook. Since our apartment is so dry, the felt automatically clings to the wall. However, you can repeat the above steps with a few more Command™Clear Medium Hooks to support the branches, if needed. Ensure the weight of the tree is evenly distributed across the hooks. 

    The great thing about using Command™Brand products for this tree is that if you don't like the placement, or need to move it for any reason, you can do so without the fear of holes or damage!


    Baby-Friendly Felt Christmas Tree Tutorial

    Using leftover felt, hot glue, string and glitter paint, I also created a small stocking and affixed it to the wall beside the tree using Command™Small Wire Hook. 


    Baby-Friendly Felt Christmas Tree Tutorial

    Now it's time to let baby play and have some fun with their new tree! But please remember, do not leave your child unattended while doing this activity.

    Baby-Friendly Felt Christmas Tree Tutorial

    Command™ Brand products provide an easy transition throughout the holidays, removing cleanly from the walls. At the end of the holiday season, simply remove the hook from the wall, fold up the felt ornaments and tree and store in your Christmas bin for another year!

    Since we've never had a permanent space to call our own, we've always used Command™Brand products in our indoor decorating, instead of having to patch holes and touch up paint. They’re easy-to-use, come off clean, and can handle any decorating task I put them up to, including hanging photos on the walls to personalize our space. The ability to remove hooks without a scratch and paint touch-ups makes them a win for those in a temporary space. 


    Baby-Friendly Felt Christmas Tree Tutorial

    Command™ Brand products, including the Command™ Clear Medium Hook and Command™ Small Wire Hook used in this tutorial, can be found in the holiday section at your local Walmart. Make sure to stock up for all of your decorating needs this holiday!


    Baby-Friendly Felt Christmas Tree Tutorial

    For more baby-friendly activities, check out this recipe for baby-safe paint.


    What are some of your tips and tricks for decorating your indoor spaces around the holidays? I'd love to hear!

     photo TampF sig_zpsi50j9kbk.jpg
    SHARE:

    December 1, 2016

    The Perfect Adult Party Gift: Personalized Wine Glass DIY

    This shop has been compensated by Collective Bias, Inc. and its advertiser. All opinions are mine alone.
    #SutterHomeForTheHolidays #CollectiveBias 
    The following content is intended for readers who are 21 or older.


    Are you looking for the perfect adult party gift for your guests at an upcoming holiday gathering? Check out this easy and inexpensive tutorial for your own personalized wine glasses!

    The Perfect Adult Party Gift: Personalized Wine Glass Tutorial

    Three of my favourite things in life are good food, good drinks and good company. When I can combine all three, I am one happy girl. 

    Now that we have a young family of our own, the option for a night out on the town with friends is not always feasible. So instead, we bring them to us. We love to entertain, especially during the holidays. We also love wine, and having the perfect wine glass to go with it. 

    Gold embossed drink ware seems all the rage right now, and I'm a big fan. However, what I'm not a fan of is the attached price tag. Instead of spending the big bucks, I decided to make my own for a recent holiday gathering we hosted. I was also able to customize the glasses I purchased from the Dollar Store, which made them the perfect gift for my guests to remember the occasion by (and to help them remember where they put their drinks throughout the night). All together, this DIY cost only $12 for 4 personalized stemless wine glasses - far less than what you'd pay in store!

    If you're looking for an easy and inexpensive party gift for your guests, or a way to spruce up your next holiday get together, check out this tutorial for your own personalized wine glasses.


    The Perfect Adult Party Gift: Personalized Wine Glass Tutorial

    Personalized Wine Glass DIY


    Materials

    • wine glasses (or other glass drink ware of your choice)
    • painter's tape
    • stencils
    • oil-based paint marker (colour of choice)
    • cotton swabs
    • nail polish remover
    • baking sheet
    The Perfect Adult Party Gift: Personalized Wine Glass Tutorial

    Directions

    Start by thoroughly washing your mugs or glasses with dish soap and water. It’s important to remove all traces of dirt or oily residue on them. I found these stemless glasses at the local Dollar Store, but you can use any drink ware that you like. They were affordable, yet classy and choosing stemless allows my guests to use them for a wide variety of beverages after the party. Make sure the glasses are completely dry before you start decorating them.


    The Perfect Adult Party Gift: Personalized Wine Glass Tutorial

    Choose your design. If you don't trust yourself to free hand the personalization, use a program on your computer and print out your design of choice on a piece of paper. You can make the design as big or small as you wish, but I recommend at least 1 inch by 1 inch. Tape the design to the inside of the glass so that you can easily trace it. I chose to add the first letter of our guests' names in cursive. I'm loving the tumblers I see with simple gold dots on them, so after adding the personalization, I added a few dots, of all sizes, to my glasses as well. 

    Make sure the paint marker you are using is oil-based, so that it will not come off. If you plan on writing on the glass, chose a medium-point pen. I purchased mine at a popular craft store at around $6. There are a variety of colours available, but I chose gold because it is a festive colour, perfect for the holidays.

    Don't worry if you make a mistake, you can easily remove it with a cotton swab dipped in a bit of nail polish remover.

    Make sure whatever design you choose, that it is at least an inch from the top of the glass so that people do not touch it with their mouths when drinking. 


    The Perfect Adult Party Gift: Personalized Wine Glass Tutorial

    When you're happy with your design, allow the paint to dry completely before the next step.

    The final step is to bake the glasses in the oven to cure the paint. If using a stencil, don't forget to remove it or it will burn in the oven.Set the glasses on a baking sheet and place in a cold oven. Do not allow the oven to preheat! You want the oven and glasses to heat gradually so that they do not crack. Turn the oven to 350 degrees and allow to "bake" for 30 minutes. Once the time is up, turn the oven off BUT do not remove the glasses! Open the oven just a crack and allow to cool completely before removing, about an hour.

    If you're a bit of a perfectionist like me, you may want to repeat the above steps.

    The glasses are now top dishwasher safe, however, I recommend washing them gently by hand, with a non-abrasive sponge, just to be safe. Keep in mind, this tutorial can be replicated on any type of glass or ceramic drink ware, like these mugs


    The Perfect Adult Party Gift: Personalized Wine Glass Tutorial

    Now that you have your fancy glasses, you also need something to serve in them! Sutter Home Family Vineyards is the perfect wine to bring people together this holiday season - from a wine tasting with friends to spending time with family around the fireplace.  We typically prefer a warm, full-bodied red during the winter months, but sometimes its good to switch things up. Like with the the Sutter Home White Zinfandel. This medium-sweet wine is perfect with all types of foods, and the pink blush colour of the wine really makes the gold design on the wine glasses pop!

    A family-owned company for three generations, Sutter Home Family Vineyards seeks to produce quality products that bring people together to share good times. Just like we enjoy doing with our friends and family during the holidays.

    Cheers!


    What is your favourite way to bring people together this holiday season? I'd love to hear!

    SHARE:

    November 30, 2016

    Pinecone Holiday Gift Wrap

    This shop has been compensated by Collective Bias, Inc. and its advertiser. All opinions are mine alone. #ShareTheHoliday #CollectiveBias

    Are you looking for a creative idea to spruce up your holiday gift wrapping? Check out this stylish and sustainable gift wrapping tutorial, inspired by Mother Nature.


    Pinecone Holiday Gift Wrap Tutorial / Rubbermaid TakeAlongs

    'Tis the season for giving! This time of the year, we often over do it with the amount of wrapping that goes into the gifts we are giving. We spend all of this time beautifully wrapping a gift, only for it to be torn open in two seconds. And then, all of the beautiful paper, bows and ribbon end up in the trash. What a waste of time, money and paper!

    Sometimes, less is more. You don't need excess paper, plastic bows or yards and yard or ribbon when you can borrow from nature. Why not take advantage of items found in your own backyard to decorate your gifts instead? Pinecones, evergreen boughs and other seasonal elements are easy to source this time of year, and free! Bring the outdoors in with this stylish and sustainable pinecone holiday gift wrap tutorial. 

    Pinecone Holiday Gift Wrap Tutorial / Rubbermaid TakeAlongs

    Pinecone Holiday Gift Wrap 


    Materials
    • small to medium-sized pinecones
    • small clippings of evergreen boughs
    • paint, colour of choice
    • paint brush
    • hot glue gun + glue
    • scissors
    • twine or yarn
    • optional: recycled paper (brown craft paper, newspaper, paper bags, etc.) + tape


    Directions

    Using a small paint brush and paint colour of choice, cover the tips of the pinecone by brushing up towards the top of the pinecone. I recommend using a colour to add a little pop, such as white, gold, silver or red. Allow the paint to dry completely.


    Pinecone Holiday Gift Wrap Tutorial / Rubbermaid TakeAlongs

    Optional step: Using recycled paper, such as newspaper, magazine pages, old maps, paper bags or brown craft paper, wrap your item as per usual.

    To wrap the package, you will need a length of twine approximately 4 to 5 times the width of your package. Lay the twine out on a flat surface. Gently flip the package over, and centre on the twine. Bring the ends of the string around the package and twist the ends around one another to create a “t” shape. Flip the package over (should now be upright) and tie the ends together with a square knot. Tie the loose ends into a bow, or leave as is. 


    Pinecone Holiday Gift Wrap Tutorial / Rubbermaid TakeAlongs

    Arrange the pine cones and other natural elements as desired. Using the hot glue, affix to the top of the package.


    Pinecone Holiday Gift Wrap Tutorial / Rubbermaid TakeAlongs

    Optional step: Cut a tag-shaped piece from the cardboard. Punch a hole in the top and add some string. Add your wording and fasten to the package.

    Voila! Simple, stylish and sustainable. 


    Pinecone Holiday Gift Wrap Tutorial / Rubbermaid TakeAlongs

    When it comes to sustainability, we also make sure to go beyond the gift wrap and also pay close attention to what we put our gifts in. This includes repurposing bags and boxes from previous holidays or taking advantage of reusable containers.

    Everyone loves baking around the holiday season, myself included. If you plan on gifting some sweet treats to friends and family like we do, take advantage of Rubbermaid TakeAlongs. Not only are they a sustainable option because they can be reused over and over, but they are also the safe option for making sure your treats make it to their destination in one piece. The Quik Clik SealTM keeps food secure and helps prevent spills, and the soft lid grips the container tightly for a great seal. Rubbermaid TakeAlongs are also microwavable, top rack dishwasher safe and freezer safe.

    Pinecone Holiday Gift Wrap Tutorial / Rubbermaid TakeAlongs

    Holiday Rubbermaid TakeAlongs come in limited edition red, green and festive prints and are available in the Home Goods section at Walmart from 10/29-12/24. I found mine located in the aisle between the Home Goods and Men's Clothing sections.


    How do you make sustainability a priority during the holiday season? I'd love to hear! For more holiday inspiration, check this out.


     photo TampF sig_zpsi50j9kbk.jpg
    SHARE:

    October 11, 2016

    Baby's First Halloween - Treat Bag DIY

    This shop has been compensated by Collective Bias, Inc. and its advertiser. All opinions are mine alone. #BacktoBabyBasics #CollectiveBias

    Looking for a fun activity to celebrate you little one's first Halloween? Make your own Halloween treat bags with this tutorial, and simple recipe for baby-safe paints.

    Baby's First Halloween Treat Bag DIY & Baby Safe Paint Recipe

    As a child, Halloween was one of my favourite times of the year. What's not to love about dressing up in a fun costume, canvassing the neighbourhood with your friends and then devouring all of your candy until your stomach hurts? Now that I have a daughter of my own, I can’t wait to celebrate Halloween through her eyes (and candy bag). 

    At 7 months old, Morley's a little young for the typical Halloween shenanigans. However, we still plan on celebrating her first, by dressing her up in a super adorable costume and giving family members these homemade Halloween treat bags, decorated with baby-safe paints and filled yummy goodies.

    DIY Halloween Treat Bag


    Materials
    • baby safe paint (recipe below)
    • small aluminum pie pans (one for each paint colour)
    • painting tools - brushes, popsicle sticks, foam pieces, etc. (optional)
    • paper lunch bags
    • large garbage bag and/or large piece of craft paper
    • tape
    • decorations (halloween/fall-themed stickers, stamps, googley eyes, etc.)
    • glue
    • markers
    • hole punch
    • twine, ribbon or string

    Directions
    1. Set up baby’s workspace - i.e. high chair, bath tub, living room floor, outside, etc. This activity can easily be done in the highchair, to help contain the mess, or by taping a garbage bag and/or craft paper to the floor, making it a great tummy time activity. We chose to do this activity on the living room floor by layering garbage bags with craft paper on top. This made it much easier to clean up when the activity was done.
    2. Lay out the paper bags and paint (in the pie tins) on the working surface.
    3. Set baby up. Make sure they are in their diaper, or clothes that can potentially be ruined by the paint. Make sure you are also in clothes that can get dirty, because you will get dirty!
    4. If your child is old enough, provide them with painting tools. If not, their fingers will do just fine.
    5. Let baby go to town on creating their masterpiece.
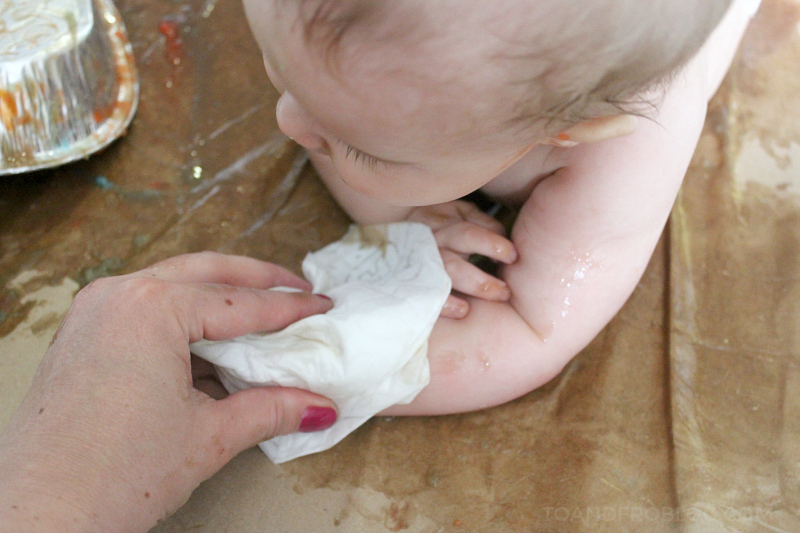
    6. Once they are finished painting (or in our case, start to fall asleep in the paint), immediately clean baby. I recommend having Huggies Natural Care wipes handy and a bath ready to go.
    7. Since the paint is quite thick, allow the bags to dry for at least 24 hours.
    8. Once the bags are dry, it is time for mom and/or dad to take over the activity. Decorate with Halloween-themed stickers, stamps, etc. Using the glue gun, we added foam pumpkins and googley eyes. 
    9. Using a marker, add recipient's name to the bag. 
    10. Fill with candies, tie closed and deliver to that special someone!
    Baby's First Halloween Treat Bag DIY & Baby Safe Paint Recipe

    Baby-Safe Paint 


    Ingredients
    • 3 tbsp white sugar
    • 1/2 tsp table salt
    • 1/2 cup cornstarch
    • 2 cups water

    Directions
    1. Combine ingredients in a small sauce pan and stir until combined.
    2. On medium low heat, warm until thickened, stirring continuously.
    3. If mixture becomes too thick, or goopy, add a bit more water to thin it out.
    4. Remove from heat and allow mixture to cool.
    5. Divide mixture equally amongst containers of choice. Choose containers that are baby safe, and easy for baby to access (i.e. small aluminium pie plates). 
    6. Add food colouring to achieve colour of choice. Stir to combine.
    7. Leftover paint can be stored in a sealed container in the fridge for up to 3 days.

    Important notes: Any finger paint that you use for young children must be non-toxic by mouth and non-irritating to the skin.  If your child is allergic or intolerant to any food substances in this recipe, please do not use this paint. These paints are not to be eaten, but if tasted, are safe for baby. And I promise you, there will be tasting. Please do not leave your child unattended while doing this activity.

    Baby's First Halloween Treat Bag DIY & Baby Safe Paint Recipe

    Painting is such a fun activity for young children. Not only does it allow them to express their creativity (yes, even at 7 months old), but it’s also fun! Sure, it can make a mess, which can equal stress for us adults. But for baby, messy is good. Messy play stimulates the senses, allowing baby to explore different colours and textures. It also helps develop hand and eye coordination and fine motor skills. What may look like a mess to you, is actually a learning experience for your child. So, roll up your sleeves and have some fun creating these Halloween treat bags. They are sure to be a hit amongst family and friends!

    Baby's First Halloween Treat Bag DIY & Baby Safe Paint Recipe

    To help keep the mess at bay when doing this fun activity with your little one, turn to Huggies Natural Care wipes! They’re gentle on baby’s skin and do a great job of cleaning up all sorts of messes. Huggies products, including these Natural Care wipes, can be found in the baby care (diaper, wipes, creams, etc.) aisle at your local Babies “R” Us

    Baby's First Halloween Treat Bag DIY & Baby Safe Paint Recipe
    Baby's First Halloween Treat Bag DIY & Baby Safe Paint Recipe
    Baby's First Halloween Treat Bag DIY & Baby Safe Paint Recipe
    Location of Huggies products, including Huggies Natural Care wipes, in Babies "R" Us.

    Did you know that Babies “R” Us is more than just a retailer destination? I love shopping in store because not only do they have a great selection of baby products, from diapers and wipes, to items to help celebrate baby's first Halloween (like super cute costumes) and beyond, they are also a great resource for all things baby, including some great baby-friendly events!

    Make sure to visit your local stand alone Babies “R” Us on 10/15 from 11am-12pm for some Halloween celebrations with baby! Celebrate baby’s first with a keepsake craft and parade around the store, and help mom get ready for colder weather with great product solutions and tips. This celebration is a great opportunity to meet and mingle with local moms who have babies of similar age, and your chance to win some incredible giveaways and raffle prizes!

    Baby's First Halloween Treat Bag DIY & Baby Safe Paint Recipe

    Happy Halloween, from our family to you and yours!

    How do you celebrate baby’s firsts? Any exciting Halloween plans? I’d love to hear!

     photo TampF sig_zpsi50j9kbk.jpg
    SHARE:

    August 31, 2016

    Getting Your Vehicle Winter Ready

    This shop has been compensated by Collective Bias, Inc. and its advertiser. All opinions are mine alone. #FRAMFresh #CollectiveBias

    Getting Your Vehicle Winter Ready - Winter Vehicle Maintenance Checklist

    Summer is sadly coming to a close, and if you're like us, you put a lot of miles on your vehicle this season. Whether it was driving to visit relatives, a day at the beach, or even a long weekend at the cottage, our family was always on the go this summer

    As the calendar starts to move away from summer, it is time to start thinking about what lies ahead. I don't know about you, but we live in an area that typically gets a decent amount of cold, ice and snow over the winter. With that winter weather, comes winter driving. The cold weather wreaks havoc on the roads, significantly affecting driving conditions and as a result, testing the limits of your vehicle's abilities. 

    While safety is an important consideration all year long, there are certainly some extra precautions specific to the colder weather. Make sure your vehicle is up to the challenge with this winter vehicle maintenance checklist.

    Getting Your Vehicle Winter Ready - Winter Vehicle Maintenance Checklist

    Winter Vehicle Maintenance Checklist


    ▢  Swap out your tires. 
    Winter tires improve driving safety by providing better traction in snow, slush and icy conditions. Check for wear before installing and check tire air pressure frequently, as it decreases in cold weather. 

    ▢  Check your brakes. 
    With the slippery road conditions that winter brings, being able to stop quickly is even more important than usual.

    ▢  Top up your fluids. 
    This includes oil, antifreeze and windshield washer fluid. Carry extra in your vehicle, just to be safe.

    ▢  Inspect all lights and bulbs. 
    Having properly working head lights, tail lights and brake lights is important, especially at times when visibility is reduced due to snowy conditions.

    ▢  Inspect your wiper blades. 
    Ice and snow can easily damage the blades, so it may be best to install a new pair at the start of the season. Think about switching to winter blades - they are heavier and push snow and ice more easily.

    ▢  Keep it clean, inside and out. 
    The salt, sand and chemicals used on the roads can have a big impact on your vehicle. Washing your vehicle during the winter is very important to ward off rust caused by the salt and chemicals. Having the proper interior floor mats will also help keep the inside of your car free from moisture, debris and chemical residues that you track in.

    ▢  Stay fuelled up.  
    You never know when the winter weather will hit, and the last thing you want to do is run out of gas on a snowy day.

    ▢  Create a winter emergency kit. 
    A well stocked kit can be a lifesaver if you find yourself stranded. Items to include are jumper cables, flares, an ice scraper, flashlights with extra batteries, blankets and extra clothing, hats and gloves, first aid materials, snacks and water. Make sure to store your kit in an easily accessible place. 

    ▢  Change your air filters. 
    It is important to change both your engine and cabin air filters to improve airflow and prevent dust, dirt and allergens from entering both the engine and cabin. Dirty cabin air filters can even reduce the efficiency of your vehicle’s defrost and heating system, the last thing you want during the cold months of winter. It is recommended to change your engine and cabin air filters at the same time, annually or every 24,000km*. (*Please consult you vehicle's manual for specific requirements.) 

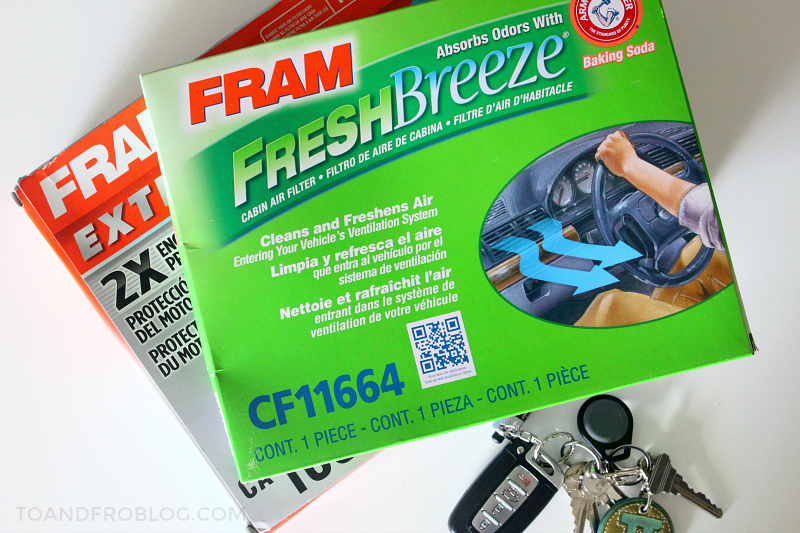
    Now you can protect your family and improve your driving comfort with a FRAM Fresh Breeze® cabin air filter. Made with a special media that includes carbon and Arm & Hammer® baking soda, the FRAM Fresh Breeze® cabin air filter prevents up to 98% of dirt, dust and allergens from entering your vehicle. Clean filters mean a more efficient vehicle, and a more comfortable you. 


    Getting Your Vehicle Winter Ready - Winter Vehicle Maintenance Checklist

    With precious cargo in tow, keeping the air inside our vehicle is extremely important. With the help of the installation instructions found inside the box, my husband and I were able to tackle the FRAM Fresh Breeze® cabin air filter in as little as 15 minutes. First, we opened the glove box and removed the contents. We located the glove box stops on each side of the glove box and removed them by twisting from the inside and pulling out. The glove box dampener cord on the right side of the glove box was then removed, allowing the glove box to swim down to the floor. We unlatched and removed the cabin filter cover and removed the dirty filter. We were definitely due for a change, it was pretty nasty! We inserted the new FRAM Fresh Breeze® cabin air filter and then replaced and relatched the filter cover. After putting the glove box back into position, we reinstalled the dampener cord to the right side of the glove box and then partially closed it to reinstall the two glove box stops. After replacing the contents and closing the door, my husband even said, "Wow, that was surprisingly easy!" I foresee many more at-home cabin air filter changes in our future. 

    Getting Your Vehicle Winter Ready - Winter Vehicle Maintenance Checklist

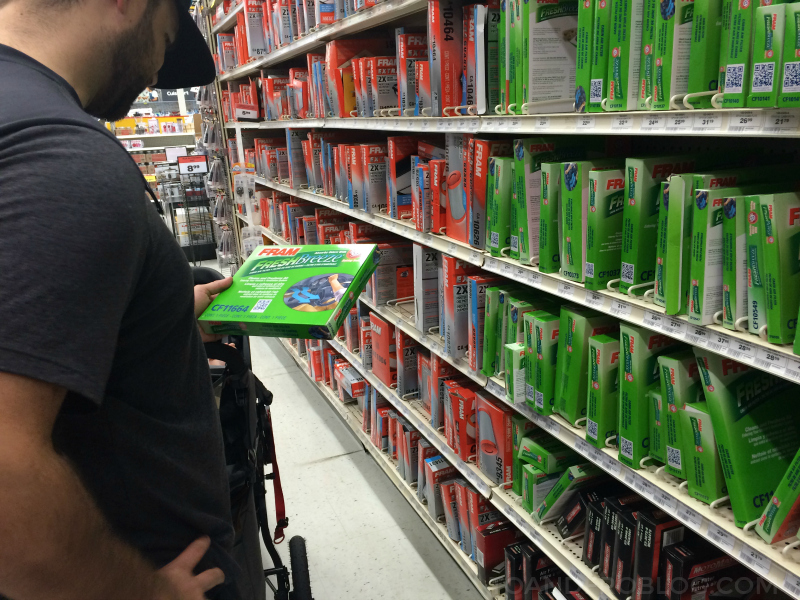
    FRAM Fresh Breeze® cabin air filters and FRAM engine air filters can be found in the automotive department at your local Canadian Tire. Not sure if your vehicle has a cabin air filter, or are unsure of the model specific to your vehicle? Be sure to ask a staff member at the Canadian Tire automotive desk. 

    Getting Your Vehicle Winter Ready - Winter Vehicle Maintenance Checklist

    Whether its winter, summer, spring or fall, maintaining your vehicle is extremely important to not only protect yourself and prolong the life of your vehicle, but also to keep your family and others on the road safe and sound. 


    What trips did you take with your family this summer? How do you get your vehicle winter ready? Check out these additional tips and tricks for changing your air filter. 


    SHARE:

    August 22, 2016

    Tips for Flying with an Infant

    This shop has been compensated by Collective Bias, Inc. and its advertiser. All opinions are mine alone. #SuperAbsorbent #CollectiveBias


    Tips for Flying with an Infant

    Traveling with a baby may be stressful and also intimidating. But, at the same time it is a great opportunity to create life long memories with your children. 

    At just over 3 months old, Morley took her first plane ride. While it was a 'quick' 4 hour flight west to Edmonton, Alberta, flying with her in tow still made us a bit nervous. Having never flown with her before, we didn’t know what we were in for. We knew the trip had the potential to be a bumpy journey. It was all new.

    Tips for Flying with an Infant

    Are you traveling on an airplane with an infant? Check out these tips to help avoid turbulence along your journey. 

    Tips for Flying with an Infant


    Time it right.
    If possible, book your flight around baby’s schedule. For example, if they usually nap in the morning, then a morning flight would be ideal for you. Also be sure to play it safe when it comes to arriving at the airport, adding a bit of time onto your journey.

    Know your airline.
    Individual airlines have individual regulations when it comes to traveling with young children. For example, baggage allowance and gate checking strollers, car seats, etc.If you are unsure of the rules for your particular airline, be sure to call their Help Centre for clarification in advance of your trip. 

    Tips for Flying with an Infant

    Pack smart.
    Make sure you have plenty of wipes, diapers, snacks and extra clothing for the flight, or in case of a delay. Choose a bag that allows you to be as hands free and comfortable as possible (such as a cross-body or backpack), with easy access to pockets.

    Be sure to check the FAA regulations on formula, milk, snacks (especially fruit and vegetables) before you travel. Regulations will differ depending on your destination. 

    Whether we're on a flight or a trip to the grocery store, Huggies Little Snugglers Plus (only available at Costco) are never too far away. These diapers come in three sizes - newborn, 1 and 2 - and are designed to help keep baby’s skin clean and healthy, with Leak Lock® for up to 12 hour protection

    Tips for Flying with an Infant

    Dress smart.
    Planes are often cooler, so make sure babe is either dressed in layers, or you have a light sweater handy. If you are breast feeding, make sure to wear a top that is feeding-friendly. A scarf or light sweater would also serve as a feeding cover and/or a pillow for your lap. 

    Carry baby.
    Instead of carrying baby on your hip to board and deplane, go hands free and strap them into a carrier. If they are able to be positioned front facing, they will enjoy watching everyone and everything around them.

    Entertainment.
    You know your baby better than anyone, so how do you think they’ll react on the plane? If they’re always on the move, keeping them settled in a seat for x amount of hours can be tricky. Bring an activity that is new to them, such as a colouring book, to help keep them engaged for longer, or pack only a few toys that you know your baby loves rather than an entire assortment.

    Tips for Flying with an Infant

    Play it safe.
    Each person reacts differently to the change in air pressure, and the same goes for infants. As a precaution, breast feed, bottle feed or have a pacifier on hand during assent and descent to help relieve any pain.

    Ask for help.
    Not only are flight attendants there to help you throughout the flight, they love babies!  

    Ignore the dirty looks.
    The majority of people on a plane love seeing babies, and are very accommodating and understanding. But, there is always one or two that give the dirty looks, regardless if your child makes a peep or not. Don’t let it get to you! You’re there to have fun, don’t let anyone ruin that.

    Enjoy making memories!
    Sit back, relax and enjoy making memories with your family and sparking the travel bug within your babe.

    In the end, we had absolutely nothing to worry about. Morley was a flying pro, and we can’t wait to take her on more airplane adventures and share our love of travel with her as she grows.

    Tips for Flying with an Infant


    Don't forget to check out the awesome diaper savings at Costco - From 9/1 to 9/25, Huggies Little Snugglers Plus (sizes 1 & 2) are $37.49, or $31.49 after the $6 discount & Little Movers Plus (Size 3, 4, 5, & 6) are $42.99, $36.99 after $6 discount and Free shipping (this offer valid 9/1 –to 9/25), with free shipping when purchased online at Costco.com. Starting in August, Little Snugglers Plus will also be available in size Newborn starting at $29.99 in select warehouses and online. What a great value for a quality product!


    Do you have any tips for traveling with infants?

    SHARE:
    Blog Design Created by pipdig