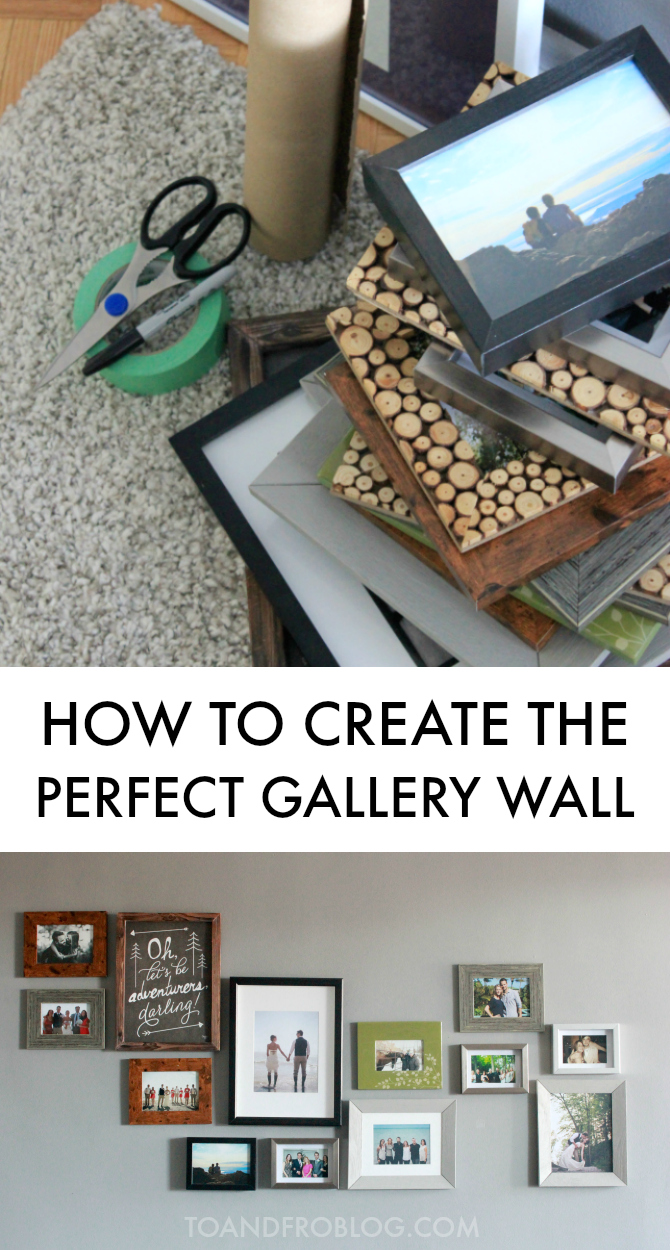
How To Create the Perfect Gallery Wall
We are currently in a transition phase as we rent a small, one bedroom apartment and patiently await the construction of our condo. But, just because we are in a temporary space does not mean that we can't make it feel like home. Gallery walls are the perfect way to spice up an empty wall in your home and make it feel just that, more 'homey'.
If you have a ton of family photos and the wall space for all your pictures, you should try putting up a gallery wall in your home. While arranging framed photos on your wall can feel like a big project, it can easily be done in less than a day. Here's how to create the perfect gallery wall, in 6 simple steps:
What You'll Need
- Photos & prints
- Frames
- Newspaper or kraft paper
- Painter's tape
- Marker
- Scissors
- Level
- Tape measure
- Hammer & nails/drill & screws/adhesive tape (depending on the wall)
What To Do
Step 1: Get inspiration
First, identify the wall that needs the oomph. For us, the large wall in our living room is the perfect canvas for our gallery wall. Grab some quick measurements of the space so that you know how many photos you need, sizes, etc.
Gather the photos, frames and other items (such as posters, prints, collectibles, etc.) that you would like to hang. Remember not everything has to match - the most important thing is that the wall represents you! Look for inexpensive and unique frames in unconventional places, such as thrift stores. Ikea also has a great selection of affordable frames in all different sizes and colours.
I picked up this piece on a recent trip to Hobby Lobby, and it became the inspiration for our wall. We decided to hang photos of our adventures together - from Alaska, to a trip to Hawaii and even our wedding. If you are lacking ideas for what to hang, or how to hang them, check out some inspiration on Pinterest.
Step 2: Lay it out.
Lay out the newspaper or kraft paper on a large flat surface, such as the floor. Begin to lay out the pieces for your gallery - start with a large centre piece and build out. Arrange the frames how you would like them. Remember, there is no right or wrong way, it all depends on your personal style. You can always switch it up when you go to put it on the wall. Have fun with the layout.
Step 3: Trace it out.
Once you have the pieces laid out the way you like them, trace around them with a marker. Don't forget to label each traced frame with a brief description of the photo so that you don't forget when you go to put them on the wall! For ease when hanging, mark where the nail or screw needs to go with an x.
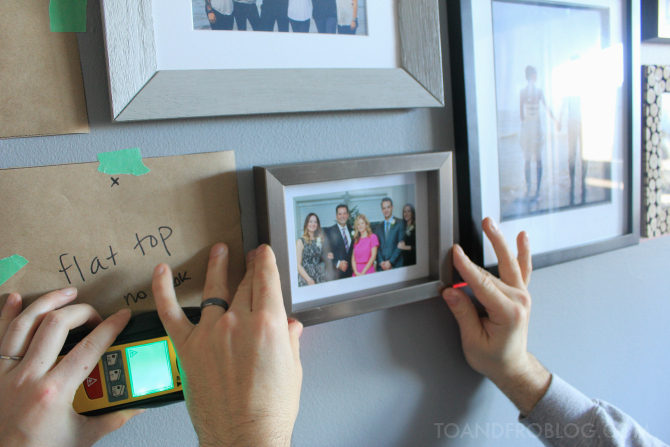
Step 4: Mock it up.
Cut out the traced pieces. Using painter's tape, a level and measuring tape, arrange the paper cutouts on the wall. Again, it will be easiest to start with the largest piece and build out.
Once all pieces are on the wall, take a step back. Ask yourself, does the grouping fit with the nearby furniture? How is the height and the space between pieces? Does the gallery fill the space appropriately? Is there room for growth if I would like to add more pieces down the road? This step is optional, but will alleviate the need for patching errors.
Step 5: Nail & hang.
One of the perks of using the paper mockup method is that you can mark exactly where the nail needs to go on the paper (step 3). Depending on what your wall is made of, use either a hammer or drill to place a nail or screw in the marked location. If you are in a temporary space like us and don't want to patch holes down the road, there are many great adhesive products that will temporarily hang your frames.
Once the nails or screws are in place, tear away the tape and paper. Now the best part - hanging your photos!
Step 6: Sit back and enjoy!
Remember there are no real guidelines or rules when creating a gallery wall—it's all up to you. Feel free to add or take away pieces as you go on, keeping the artwork relevant to your life. Ours is a constant work in progress, but I am so happy with how it has transformed our space from temporary to home.
How do you make your space feel like home?
If you enjoyed this post, you may also like: Do You Have a Home Emergency Plan?