November 24, 2020

DIY Family T-Shirts - The Perfect Holiday Gift Made with the Cricut Joy & EasyPress 2

*Disclosure: This is a sponsored post written by To & Fro on behalf of Cricut, and contains affiliate links. All opinions are 100% that of To & Fro. 

Love making homemade gifts for friends and family? This holiday season, put your Cricut Joy and Easy Press 2 to good use with these DIY personalized family t-shirts - the PERFECT holiday gift. 

DIY Family T-Shirts - The Perfect Holiday Gift Made with the Cricut Joy & EasyPress 2

My four year old LOVES to draw! Scrap paper? She'll find it. And not long after, it will be covered in letters and drawings. Mostly the names and depictions of close family members.

So this holiday season, I decided to put her writing and doodling to good use and turn it into a gift for family members using the Cricut Joy and Easy Press. 

Today I'm sharing how to make personalized t-shirts with an easy Cricut Joy and EasyPress 2 tutorial, and you are going to be shocked at just how simple it is to create fun shirts for your family at home! 

DIY Family T-Shirts - The Perfect Holiday Gift Made with the Cricut Joy & Easy Press 2

DIY Personalized Family T-Shirts 

What You'll Need

White printer paper
Parchment paper
Scissors
Heat resistant tape (optional)
Lint roller

DIY Family T-Shirts - The Perfect Holiday Gift Made with the Cricut Joy & Easy Press 2

What To Do

1. Create! This is the fun part. I gave Morley the infusible ink pens and printer paper and let her go to work creating her masterpiece. I had asked her to draw photos of our family of 4, with one parameter - no words (because they would transfer backwards). The drawings also had to be a specific size (smaller than the EasyPress 2), so I gave her a specific-sized piece of paper to use.

DIY Family T-Shirts - The Perfect Holiday Gift Made with the Cricut Joy & Easy Press 2

2. Prepare your blanks. In order for the ink to transfer properly, the blanks (in my case, t-shirts) had to be clean and lint-free. You can use any "blank" (i.e. t-shirt, tote, etc.), however, it is important to note that Cricut brand products will give you the best quality transfer. 

3. Consult the heat guide. Once the blanks are prepped, consult the Cricut Heat Guide for the EasyPress 2 to know exactly how hot the press should be based on the product and material you are using. This guide will also give you instructions as to the layering process for using the EasyPress 2, and the length of time to apply the press. 

Tip: If you purchase Cricut t-shirts, they will come folded with a piece of cardstock. This piece of cardstock can be used when pressing. 

DIY Family T-Shirts - The Perfect Holiday Gift Made with the Cricut Joy & Easy Press 2

4. Further customization. This is a totally option step, but adds a little bit more personalization to your gift. After our infusible ink design was successfully applied, we decided to further personalize the t-shirts with the Cricut Joy and infusible transfer paper. This is where we added text to the t-shirts.

Using the Cricut Design Space app, I created the text. It was then cut out of black infusible transfer paper. (I consulted help.cricut.com to learn how to use the Cricut Joy to cut the transfer paper properly, as it is a slightly different than the vinyl.) Don't forget to mirror the image, or it will transfer backwards! 
After weeding the transfer paper, I again consulted the Cricut Heat Guide for further instructions on applying this transfer paper to the t-shirt using the EasyPress 2.  As it was a different material than the original design, the instructions slightly varied. 

DIY Family T-Shirts - The Perfect Holiday Gift Made with the Cricut Joy & Easy Press 2

And voila, our personalized family t-shirts, care of Morley.

I am fully aware that there will come a day that Morley will not want to be caught dead wearing matching homemade family t-shirts, but until that day, I'm going to embrace every single second and cherish the fact that she wanted to make these shirts for members of our family.

 The PERFECT holiday gift made with our Cricut Joy and EasyPress 2, don't you think?!

Now, what shall we make next?!

Do you have a Cricut machine? Do you use it to make gifts? What is your favourite holiday gift to make with it? I'd love to hear!


PIN IT: 

DIY Family T-Shirts - The Perfect Holiday Gift Made with the Cricut Joy & EasyPress 2


SHARE:

September 17, 2020

Favourite Packable Kid-Friendly School Lunch Ideas


There’s no denying that for children everywhere, the 2020-2021 school year will look different than those in the past. Just how different, is yet to be fully determined. But one thing that will remain constant is lunch time, and the need to pack your child’s lunch. 


Check out some of our favourite packable kid-friendly school lunch ideas, made with Mastro/San Daniele cooked deli meats.


Favourite Packable Kid-Friendly School Lunch Ideas


This September, our family enters a new chapter - our oldest daughter enters kindergarten. And while we're all excited for her to go to "big girl school", one thing I'm NOT looking forward to? Having to pack her lunch every day. 


I was having a conversation with a girlfriend the other day about school lunches. For the past six months, I’ve made my girls’ lunch every. single. day. Making my kindergartener lunch for school should be no different, right? Wrong. We may only be a few days into the school year, but I’ve quickly found that the opposite is true.


So much more planning needs to go into school lunches - ensuring they have enough food to last the entire day, that what you pack is peanut-free, that your kids actually like and eat what you pack, that the lunch contains minimal packaging, that they can easily open any of those packages, and so on, and so on. 


Favourite Packable Kid-Friendly School Lunch Ideas


At the end of the day, regardless of whether our children are in kindergarten or high school, we just want them to eat lunch. Am I right?! But, coming up with creative ideas that ensure no food gets left behind can often be a challenge. 


Mastro/San Daniele offers a variety of cooked deli meat products that are great for families and can make going back-to-school easier. They are versatile, light and can be used to elevate a dish that you eat regularly (think that reliable lunch sandwich) or incorporated into a tasty snack. 


Check out our favourite packable kid-friendly lunch ideas made with Mastro/San Daniele cooked deli meats - meals that are easy to whip up the night before, but delicious and healthy to keep our kiddos fuelled throughout their busy day (regardless of what that may look like this school year).

Favourite Kid-Friendly School Lunch Ideas 

Nectarine Wraps

Kids won’t eat fruit? Try this fun alternative. Mastro Prosciutto Cotto is full in flavour, extra lean and low in fat. Combined with the sweet nectarine, its a winning combination.


What you’ll need:

  • Mastro Prosciutto Cotto
  • Nectarine (can also use peach, pear or melon)


What to do:

  1. Slice the nectarine into manageable sizes. 
  2. Wrap each individual slice of nectarine in an approximately sized piece of prosciutto cotto.


Favourite Packable Kid-Friendly School Lunch Ideas

Ham & Cheese Flatbread

A fun spin on a classic sandwich! Slow cooked to perfection, Mastro Capocollo’s distinctive flavours make it ideal in sandwiches, antipasto and pizzas.


What you’ll need: 

  • Mastro Capocollo
  • Cheese, thinly sliced
  • Small pita or naan bread
  • Mayonnaise (optional)
  • Mustard (optional)
  • Shape cutters (optional)


What to do:

  1. If your child likes mayonnaise and mustard, add a thin layer of each to the top of the pita or naan.
  2. Add a piece of Mastro Capocollo on top of the bread. 
  3. On top of the cooked deli meat, add a piece of thinly sliced cheese (your choice of variety). 
  4. If you want to get really fancy and fun, use shape cutters to cut fun shapes into the bread, meat and cheese.

Favourite Packable Kid-Friendly School Lunch Ideas

Lunch Sandwich Sushi

Perfectly portioned, two-bite sandwich rolls. It’s like kid-friendly sushi! San Daniele Mortadella is gently prepared and cooked to savoury perfection, a great choice for this lunch sushi. It comes in three varieties - classica, light and hot.


What you’ll need:

  • San Daniele Mortadella
  • Whole wheat tortilla
  • Cream cheese
  • Cucumber, thinly sliced


What to do:

  1. Peel and thinly slice cucumber.
  2. Lay out the tortilla on a flat surface, and cover in a thin, even layer of cream cheese.
  3. At the bottom of the tortilla (closest to you), lay a few thin slices of cucumber.
  4. Layer a piece of San Daniele Mortadella on top of the cucumber.
  5. Starting from the bottom (closest to you), roll up the tortilla. If the wrap does not stay closed, use a bit of cream cheese to hold it together. 
  6. Using a sharp knife, slice in one inch sections.

Favourite Packable Kid-Friendly School Lunch Ideas

Check out this link for $1 OFF your next Mastro Prosciutto, Mastro Capocollo or San Daniele Mortadella purchase. 


What are your favourite kid-friendly lunch ideas? Any tips or tricks for this new school-aged kiddo mom? I’d love to hear!


*Disclosure: I have participated in a paid partnership with Mastro/San Daniele. Opinions in this post are my own.


PIN IT

Favourite Packable Kid-Friendly School Lunch Ideas


SHARE:

September 10, 2020

Tips for Preparing Your Child for Back-to-School in a COVID-World


Next week, our oldest heads off to kindergarten. And in the world that we currently live in, I would be lying if I said I wasn't just a little bit stressed.

Starting "big kid school" alone is enough of a worry for parents - how will my child do, will my child make friends, will they miss me, and so on and so on, are all valid questions on our mind. Truth is, I don't feel prepared. BUT add on a global pandemic, potential exposure, new health and safety policies and procedures, wearing a mask all day, etc. etc., and things get a bit more worrisome.

tips for back to school during global pandemic; back to school letter sign

(^^ How was that one year ago already?! ^^)

The past few weeks I've spent a lot of time talking with other family members, parent friends and teacher friends to learn how they're feeling about sending their kids back to school, and the techniques they're applying to ensure a smooth transition.

Here are some of the things I learned, straight from the mouths of parents and teachers.

Side note: I understand that school has already started for some and for us in Toronto, is quickly approaching next week. However, it doesn't help to apply these tips anyways. 

Tips for Preparing Your Child for Back-to-School in a COVID-World

1. If your child is not used to wearing a mask, get them used to it as soon as possible.  Start in small increments (5-10min) and gradually build up.  Perhaps you can put a mask on their favourite stuffy to "normalize" it a bit more.  


*I know that school starts next week for us here in Toronto, and it may be too late to apply this tip. However, if you live outside of Toronto and masks are not mandatory in your child's school, it may not hurt to start applying this tip in the evening, just in case. 


2. If you are out shopping with your child, be intentional about showing them the signs and stickers on the floor which point out directions and the need for proper social distancing and what that looks like. 


3. For lunch or snack times, pack a tea towel or cloth in their bag for them to use as a placemat.


4. Make sure to pack a spoon and/or fork for your child to use so that they are limiting the need to put their hands in their mouths-especially for fruit which can be very sticky. 


5. Make sure that your child can open and close all of her/his containers,packages or thermos meals. 


6. Start practicing with your child how to zip up/button clothing and make sure to send your child to school with velcro shoes. Laces will not be tied up.👟


7. Start practicing a hand washing routine and how to do so properly (between the fingers, wrists, back of the hand). Same with sanitizing.  Do it multiple times in the am and pm.  


8. Talk to your child about how to behave in the bathroom at school.  It's not a place to play. Do your business and get out. And stay off the floor. 


9. Have a safety plan. If you are working and receive a call from the school that your child is ill, is there someone who can pick them up?  What protocols does your place of work have for parents who need to pick up a sick child?  


10. Invest in good outerwear for your child-rain boots, raincoat with a hood, snow pants and jacket, warm mittens and hats. This year students will be spending A LOT of time outdoors-rain or shine. 


Check out some of our favourite back-to-school gear for outdoor play, here.


11. Remember to pack an indoor pair of running shoes for the first day of school so that soiled outdoor shoes remain out of the classroom area.  Children will need a set of clothes to remain at school in case of spills or bathroom accidents. 


12. Label everything-masks, clothes, masks, water bottles etc. Mabel's Labels are durable labels that can get wet and won't wear off. We buy the Ultimate Back-to-School combo which includes 40 small rectangle labels, 70 Tag Mates stick on clothing labels and 16 shoe labels. 


Additional tip: If you have multiple children, order labels with your last name instead of the child's first name. This makes it easier if they share belongings. 


13. Invest in a breakaway lanyard or fanny pack for your child to place their mask when not in use. (We used this breakaway lanyard and this fanny pack - both Canadian small shops.)


14. Practice having your child apply sunscreen.  In the past we have helped apply it, but will be unable to do so this year.  Show them what an appropriate amount is and important places it needs to be applied.  


15. Ensure your child drinks enough water to stay hydrated. Talk about the importance of drinking water, and how it can help to keep them healthy. (This is our favourite reusable water bottle for kids.)


16. Pack extra masks in your child's backpack, just in case. Place them in a clean resealable sandwich bag. Also have an extra bag on hand for soiled masks. 


17. Have conversations. Having open, age-appropriate conversations with your children will help them know they are not alone, that we do not have all the answers, that flexibility is very important and that parents, teachers, doctors, etc. are doing everything possible to ensure their health and safety.


18. After spending many long months at home, children may feel nervous about going back to school and being apart from family members. There's a strong possibility of separation anxiety. Have conversations about going back to school and try to develop tools for your child to feel connected to home, such as notes in their lunchbox, or a family photo they can bring to school.


19. While visiting the interior of the school may not be allowed, take a walk through the outdoor yard. Show your child where they will enter, where you'll pick them up at the end of the day and where they will play outdoors. Children (especially kindergarteners) are creatures of habit, so walking them through where they will spend their time may make them feel more at ease. 


20. Remember, we're all in this together. Talk with your children and help them understand that anyone can get the virus, no matter where they are from in the world. We all must do our part to keep ourselves, family, friends and others safe and healthy. 


Keep in mind - these tips can be applied to children of all ages and are not restricted solely to those entering kindergarten. Practicing proper hygiene and health and safety procedures is important for everyone, regardless of your age. 

Do you have any tips and tricks for preparing your child for back-to-school in a COVID-world? I'd love to hear!

For those that have already started school, did you apply any of these tips? And did you find they were effective? Please share!


PIN IT:

child with first day of school letter sign


SHARE:

August 24, 2020

5 Fun & Easy Summer Cricut Joy Projects (+ Preschooler Flashcard DIY)

*Disclosure: This is a sponsored post written by me on behalf of Cricut. All opinions are 100% mine.

Summer. The days are long, and the kids are out of school. And chances are high that you’ve also been home from work - maybe juggling working and caring for your children? Ya, me too. Keeping them busy and engaged, while limiting screen time to allow you to get work done is not an easy task. And if there is ever a time to pull out the Cricut and create some fun projects with (or without) your kiddos, now is the time.

Today, I’m sharing why I love my Cricut Joy™, specifically five of my favourite Cricut Joy DIY projects that I’ve made at home this summer using Cricut Joy Smart Vinyl™.

5 Fun & Easy Summer Cricut Joy Projects

5 Fun & Easy Summer Cricut Joy Projects

Vegetable Garden Markers

One of my favourite things about our new house is the backyard. It’s crazy what a little green space can do for your mood. Since moving in last summer, I have been so excited for the girls to finally have a place to get outside and play. But, this new green space also meant that I could build an even bigger and better vegetable garden than the container gardens we had on our condo terrace last summer. So we were able to tell what was what, I created these vegetable garden markers using up cycled paint stir sticks that I simply spray painted white and Smart Vinyl - Permanent in black. I measured the size of the paint stir sticks and created the vegetable labels text (DJ Juicy font) in the Cricut design space app. I applied the labels to the painted stir sticks with Transfer Tape, and once completed, added them to my garden next to the appropriate fruit or vegetable. Much better looking that the generic tags that come from the Garden Centre. 

Wooden Welcome Sign

This wooden welcome sign is one of my favourite Cricut Joy projects to date. Earlier this summer, we added a deck to the back of our house, and to give it some added personality, we created this “Welcome to Our Deck” sign. It was also super easy to make, and with several home update projects already on the go, we had all of the materials we needed already at home. I simply created the text in the design space app (Babette font for "Welcome" and Creative Memories Tiny Treasures - Rubber Ducky font for "to our deck"). My design can be found on Design Space here.

5 Fun & Easy Summer Cricut Joy Projects

Mailbox Decal

While our front porch is going to be next summer’s focus, I couldn’t help but take our ugly white mailbox and give it some curb appeal by painting it black to match the porch railings. I then personalized the mailbox with “hello” text created in the Cricut design space app using Babette font (easily my favourite cursive font in the app). Once the mailbox was dry, I applied the cut vinyl in the desired spot using Transfer Tape. 

5 Fun & Easy Summer Cricut Joy Projects

Stemless Wine Glasses

We love to entertain. And while this summer may look a little different when it comes to entertain, I am happy that we have still been able to have those in our bubble over for backyard BBQs. I recently purchased more backyard-friendly plastic stemless wine glasses and decided to jazz them up a little using Smart Vinyl - Permanent in gold. I measured the size of the glasses and created the “cheers” text (Babette font) in the Cricut design space app. I then applied the labels to the outside of the clean glasses uses Transfer Tape. They were very easy to make, and added a little something extra (including lots of compliments and questions about where I bought them) to our backyard get togethers.

5 Fun & Easy Summer Cricut Joy Projects

Preschooler Flash Cards

These flashcards were one of the first projects I made with my Cricut Joy when schools closed back in March. I was determined to keep the learning continuing, and these super simple flashcards were a great help in doing so. Using construction paper and Smart Vinyl - Permanent, in white, I created a set of capital letter cards and small letter cards. These flashcards could be used for letter recognition, spelling names and/or matching capital and small letters. The flashcards were very easy to create in design space, as the font Cricut Alphabet Circle already existed. I simply printed it on the vinyl, and applied it to the construction paper using the Transfer Tape. I did used two separate colours of construction paper, one for the capital letters and one for the small letters. But if you wanted to up the difficulty, you could use the same coloured paper for all. 

5 Fun & Easy Summer Cricut Joy Projects

Next up on my Cricut Joy DIY list? Story blocks. Stay tuned to see how they turn out.

The Cricut Joy makes home DIY projects so easy. Unlike other Cricut machines, the Cricut Joy is a compact cutting machine, less than half the size of Cricut Explore and Cricut Maker—making it perfect for people without a dedicated crafting area (like me)! From customized pillows, to personalized glassware and welcome signs, the possibilities are nearly endless with this fun tool.

For the majority of my projects, including those outdoors, I use Cricut Joy Smart Vinyl - Permanent which is water- and UV-resistant, and lasts up to 3 years. Cricut Joy Smart Vinyl also comes in removal and writable, and a variety of different colours, including mattes, metallics, holographic and more. 

Be sure to check out the Cricut blog, where you’ll will find more DIY inspiration and tutorials! Use the hashtag #CricutAtHome when sharing your project on social media - I would love to see what you create!

Do you have a Cricut machine? What’s your favourite project to make? I’d love to hear - I’m always looking for inspiration!


PIN IT

5 Fun & Easy Summer Cricut Joy Projects

5 Fun & Easy Summer Cricut Joy Projects


SHARE:

August 19, 2020

Easy DIY Piñata - Made with Up-Cycled Materials Found at Home!


Looking to add some excitement to your next backyard birthday party? Check out this easy DIY piñata tutorial, made with up-cycled materials found at home!

Easy DIY Piñata - Made with Up-Cycled Materials Found at Home!

Last summer, our daughter’s first birthday party theme was “One in a Melon”. To go with the theme, I decided to create a watermelon shaped piñata. It was really ambitious, I admit. BUT turns out, it was SUPER easy! And not to toot my own horn, but it also turned out pretty amazing and was a smashing success (no pun intended). 

Also turns out, I set the birthday bar REAL high, and piñatas are now a birthday party expectation. 

So, when Berks’ second birthday came around, I decided to go it again and make an ice cream-shaped piñata, because she was “Two Cool”. 

Easy DIY Piñata - Made with Up-Cycled Materials Found at Home!

Buying a piñata at a party store can get pricey. Making your own is a cost effective option and not as hard as you’d think. Chances are, you already have all of the materials you need at home. And, it's a good way to repurpose those items destined for the recycling bin - think Amazon boxes, newspapers or flyers and gift tissue paper. 

I will admit, while they’re easy, they do take some time to make. At least 2-3 days. So it does take a bit of pre-planning and can’t be a night before decision. But, they’re so worth it because it will be a hit (ok, pun intended on that one). 

Check out the easy DIY piñata tutorial, and all of the materials you will need to gather from around your home, below.

Easy DIY Piñata Tutorial

Materials:

  • Cardboard (i.e. your Amazon boxes)
  • Marker or sharpie
  • Scissors
  • Tape (thicker tape works best)
  • Newspaper or flyers
  • Large bowl
  • Flour
  • Water
  • Streamers or tissue paper
  • Rope
  • Screwdriver 
  • Sharp knife
  • Goodies (i.e. candy - for the inside)

Directions:

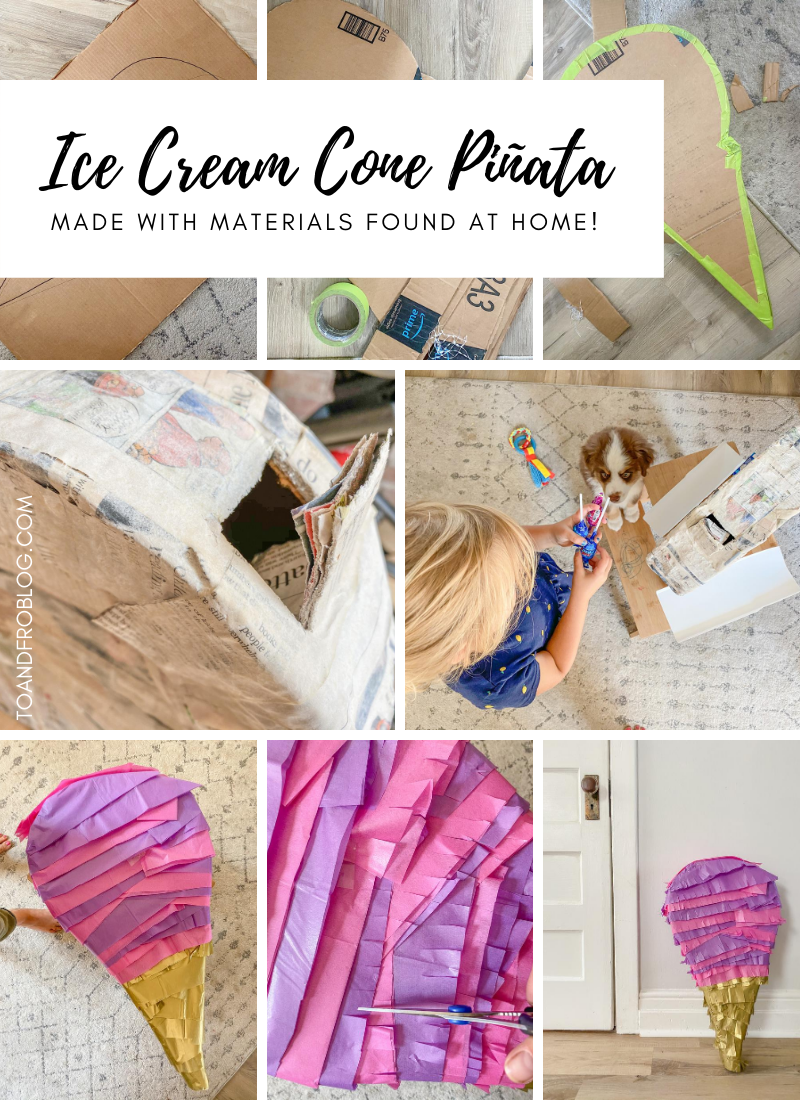
  1. Repurpose the boxes from all of your COVID Amazon purchases (I can't be the only guilty one?) - Cut two pieces of cardboard, large enough for your design. Using the marker, draw your design and cut it out. Pick a design with less detail. The less detail, the more structurally sound (and easier to put together) it will be. 
  2. Using the left over cardboard, cut cardboard strips, which will act as the edges of the piñata to give it the 3D shape. 
  3. Using the tape, attach the cardboard strips to one side of the piñata face. Repeat for the other side.
  4. Cut the newspaper into large strips. I kept the newspaper folded when I cut so that the strips were two-ply. It will save some time when getting down to the paper mache part of the piñata.
  5. Mix up the paper mache goo. You can use traditional plaster of paris, but not everyone has that lying around. Flour and water will work just as well, and chances are, you already have flour in your pantry. Add a little bit of water at a time to get the correct consistency, you want it to be almost pancake batter thin. Add more flour if it is too thin. Flour and water is much more environmentally friendly (and pet safe) as well. 
  6. Start paper maching! Dip the double-layered strips of newspaper into the flour-water mixture. Remove any excess with your fingers. Cover the cardboard cutout with a single layer of paper mached newspaper. Allow to dry for 24 hours, flipping every so often to allow each side to dry. By this point, it should be rock solid. If not, repeat with another layer.
  7. Before decorating, cut a hole for the candy using a sharp knife. Don’t make it too big, or it will affect the structure of the piñata. It just needs to be as big as the biggest piece of candy or item you will be putting in it. 
  8. Add the goodies to the piñata. Once you are done, close the flap. No need to tape the flap shut, the tissue will eventually cover it.
  9. Now it’s time to bring the piñata to life and decorate the outside! To do this, you can either use paper streamers or tissue paper cut into strips. When I made the watermelon, I purchased pink paper streamers and green tissue paper at Dollarama. For the ice cream cone, they did not have the colours I wanted in the paper streamers so I bought gold, purple and pink tissue paper (gold for the cone, and purple and pink for the Cotton Candy ice cream, as requested by my four year old).
  10. Cut the tissue paper into strips. Using tape, wrap the tissue around the piñata and use small pieces of tape to secure it. Remember to start at the bottom and work your way to the top so that the layers overlap properly. Repeat until the entire piñata is covered, with no exposed newspaper or tape. It doesn’t need to be pretty - the next step will help to blend it all together.
  11. Using scissors, fray each layer of the tissue paper to help to blend it all together.
  12. Using a screwdriver or sharp knife, poke a hole through both sides of the piñata to be able to hang it. Make sure the hole is about two inches from the edge of the piñata to keep the structure and so it doesn’t fall apart at the rope.
  13. Once the rope is added, pick a location to hang it, grab a bat or hockey stick and have fun cracking it open!

*See photo below for detailed photo instructions.

Easy DIY Piñata - Made with Up-Cycled Materials Found at Home!

Happy piñata-ing!

Have you ever made your own piñata? I’d love to hear about it!


PIN IT

Easy DIY Piñata - Made with Up-Cycled Materials Found at Home!

SHARE:

August 18, 2020

Navigating the New Normal - Working From Home with Kids & Managing Stress


For many, stress has become a constant in our lives - especially in the current state of the world. The combination of working from home and meeting deadlines, while being responsible for caring for children, making multiple meals and snacks, doing heap after heap of laundry, and so on - it can all add up, leading to chronic stress. 

Read on to learn how I’m navigating our new normal, and managing stress while working from home with kids. 

Navigating the New Normal - Working From Home with Kids & Managing Stress

The consequences of chronic stress? A constant feeling of being overwhelmed, nagging irritability and anxiety and insomnia.

Sound familiar? Ya, me too.

Although we talk about stress, it isn’t often really clear what it means. When your body is under stress, it is effectively triggering the flight-or-fight response. And when your body is literally just trying to get through the day, it is not restoring and healing. It wears on you - on your mood and on your sleep. 

Lately, my stress has come in many forms, from many different forms. No daycare or school means daily routines are off, and sleep routines have been pushed later and later as if we’ve been on a constant vacation for the past five months. I’m consistently waking during the night to make sure one goes pee, and then comforting the other who heard us and wanted to join the party. Night time is often a time of musical beds in our house, and it never ends with me winning. And then, there’s work. I love my job. I am extremely grateful to have a job, especially during the current times. But working a full work week from home, hopping between Zoom calls while managing snack time, lunch time, nap time and everything in between, is not an easy task. The ongoing monologue in my head is constantly reevaluating my mental to-do list, checking one item off and adding another. And then, there’s the guilt. The biggest stressor of all - not being able to give my girls the attention they deserve because I’m locked into my computer. The amount of screen time we’ve racked up the past month is not something I’m proud of, but some days, it’s the only thing getting us through.

You could say this “new normal” is extremely stressful. 

Navigating the New Normal - Working From Home with Kids & Managing Stress

So, how am I navigating it?

There are many healthy ways to help manage stress in our everyday lives, including eating well, exercising, sleeping well and being mindful. One of my favourite ways to help manage stress is by getting outside. There is just something about the fresh air and green space that instantly calms me.
By getting outside I don’t mean getting lost in the middle of a forest. No, it can be as easy as just stepping out the door. There’s good evidence that just looking at a green space has positive effects on people’s mental health, helping them relax and de-stress. While we do enjoy completely submerging ourselves in nature, lately, we’ve found peace in simple neighbourhood scavenger hunts, walks around the block and even dinner at the beach.

But you want to know the one surprising place I’ve found the most peace the past few months? 

In my garden.

Navigating the New Normal - Working From Home with Kids & Managing Stress

I never considered myself to have a green thumb, but over the past few months I’ve enjoyed spending time pulling weeds, cultivating a vegetable garden, watching the pollinators do their work and just being surrounded by the flourishing greenery. When I begin to feel overwhelmed, when the irritability and anxiety start to creep in, when I lack focus - I walk out the back door, and into my garden.

If I’ve learned anything during this global pandemic, it is that being able to eat what you grow isn’t the only benefit of gardening - it’s actually really good for your mental well being. Gardens are special peaceful spaces with restorative qualities that can work wonders when we are stressed and under pressure. And while gardens can be relaxing, they can also be places where our efforts result in a real sense of achievement, boosting confidence and self-esteem. Something I’ve been lacking thanks to that mom guilt. 

Navigating the New Normal - Working From Home with Kids & Managing Stress

Another approach I take to managing stress lately is through the supplements that I take. Remember when I said eating well, exercising, sleeping well and being mindful helps to manage stress? Supplements can also be included to help support the body - providing key nutrients that promote relaxation and can help relieve mild symptoms of stress and exhaustion, and aid in longer, better sleep. And that’s something this mama can appreciate. 

New Roots Herbal is a leading Canadian manufacturer and distributor of high-quality natural health products, with a goal is to provide quality-of-life–enhancing products to everyone. They have a line of products related to stress, sleep and mood - including Chill Pills, Sleep⁸ and D-Stress.

When I want to make the best of the sleep I get, I turn to New Roots Herbal Sleep⁸, which helps rebalance my body’s natural circadian rhythm with a dose of melatonin.

When the girls test my patience and irritability runs high, I turn to New Roots Herbal Chill Pills, which use natural ingredients that reduce nervous irritability and induce relaxation so I can calm down and concentrate, helping me work more effectively. 

And finally, when I have a million things on the go (including a racing mind) and just need to slow it down, I turn to New Roots Herbal's D-Stress softgels which contain organic lavender oil that boasts an impressive profile of active constituents useful for coping with restlessness and mental stress.

Pandemic or no pandemic, life is stressful. Period. Managing stress looks different for everyone, so it’s important to find something that works for you. And when it comes down to it, don’t be afraid to ask for help. We’re all in this together, and I’m here if you need to talk. 

You can find New Roots Herbal products at your local health and wellness product store

What are some of your tried and true stress management techniques? I’d love to hear!


*Disclosure: I have participated in a paid partnership with New Roots Herbal. Opinions in this post are not my own.

PIN IT

Navigating the New Normal - Working From Home with Kids & Managing Stress

SHARE:

February 6, 2020

Tips for Moving With Young Kids


Moving with children is exciting, but also challenging. The transition can be incredibly stressful, not just on the parents, but also on the young children. Today, I’m sharing our recent moving story - specifically how we moved from a 750 square foot condo to a two-storey farmhouse - and some tips we learned for moving with young kids.

Tips for Moving With Young Kids

The other day, I was talking with a friend that recently sold her 1 bedroom plus den condo downtown Toronto, and bought a 4-bedroom house in the ‘burbs, backyard and double garage included.

She told me how nervous she was, moving out of the city, into a big house, and most importantly, uprooting her little ones from their current routine.

“Trust me”, I told her, “You will question the decision for a few months after you move in, but man oh man, the SPACE! Just think of all the space.”

I, of course, was speaking from recent experience - having sold our condo in late summer, and moved into a two-storey house just down the street.

We loved our condo, don’t get me wrong. It’s was ours, it was shiny and new, it was where we brought home a baby, it was our first home. But, it was also small. And everywhere we went, we could see or hear each other. Space was an issue. Peace and quiet was an issue. Privacy was an issue.

And so, we bought and sold. And while our new house may not be big by any means, it has space. Oh, the space. The separation. The (sometimes) peace and quiet. And, the (sometimes) privacy. 

Tips for Moving With Young Kids

When we moved into the condo, Morley was just two years old. Knowing it may be a tough transition, I researched the heck out of it, interested in learning how we could minimize the stress on all three of us at the time. 

And so, going through it not once, but twice in the past year and a half, and not with just one kid, but most recently, with two in tow, you could say I’ve learned a thing or two about moving with young kids.

Is your family planning an upcoming move? Are you worried about the stress it may cause your young children? Check out our tips for moving with young kids. 

Tip for Moving with Young Kids

Set the tone. 

As parents, our children look to us for guidance, especially in new situations. This means that when you are stressed, your child takes notice. While easier said than done, it is important to manage your own anxiety, not just when it comes to moving, but in your every day. It is important to set a calm tone in your home, especially before, during and after a big transition such as a move.

Talk to your child. 

Sure, they may not 100% understand what’s going on, but talking them through it definitely helps. Repetition is always important when it comes to learning for little ones, so talk about it often. As we packed up our belongings, we constantly talked about “Morley’s new house”, in hopes that it would get our oldest excited. 

Keep a routine. 

Moving is a chaotic and stressful time, and also a time that routine couldn’t be more important. Schedules and routines offer children feelings of safety and security. Children learn to expect what happens next in a day to day routine, and they can feel confident in that. Knowing what comes next helps new situations feel less stressful.

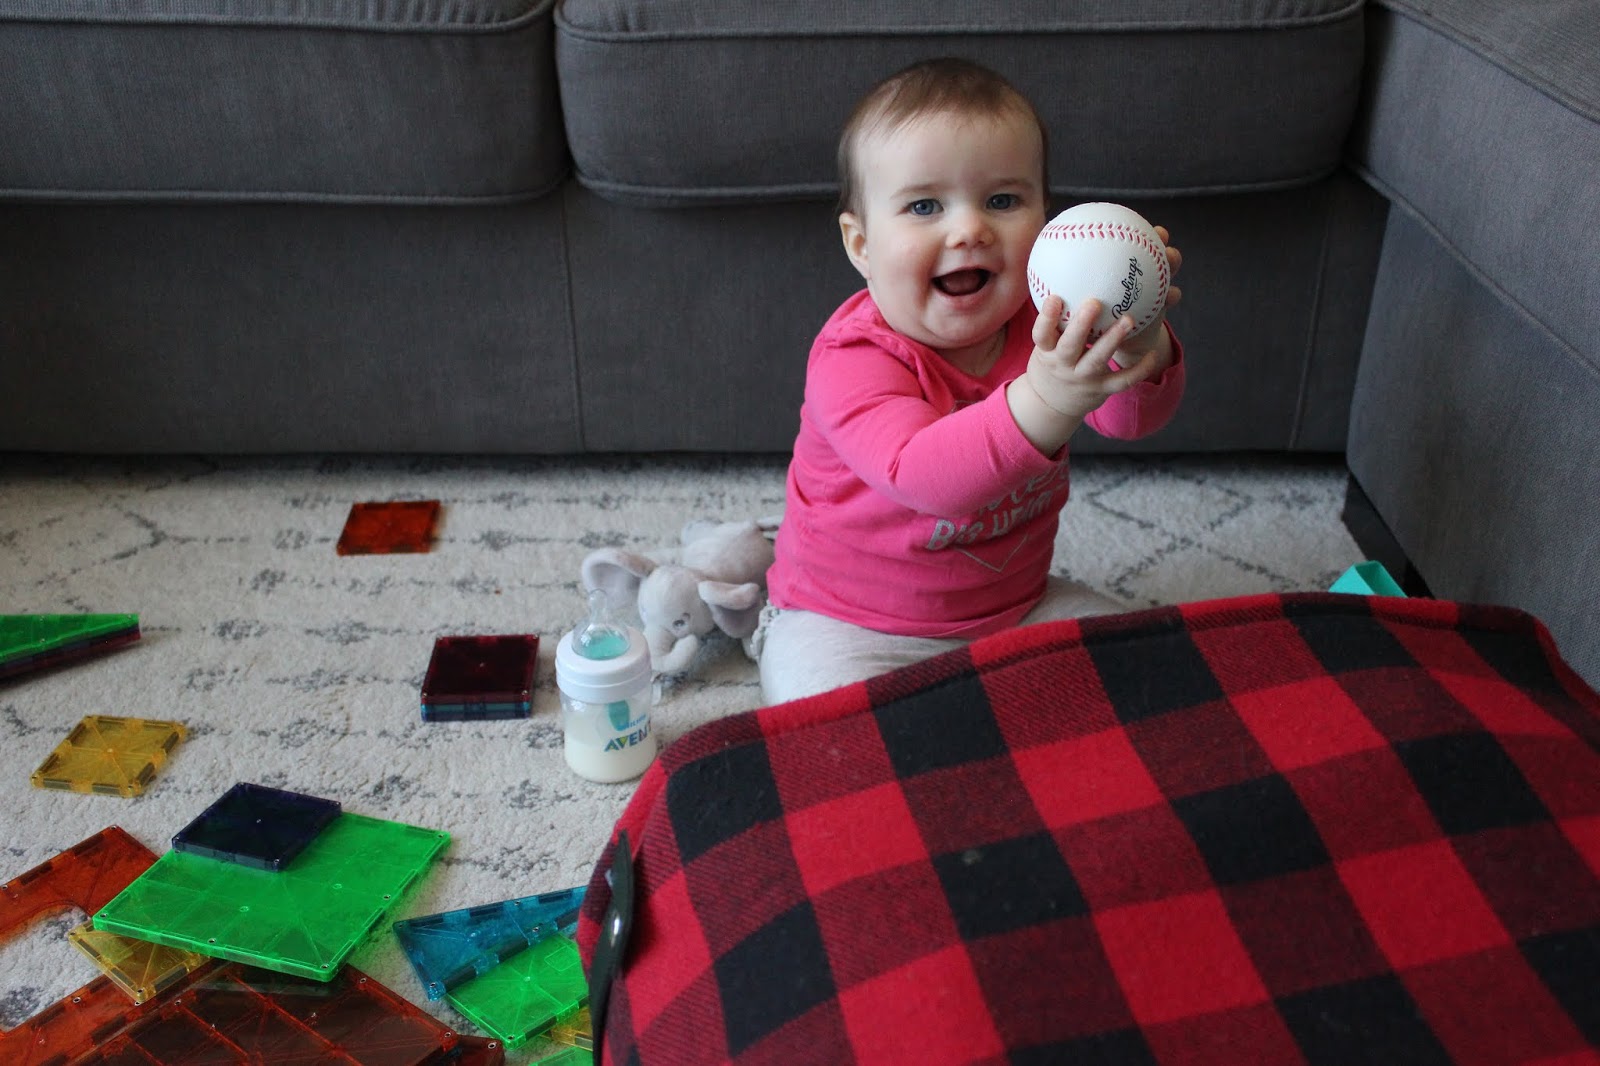
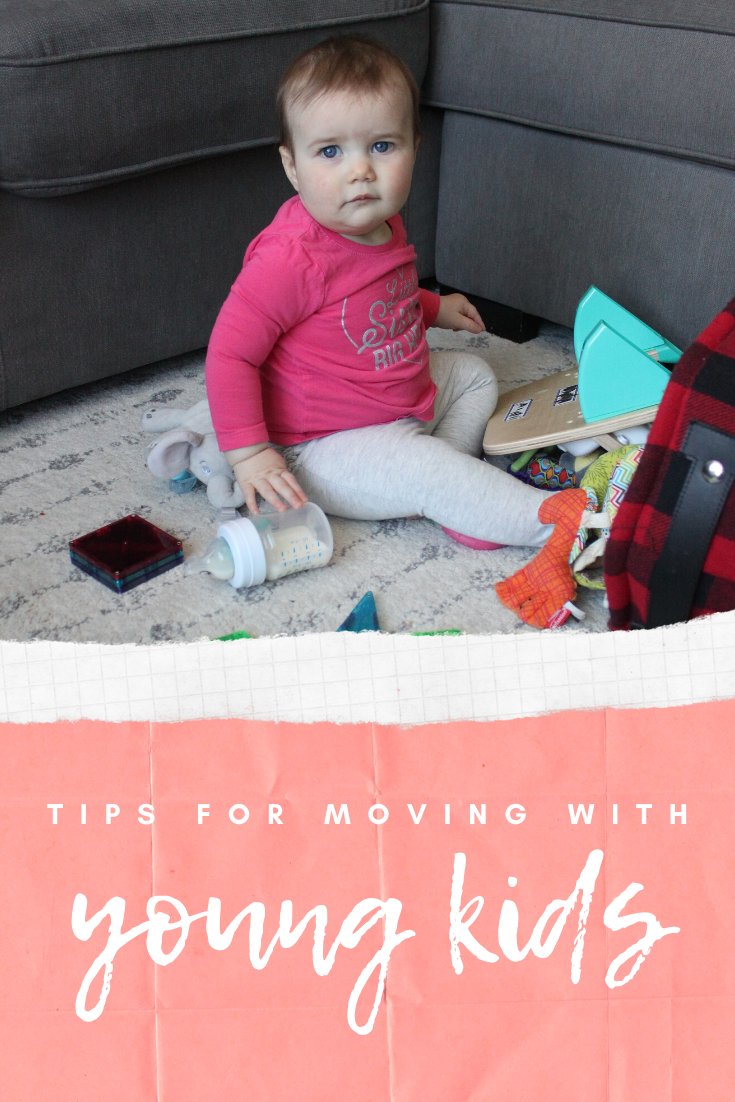
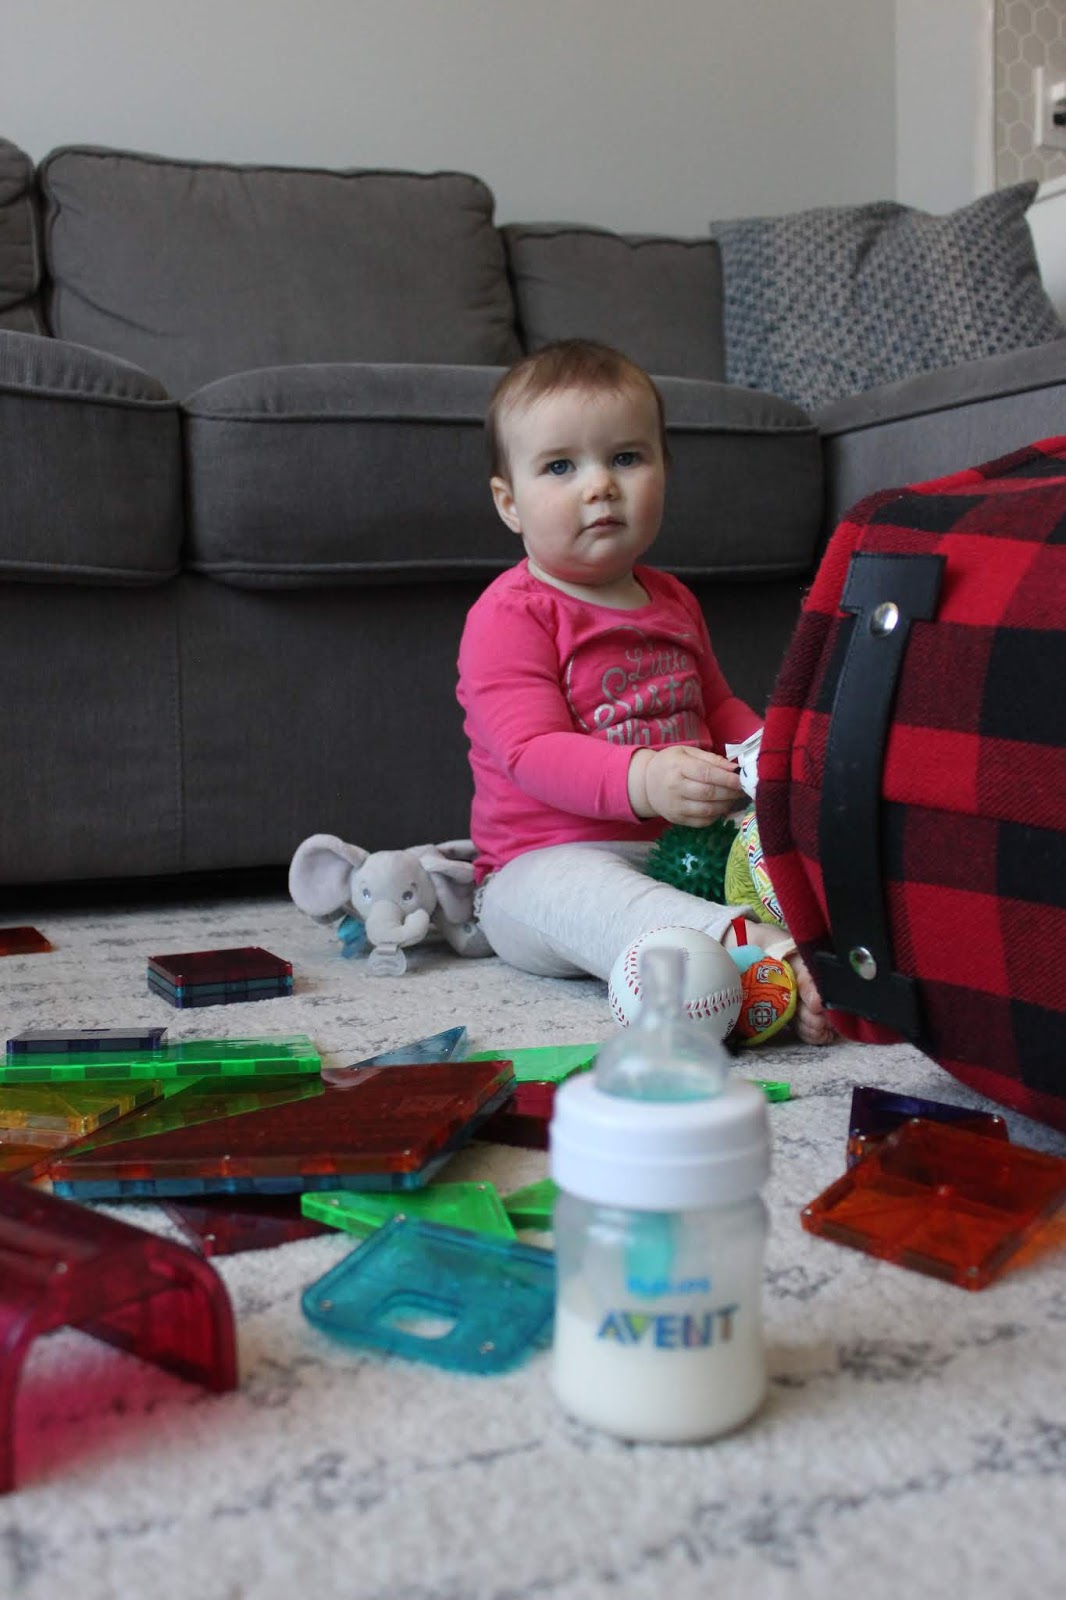
For our youngest (who was just a year old at the time of our recent move), that meant keeping her bedtime routine in check - bath, book, bottle, bed. 

When it comes to bottles, Philips Avent has been our go-to for both girls. The Philips Avent Anti-Colic Bottles with Airfree Vent BPA-free bottles are designed to reduce colic, gas and reflux. The shape of the nipple allows a secure latch and stays full even when the bottle is horizontal, allowing baby to drink in an upright position so that they swallow less air as they drink. The bottle itself has an ergonomic shape for maximum comfort, making them easy to hold and grip in any direction. At the time of our move, I was transitioning our youngest from breast feeding to bottle feeding (just to add another stressor in there), so the design of both the bottle and nipple helped to ease this transition. 

Tips for Moving With Young Kids

Recognition. 

Little kids recognize places that we frequent, so seeing as our new house was right around the corner from our condo, from their favourite park, from grandpa and from daycare definitely helped. Between selling and closing, we would occasionally walk past the new house to get them familiar with it. They are such creatures of habit, so showing our oldest that we would still be in the same area, and (for the most part) follow the same routine, definitely helped. 

Allow them to participate. 

While still young, having them feel involved is a way to help minimize stress. She may not have been able to help in the actual move, but we got her involved in other moving-related tasks. Unpacking their room first allowed them to have access to all of their regular items. We also let our oldest pick out her own paint colours. Pretty soon, there will be a pink and purple wall (sigh).

Be present and supportive.

During a move, it can be so easy to get hung up on your “to do” list - cleaning, painting, decorating, etc. It is important to remember to carve our some family time, to be present and provide support and TLC when needed.

Tips for Moving With Young Kids

Major life changes are challenging and stressful - not only to adults, but especially to small children. Our children look to us for guidance during tough times, and as parents, we can offer a lot of help to make the transition easier - offering comfort and support by maintaing a positive attitude, clear and constant communication and a good routine. It may be a stressful time, but getting them excited for the move by talking about your new home, walking the new neighbourhood and allowing for their involvement are sure to help ease the transition.

It is also important to remember, children are incredibly resilient. They are capable of more than we expect, so when all is said and done, I’m sure they will surprise you. Ours did.

Have you moved houses with young children? What are some of your tips for easing the transition? I’d love to hear!


*Disclaimer: This post is in partnership with Philips Avent. I received products and/or compensation in exchange for this post. All opinions and advice shares are 100% that of To & Fro.


PIN IT:

Tips for Moving with Young Kids

SHARE:
Blog Design Created by pipdig