February 24, 2021

How to Make Your Own Beaded Chandelier - For Under $100!


You've seen them pop up all over the internet - from Pinterest to Instagram and beyond. But when you look at retailers that sell them, you're shocked at the ticket prices. Beaded chandeliers are the hot new home decor item for kitchens, dining rooms and bedrooms, but are often hundreds of dollars to purchase. With just a few simple supplies and lots of love, why not make your own for just a fraction of the cost?! Check out my Beaded Chandelier Tutorial below, made for UNDER $100!

How to Make Your Own Beaded Chandelier - For Under $100!

Remember that time I started making a beaded chandelier for the girls' room? Ya, that seems like ages ago, doesn't it? Truth be told, it was almost a full year ago in early spring 2020.

Fast forward to winter 2021, and I can officially tell you... it is COMPLETE! And I'm obsessed.

But before I get into how I made it, let's rewind back to the spring when I started designing the girls' room. Knowing I wanted to switch out the existing industrial-looking flushmount light for something a little more fun, I fell in love with the beaded chandeliers I was seeing on Pinterest. But what I didn't love, was the price tags that came along with them. $150? $200? $200+? No thanks. 

And then, I came across the photo below and just KNEW I could make that. For a lot less.

How to Make Your Own Beaded Chandelier

And while it may have taken me 7 months fully complete and install, I did end up making it for a lot less. I also made one that was a lot more personalized to the style of my girls' room. (In reality, it only took a month to make, chipping away little by little each day when I had some free time - aka nap time - BUT it took 6 more months of install because of some technical difficulties. And by technical difficulties, meaning me not doing it right the first time. See why below in 'Lessons Learned'.)

Read on to learn how I made this beaded chandelier for under $100, and how YOU can too!

How to Make Your Own Beaded Chandelier - For Under $100!

Beaded Chandelier Tutorial

Materials

  • Wire hanging basket
  • Spray paint (white, or colour of choice)
  • Fishing line
  • Scissors
  • 2 bags of Wooden beads (700 pieces, 4 sizes) *see number of beads used below
  • Yarn, colour(s) of choice
  • Hot glue and glue gun
  • Acrylic paint (white, or colour of choice)
  • Small art paint brush
  • *Associated tools for disconnecting and reinstalling existing light

Directions

Creating the Beaded Chandelier

1. // Measure the base of your existing flushmount light to know what size of wire hanging basket you are looking for.

2. // Once you have found your basket, spray paint it your colour of choice. I used Rust-Oleum Painter's Touch 340g Ultra Cover Spray Paint (Paint + Primer) in white - good for metal. You may need more than one coat to ensure that you get in all of the spots. Allow to dry.

3. // Using the fishing line, measure the length you need to go from the wide end (top) of the basket to the bottom. Add a few extra inches for tying. 

4. // Knowing the length of fishing line and size of beads, determine your bead pattern. The pattern I chose was (from top to bottom) 4x large (20mm), 5x medium (16mm) and 6x small (12mm). 

5. // Tie one end of the fishing line to the top of the basket. String your beads in the desired pattern. Instead of stringing the last bead in your pattern on the line (like the rest), tie a knot around the last bead (see photo below). Leave the fishing line long as you will need to eventually tie it to the bottom of the basket. (You could attached the beaded line directly to the bottom of the base, but that will case some issues if you need to adjust the beads due to spacing once they are all strung.)
How to Make Your Own Beaded Chandelier
6. // Allow the beaded line to hang, and move on to the next line. Repeat until you have gone all the way around the basket. Note - this may take a bit of trial and error to know exactly how many strands to hang and how to place them. Remember the top of the basket is larger than the bottom, so it shouldn't be over crowded. (In all, I had 36 strands evenly spaced.) 

7. // Once you have completed the bead strands, it's time to tie them to the bottom of the basket. This may be a bit tedious, as there is not as much room on the bottom as there is on the top. Some of the beads may overlap, and that's ok. Snip any loose ends of line.

8. // Once the strands are arranged the way you would like them, take hot glue and put a small dab on the knots (on both the top and bottom of the basket) to secure the strands so they don't slip.
How to Make Your Own Beaded Chandelier
9. // Trim any excess line.

10. // Take your yarn colour of choice and wrap it around the top of the basket (see photo below). Be sure to cover any knots and line. Depending on the thickness of your yarn, you can do a couple of layers.

11. // If you wish, create a tassel using one or multiple colours of yarn to hang from the bottom of the basket. This step is option, but will help to add a little more colour to your chandelier.

12. // For the last step before installation, I went back and touched up the white paint on the basket with acrylic paint and a small paint brush, as some of it had chipped when I was tying the fishing line. 
How to Make Your Own Beaded Chandelier
Now, your basket is complete! On to turning it into a chandelier that you can hang.

Hanging the Beaded Chandelier

*Keep in mind, this part of the process will vary depending on the existing light and/or what you will be using as the base (the part with the bulbs). After some trial and error (see 'Lessons Learned' below) this is how I ended up securing the basket to the base.

1. // Adjust your existing lighting as you need to. For us, it was removing the glass dome and eventually turning off the power supply, disconnecting the power supply and the wiring and removing the entire base from the ceiling (see why in "Lessons Learned" below). The existing base was a brown metal (very industrial looking), so I also painted it white using the same paint I had used for the basket.

2. // Apply hot glue to the top of the basket (in my case, where I wound the yarn). Remember, as the basket will be hanging, gravity will not be working in your favour. Be generous with the hot glue, but still try to keep it neat and tidy.

3. // Using gentle pressure, attach the top of the basket to the light base. Hold and allow to dry.

4. // Using fishing line, fasten the basket to the light base. You could also use yarn for a bit of colour, but I chose to use fishing line as it is clear. If needed, you could spray paint over the fishing line to cover it, but being clear, it will not be very noticeable. 

5. // Reconnect the light to the ceiling. Turn on the power supply. Flick on the lights, take a step back and admire your latest DIY!
How to Make Your Own Beaded Chandelier

*Please note, we are not licensed electricians. Please seek professional help installing the light if you need it to ensure it is done safely and properly.  

Total Number of Beads Used

  • 36 strands x 15 beads per strand (4x 20mm, 5x 16mm, 6x 12mm) 
  • 20mm beads = 144
  • 16mm beads = 180
  • 12mm beads = 216 
>> Total number of wooden beads: 540

Total Cost

>> Total cost: approximately $74.00 
* in Canadian dollars, pre-tax
** some items were $0 because I already had them at home

Lessons Learned

I started this project way back at the start of the pandemic in spring 2020. It's now winter 2021 and we're just getting it installed. Let's just say, a labour of love went into this piece. But, it was for the girls and I would do anything for them.

Looking back, making the beaded chandelier itself was not the difficult part. It really only took about a month to make, chipping away little by little each day when I had some free time (aka nap time). BUT it took 6 more months to install the completed piece because of a few technical difficulties. And by technical difficulties, meaning me not doing it right the first time. Or the three times after that. 


While it did take some time (and sore fingers) to string all of the beads, I would say that was the easy part for me. The hardest part of this DIY was securing the light the existing flushmount base (from now on referred to as light base). It took a bit of trial and error to figure out how to get it attached. Our first road block was that the existing light base was not flat, and instead had small pieces of metal sticking out of it. We tried to hang it as is, and without removing from the ceiling, but the metal pieces got in the way and the basket would not sit flat. 

I really hoped we wouldn't have to remove the fixture from the ceiling, but that was what happened after attempt number one (and what should have happened in the first place). When we disconnected the wiring and removed the base, it turns out the metal pieces were attached by screws on the underside and could be removed, meaning the base would now be flush! (I didn't take any photos of what I mean, but let's just say I wish I had figured that out from the start.) 

How to Make Your Own Beaded Chandelier - For Under $100!

With attempt number two came foam core and industrial velcro strips. I cut a ring out of the foam core, the size of the basket, and hot glued it to the basket. I then added velcro strips to the foam core and light base. I thought for sure this would work as the basket was not that heavy. And it worked, for about 15 minutes until it crashed to the floor. 

Enter attempt three. I originally avoided gluing the basket directly to the light base as I was worried about removing lights bulbs should they burn out. However, during my attachment trials, I realized the the metal basket was big enough that I could easily stick my hand through the side and access the bulb to unscrew, remove and replace. So attempt three was to hot glue the entire base to the light base. BUT, wanting to ensure that this was the final attempt, I added some fishing line (the same stuff I had used to string the beads) for reinforcement. This involved disconnecting and moving the light for the final time. Using hot glue around the rim, I attached the basket to the light base. I then took some fishing line (because it is clear, but you could use similar coloured yarn if you wish) and wrapped it around the rim of the basket and the flush mount base (see photo). We then reattached the light to the ceiling.

How to Make Your Own Beaded Chandelier - For Under $100!

Moral of the story? Remove the entire light from the ceiling the first time. And your best bet is to hot glue it to the base, with some adding fishing line AND if your hands are able to fit through the basket design to reach and remove the bulbs. 

So yes, it took some love and some effort, but we eventually got it. I guess it just goes to show that not all DIY projects are perfectly executed, despite what you may see online.

How to Make Your Own Beaded Chandelier - For Under $100!

Since moving into this house in August 2019, we've taken on quite a few DIY projects - from painting all of the old wooden trim and doors white, to painting a geometric mural in the girls' room, whitewashing our faux brick wall and adding a carpet runner to our main stairs. And while this DIY may have taken the longest to complete, it was by far cheaper and far more customized that buying one off the shelf. I'm pretty proud of this project, and I think it adds the perfect touch to the girls' pink and purple unicorn room

Now, onto the next project! Let's just hope it doesn't take me 7 months to complete...

If you are interested in trying this for yourself and have questions, feel free to reach out on IG or by email

Do you enjoy taking on DIYs? What is your favourite project that you've done? I'd love to hear!


*Disclosure: This post contains affiliate links. Purchasing products through these links helps to support the content To & Fro creates. 

PIN IT

How to Make Your Own Beaded Chandelier - For Under $100!


SHARE:

February 16, 2021

The Wonders of Wall Art: A Peek Inside Our Home


Wall art. While important to the character of our homes, sad to say, it's usually the last thing to check off our home decor lists, long after the final coat of paint has dried on the walls and all of the furniture has been perfectly arranged. 

Or... is that just my house?

Read on the learn the wonders of wall art, and take a glimpse inside our home. 

Moose Wall Art

We moved into our current home at the end of August 2019, and I can honestly say, the above stated is 100% the case for us. 

If you've followed along with us on Instagram, you would know that our house needed quite a bit of TLC to get it to the point it's at. I'm talking painting aaaallllllll of the dark trim white, replacing the main space flooring and white washing the faux brick wall to completely brighten up the space. And that's just for starters, we have a lot more plans in the works to make it feel more like home.

But until then, for the most part, our furniture is the way we want it and the walls are the colour we want them... BUT ours spaces do lack some character. There is nothing on the walls. 

When it comes to wall decor, I first thought thought that everything on the walls needed to be photographs - photographs from our travels, photographs of the girls, photographs of family and photographs of other special memories. But over time I've learned that it's important to also mix in some wall art - whether it be landscape photographs, paintings, kid art, etc. Wall art adds an instant colour palette, they are focal points and they are conversation pieces. Wall art is important. 

While no expert in the home decor realm, I have learned a thing or two about decorating and our likes and dislikes when it comes to making the space our own. (Maybe it has to do with the 10+ times Steve and I have moved over the course of the past decade - thank you, hockey life.)

Now that we are settled and where we want to be, we can start to make things a bit more permanent. And future projects aside, it's time to start hanging some art on those walls!

Now to talk about some of the wall art we have added to our house...

When choosing wall art, we usually gravitate to certain themes. As lovers of the outdoors, we like animals, landscape scenes, etc. Anything else is a bit outside of our comfort zones, but we're working on that. 

Watercolour Toronto Skyline Wall Art

I have been eyeing this colourful art print silhouette of the downtown Toronto skyline for some time, and knew it belonged in our home. With it, I paired the colourful silhouette of the Anchorage, Alaska skyline, another city that holds a very special place in our hearts. They now both hang in our upstairs hallway.

When shared on IG, I often receive many questions about this moose canvas art hanging above our bed. We were obviously attracted to the moose itself, but the green and blue hues also matched our master bedroom colour palette perfectly. While this piece was purchased at a well-know Canadian home retailer, I did also find it available for purchase on Fine Art America. When we purchased this art it was the only piece available, however on Fine Art America, you can choose whether you want the art print itself, it to be on canvas or even matted and framed. And the best part is that you can choose the size to fit your space.

Moose Wall Art

While we may gravitate towards places and spaces that speak to us (and follow our favourite blue and green colour palette), my daughters, on the other hand, gravitate towards one thing... pink. And these days, that's in the form of unicorns. 

When asking our four and a half year old what kind of art she wanted for her walls, she chose this watercolour unicorn art print, because "it looked like cotton candy". And while I very much miss the amazing mountain wall mural she once had painted in her room, I have grown to accept the pinks, purples and unicorns. I did however, try and sneak some type of woodland animal art into their room, in the form of this little girl riding a unicorn (approximately named the Rainbow Princess) with all of her forest friends. The little girl reminded me of my oldest daughter, so she liked that. 

Unicorn Wall Art for Girls Bedroom

So, while it may have taken us over a year to start hanging art on our walls, we're pretty happy with how adding those little extra touches has turn this house into OUR home. Now I've got the itch to start making some more of the major changes I was hinting at. Stay tuned. 

I'd love to hear - what type of wall art do you have in your home? What are your favourite pieces, and where do you find them?

*This post was sponsored by Fine Art America, however, all opinions are 100% that of To & Fro.
 

PIN IT

Importance of Wall Art in Home Decor

SHARE:

December 4, 2020

Top Cricut Products That Should Be on Every DIYer's Gift Wish List This Holiday


*Disclosure: This is a sponsored post written by To & Fro on behalf of Cricut, and contains affiliate links. All opinions are that of To & Fro. 

Earlier this year, I received one of my favourite crafting tools of all time - a Cricut Joy. If you have one, you know what I mean. And if you don't, you're missing out AND I highly suggest you add it and these other Cricut products to you gift wish list this holiday season.

Top Cricut Products That Should Be on Every DIYer's Gift Wish List This Holiday

With my Cricut Joy, I have made custom family t-shirts, vegetable garden markers, a personalized porch sign, toddler alphabet flashcardsdecaled wine tumblers and the list goes on. With a Cricut smart-cutting machine, the DIY crafting and gifting possibilities are endless. 

Today I'm rounding up a fun list of Cricut items that are some of my favourite, and that should be on every DIYer's gift wish list this holiday season!

Top Cricut Products That Should Be on Every DIYer's Gift Wish List This Holiday

Top Cricut Products That Should Be on Every DIYer's Gift Wish List This Holiday

Unlike other Cricut machines, the Cricut Joy is a compact cutting machine, less than half the size of Cricut Explore and Cricut Maker—making it perfect for people without a dedicated crafting area (like me)! From customized pillows, to personalized glassware and welcome signs, the possibilities are nearly endless with this fun tool. The Cricut Joy cuts 50+ materials, including iron-on, cardstock, vinyl, paper, and Smart Materials™ – super-easy, super-long cuts without a cutting mat. Designs are easily created in the Design Space app, which is connected to the machine via bluetooth. 

Your every day iron on essential - a no stress heat press. Cricut EasyPress 2 gives you fast, effortless results that really last, even after repeated washes. Also compatible with Infusible Ink products and most major brands of iron on materials. The 9" x 9" size is ideal for basic T-shirts, tote bags, pillows, aprons, and more. 

Transfer tape is a must for any vinyl project. The tape allows you to easily transfer vinyl cuts to a variety of surfaces. This specially designed Transfer Tape is made for most types of Cricut Smart Vinyl™, including Patterned, Holographic, Holographic Sparkle, Metallic, and Matte Metallic. Use it to create custom decals, labels, decor, and so much more. 

Cricut Joy™ Smart Vinyl™ – Removable
Removable vinyl can be used in an temporary project, such as wall decals or stickers. Like the permanent vinyl, it comes in a variety of roll lengths and different colours. 
Removes without residue.

With a variety of different colours to choose from, these Infusible Ink markers produce vibrant, pro-quality transfers that last a lifetime. Transferred inks won't flake, peel, fade, crack, or wrinkle. Requires compatible Infusible Ink blank such as tote bags, t-shirts or coasters (sold separately) and Cricut EasyPress or heat press that reaches 400°F (205°C).

Smart iron on materials are great for apparel, accessories & home decor! This clever crafting material works without a cutting mat, so you can just load and go. Smart Iron-On works fabulously on a wide variety of materials and outlasts 50+ washes! For effortless application, use Cricut EasyPress, or apply with household iron.

This 3-piece set includes the tools you need for Cricut Joy projects. Use the Spatula to carefully lift delicate materials like paper from your cutting mat. Turn to the Weeder when you need to remove unwanted vinyl & iron-on pieces from your design. You'll use the Scraper to apply vinyl decals or clean material remnants from your mat. It is a must-have companion for Cricut Joy - perfect for a wide variety of projects, including vinyl decals, custom cards and labels.

Cricut Joy™ Smart Vinyl™ – Permanent
Permanent vinyl is necessary if you plan to do any outdoor project, such as vegetable garden markers or a porch welcome sign. Comes in a variety of roll lengths and different colours, including flat and shimmer. Permanent adhesive lasts up to 3 years.

Use these ready-to-cut sheets in fun patterns with your Cricut Joy cutting machine to infuse any compatible Infusible Ink blank with your custom art – a name, a logo, an inside joke, or a favorite quote! Infusible Ink transfer sheets produce. vibrant, pro-quality transfers that last a lifetime. Requires compatible Infusible Ink blanks such as tote bags, coasters and t-shirts (sold separately) and Cricut EasyPress. For use with the Cricut Joy and Cricut EasyPress. Comes in a variety of colours and patterns.

The standard grip mat helps you make fun and functional projects like gift tags, T-shirts, coasters, and so much more. Secure medium-weight materials, including Adhesive-Backed Deluxe Paper, Infusible Ink Transfer Sheets and even materials you may have at home like heavy cardstock for cutting and writing with your Cricut Joy™ machine. 

Top Cricut Products That Should Be on Every DIYer's Gift Wish List This Holiday

Of course, this list is just my personal favourite that I use regularly when crafting with Cricut AND it is just the tip of the iceberg when it comes to possibilities with the Cricut Joy. You can make iron-on clothing decals, greeting cards, etc. Like I said, the possibilities are endless. But together, the Cricut items above make the ultimate holiday bundle that any DIYer in your family is sure to appreciate. 

For a limited time, ALL Cricut materials and accessories are 50% OFF. The Cricut Joy is also the best deal of the year, at just $169.99 USD! 
See more of my past projects made with the Cricut Joy, here:


Do you have a Cricut machine? What do you make with it? I'd love to hear your projects, ideas, and inspiration!

SHARE:

November 20, 2020

Toddler-Friendly Felt Christmas Tree Tutorial


Are you looking for a toddler-friendly Christmas tree alternative? This Toddler-Friendly Felt Christmas Tree Tutorial will add a festive flair to your home this holiday season, while creating a learning opportunity for your little one.

Toddler-Friendly Felt Christmas Tree Tutorial

Holiday decorating is upon us, and today, I'm flashing back to the 2016 holiday season with this simple and festive DIY for your little one. 

I originally created this felt Christmas tree tutorial when my husband, 8 month old daughter and I were living in a teeny tiny one bedroom apartment as we awaited the completion of our first home. We were so excited to celebrate baby's first holiday season, but since, at the time, she was starting to become quite the mover, we were worried about her safety around the Christmas decorations in the small space. 

We usually opt for a real tree, complete with all of the fancy decorations, but because of our little mover, that year we decided to try something a little different. 
We had a small tree tucked out of the way for mom and dad, but also added this felt Christmas tree to the living room wall, just for the babe.

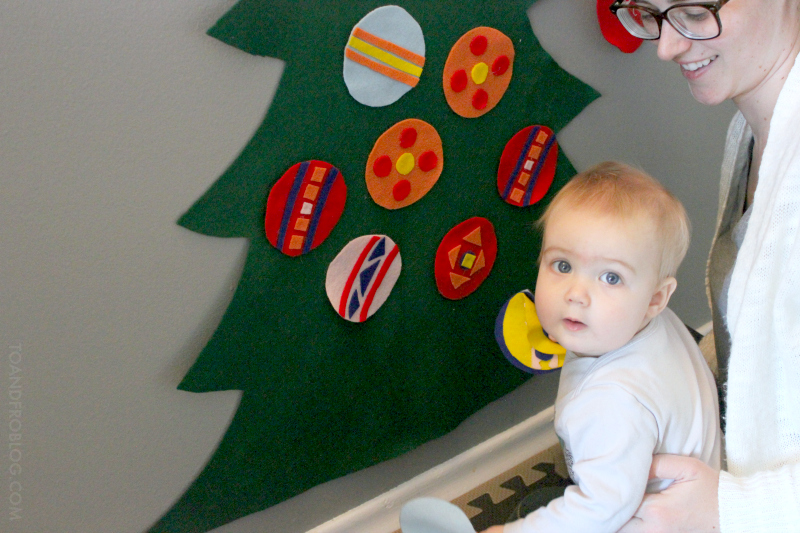
This simple-to-make felt Christmas tree is baby/toddler-safe, maintenance-free and decorated with lots of brightly coloured ornaments that your little one can easily rip off and put back on.  It added a festive flair to our teeny tiny abode, while creating a great learning opportunity for little miss Morley. 

Why not make one for your little one this holiday season?

Toddler-Friendly Felt Christmas Tree Tutorial

Materials


Toddler-Friendly Felt Christmas Tree Tutorial

Directions

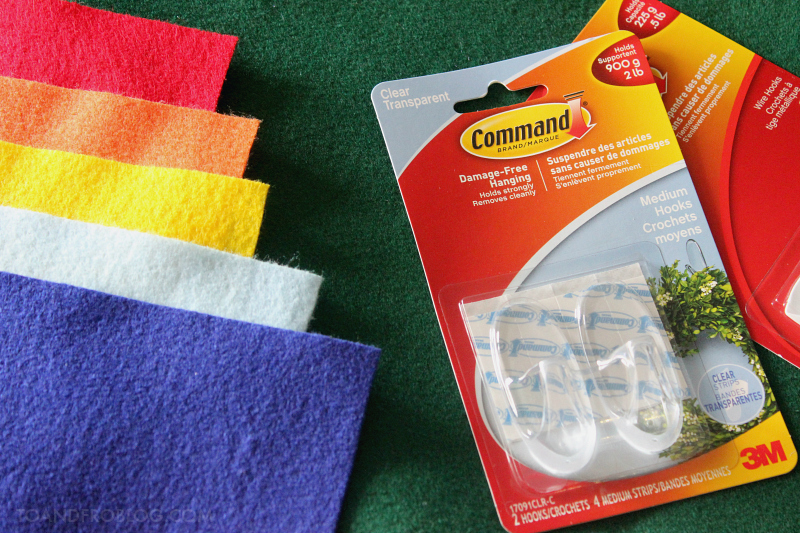
I purchased the felt from my local fabric store. They sell small individual squares in a variety of colours (for making the ornaments) as well as felt by the length, which I used to make the tree. You can also find a package of assorted colours, here

First, make the star for the top of your tree using the yellow felt. I started with the star because I had a limited amount of yellow felt and the size of the star would determine the size of the tree. 

Next, make the tree body. Lay your tree fabric (green felt) on the floor and fold in half, vertically. Using a marker, draw the outline of your tree. Cut along the line, through both layers of green felt. Open the fabric back up to reveal your bare tree. Attach the star to the top with hot glue.

Next step is to make the ornaments. I used a cup as my stencil to make circles on the felt. I made circular ornaments for my tree because they are easy for my daughter to grab. Get creative - you can make any size or shape you desire! Use the scrap felt to spruce up the ornaments.

When it comes time to sticking the ornaments on the tree, you won't need any additional material. Thanks to a little science and the power of static electricity, felt sticks to felt like magic.

Toddler-Friendly Felt Christmas Tree Tutorial

Don't worry about making it perfect - your babe is not going to judge you if the tree is not symmetrical or the colours of your ornaments don't match. They are going to love it either way!

Now it's time to hang your tree. Using the glue gun, add a loop of string to the top of the star/tree. This will be how you hang the tree on the wall. Make sure that the wall you hang the tree on is a smooth surface. With the tape measure, measure the height of your tree on the wall. Following the directions on the package, affix the Command™Clear Medium Hook to the wall. 

Toddler-Friendly Felt Christmas Tree Tutorial

Hang the tree on the hook. Since our apartment is so dry, the felt automatically clings to the wall. However, you can repeat the above steps with a few more hooks to support the branches, if needed. Ensure the weight of the tree is evenly distributed across the hooks. 

The great thing about using these hooks for this tree is that if you don't like the placement, or need to move it for any reason, you can do so without the fear of holes or damage!

Baby-Friendly Felt Christmas Tree Tutorial

The possibilities with this tree are endless. You can add as many different colours and shapes of ornaments as you wish! If you are feeling especially creative, you can even make presents to go "under the tree" or even a stocking to hang beside (like I did in the photo above). 

To incorporate a learning experience into your felt Christmas tree, make ornaments of different shapes, sizes and colours. Add numbers and letters to the ornaments to take it to the next level.

Toddler-Friendly Felt Christmas Tree Tutorial

Now it's time to let your little one play and have some fun with their new tree! But please remember, do not leave your child unattended while doing this activity.

For more baby-friendly activities, check out this recipe for baby-safe paint.

What are some of your tips and tricks for decorating your indoor spaces around the holidays? I'd love to hear!


*Disclosure: This post contains affiliate links.

PIN IT:

Toddler-Friendly Felt Christmas Tree Tutorial

SHARE:

October 7, 2020

Things That You Should Add To Your Amazon Cart


Online shopping is the greatest - with as little as three clicks you can browse for an item, add it to your cart, pay for it and have it delivered to your door the very next day. It’s just that simple.


And with no lines and no need to interact with a human, in the age of a global pandemic, online shopping has become that much more sweet. 


Favourite Finds for Home and Pets on Amazon

So, where do you turn when you need something at a low price and in a hurry?


Amazon, of course.


Oh the things you can find on Amazon. You come for one item, and an hour later end up with a shopping cart FULL of things you don’t need. Am I right? Or, am I right?!


While staying at home the past seven months, we’ve turned to Amazon to complete a lot of our home projects - painting, the girls’ room, backyard, etc. We’ve also found many items to stock out pantries, limiting the need for big grocery shops.


The e-commerce kingpin has a huge selection where you'll find household names, low prices, and with a Prime membership, next-day shipping that panders to our fast lifestyles.


Amazon Prime Day is one of the biggest online shopping events of the year, and you're not going to want to miss out. Usually taking place in July, this year the shopping event has been postponed until October 13 and 14. Be sure to mark your calendars!


Not a Prime member? Sign up for a 30-day free trial before committing to the monthly fee and still take advantage of these great promotions.  (Click on the banner below for more info.)


With Prime Day quickly approaching, today I’m sharing our random (and not so random) things we’ve found and/or purchased on Amazon. You’re welcome!

Favourite Finds on Amazon Prime

For the Home
Favourite Amazon Finds for the Home

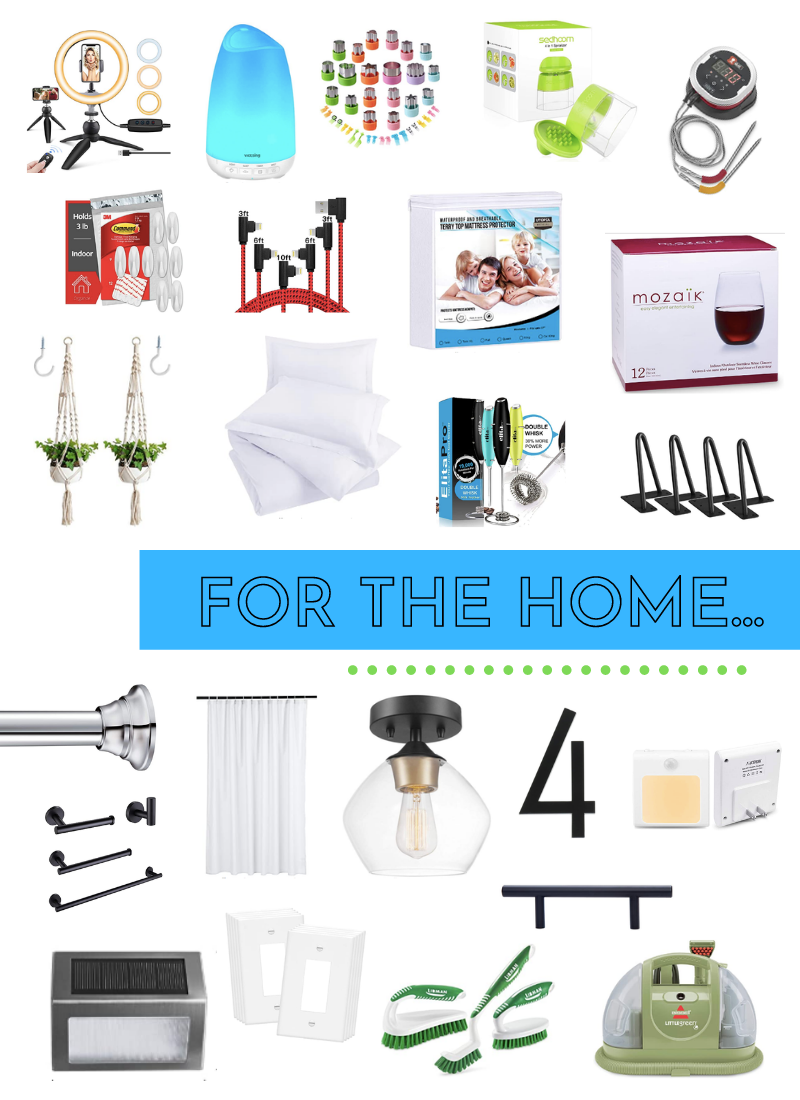
From top left to right:

LED Ring Light  //  Oil Diffuser with LED 8-Colour Light  //  Vegetable Cutter Shape Set  //  Handheld Spiralizer  //  Weber iGRILL 2 


Command Self-Adhesive Wall Hooks  //  iPhone Charger - 90 Degree Angle Cable (5 Pack)  //  Waterproof Mattress Protector  //  Plastic Stemless Wine Glasses


Macrame Plant Hanger (2 Pack)  //  3-Piece Duvet Cover Set (White)  //  Handheld Whisk/Milk Frother  //  Table Hairpin Legs


For Your Pets
Favourite Amazon Finds for Pets

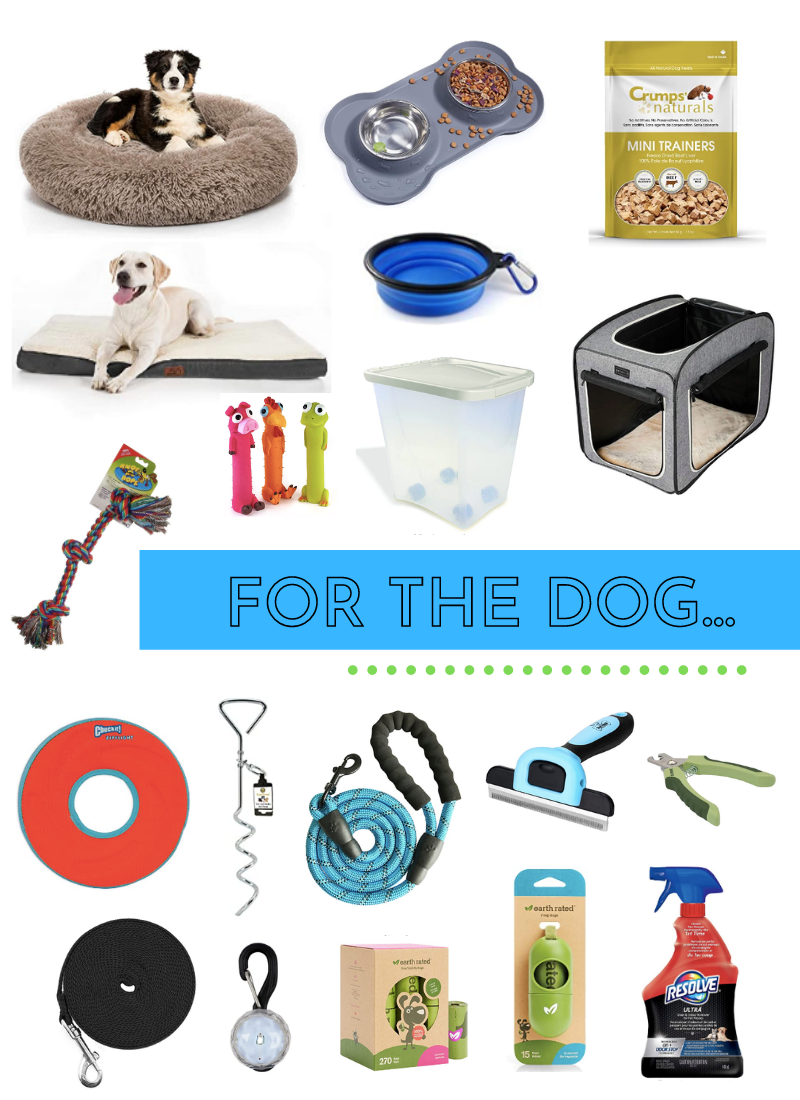
From top left to right:


Coming soon!

For Kids

For Yourself


What are some of your favourite finds on Amazon? I'd love to hear!


*Disclosure: This post contains affiliate links. To & Fro may make a small commission from items purchased through these links. Thank you for your continued support!

PIN IT

Favourite Amazon Finds for the Home


SHARE:

August 24, 2020

5 Fun & Easy Summer Cricut Joy Projects (+ Preschooler Flashcard DIY)

*Disclosure: This is a sponsored post written by me on behalf of Cricut. All opinions are 100% mine.

Summer. The days are long, and the kids are out of school. And chances are high that you’ve also been home from work - maybe juggling working and caring for your children? Ya, me too. Keeping them busy and engaged, while limiting screen time to allow you to get work done is not an easy task. And if there is ever a time to pull out the Cricut and create some fun projects with (or without) your kiddos, now is the time.

Today, I’m sharing why I love my Cricut Joy™, specifically five of my favourite Cricut Joy DIY projects that I’ve made at home this summer using Cricut Joy Smart Vinyl™.

5 Fun & Easy Summer Cricut Joy Projects

5 Fun & Easy Summer Cricut Joy Projects

Vegetable Garden Markers

One of my favourite things about our new house is the backyard. It’s crazy what a little green space can do for your mood. Since moving in last summer, I have been so excited for the girls to finally have a place to get outside and play. But, this new green space also meant that I could build an even bigger and better vegetable garden than the container gardens we had on our condo terrace last summer. So we were able to tell what was what, I created these vegetable garden markers using up cycled paint stir sticks that I simply spray painted white and Smart Vinyl - Permanent in black. I measured the size of the paint stir sticks and created the vegetable labels text (DJ Juicy font) in the Cricut design space app. I applied the labels to the painted stir sticks with Transfer Tape, and once completed, added them to my garden next to the appropriate fruit or vegetable. Much better looking that the generic tags that come from the Garden Centre. 

Wooden Welcome Sign

This wooden welcome sign is one of my favourite Cricut Joy projects to date. Earlier this summer, we added a deck to the back of our house, and to give it some added personality, we created this “Welcome to Our Deck” sign. It was also super easy to make, and with several home update projects already on the go, we had all of the materials we needed already at home. I simply created the text in the design space app (Babette font for "Welcome" and Creative Memories Tiny Treasures - Rubber Ducky font for "to our deck"). My design can be found on Design Space here.

5 Fun & Easy Summer Cricut Joy Projects

Mailbox Decal

While our front porch is going to be next summer’s focus, I couldn’t help but take our ugly white mailbox and give it some curb appeal by painting it black to match the porch railings. I then personalized the mailbox with “hello” text created in the Cricut design space app using Babette font (easily my favourite cursive font in the app). Once the mailbox was dry, I applied the cut vinyl in the desired spot using Transfer Tape. 

5 Fun & Easy Summer Cricut Joy Projects

Stemless Wine Glasses

We love to entertain. And while this summer may look a little different when it comes to entertain, I am happy that we have still been able to have those in our bubble over for backyard BBQs. I recently purchased more backyard-friendly plastic stemless wine glasses and decided to jazz them up a little using Smart Vinyl - Permanent in gold. I measured the size of the glasses and created the “cheers” text (Babette font) in the Cricut design space app. I then applied the labels to the outside of the clean glasses uses Transfer Tape. They were very easy to make, and added a little something extra (including lots of compliments and questions about where I bought them) to our backyard get togethers.

5 Fun & Easy Summer Cricut Joy Projects

Preschooler Flash Cards

These flashcards were one of the first projects I made with my Cricut Joy when schools closed back in March. I was determined to keep the learning continuing, and these super simple flashcards were a great help in doing so. Using construction paper and Smart Vinyl - Permanent, in white, I created a set of capital letter cards and small letter cards. These flashcards could be used for letter recognition, spelling names and/or matching capital and small letters. The flashcards were very easy to create in design space, as the font Cricut Alphabet Circle already existed. I simply printed it on the vinyl, and applied it to the construction paper using the Transfer Tape. I did used two separate colours of construction paper, one for the capital letters and one for the small letters. But if you wanted to up the difficulty, you could use the same coloured paper for all. 

5 Fun & Easy Summer Cricut Joy Projects

Next up on my Cricut Joy DIY list? Story blocks. Stay tuned to see how they turn out.

The Cricut Joy makes home DIY projects so easy. Unlike other Cricut machines, the Cricut Joy is a compact cutting machine, less than half the size of Cricut Explore and Cricut Maker—making it perfect for people without a dedicated crafting area (like me)! From customized pillows, to personalized glassware and welcome signs, the possibilities are nearly endless with this fun tool.

For the majority of my projects, including those outdoors, I use Cricut Joy Smart Vinyl - Permanent which is water- and UV-resistant, and lasts up to 3 years. Cricut Joy Smart Vinyl also comes in removal and writable, and a variety of different colours, including mattes, metallics, holographic and more. 

Be sure to check out the Cricut blog, where you’ll will find more DIY inspiration and tutorials! Use the hashtag #CricutAtHome when sharing your project on social media - I would love to see what you create!

Do you have a Cricut machine? What’s your favourite project to make? I’d love to hear - I’m always looking for inspiration!


PIN IT

5 Fun & Easy Summer Cricut Joy Projects

5 Fun & Easy Summer Cricut Joy Projects


SHARE:
Blog Design Created by pipdig